Superhero Smoothie (allergy free)

Superhero smoothie

Superhero smoothie

Today’s smoothie recipe is free from the top 8 allergens and Miss 2 asked for more (even though it has vegetables in it – bwahaha!). It’s also a great way to get some healthy fats and foods into your system when you’re recovering from the flu and can’t cope with the idea of making soup from scratch!

Ingredients

  • 200ml coconut milk
  • 200ml water
  • 4-6 ice cubes
  • 1 ripe banana
  • 2 slices mango
  • 1/3 cup baby spinach
  • 1 tsp ground chia seeds
  • 1 tsp ground linseed (flaxseed)
  • Optional: drizzle of maple syrup

Optional: Since your smoothie is going to be green anyway, you may want to add 1 tsp of Healtheries Super Greens Smoothie Booster.

Tip: Have the coconut milk in the fridge (or add less water & more ice) so that this will be chilled once blended,

Allergies: gluten free, dairy free, soy free, egg free, nut free.

Directions

  1. Put everything in a blender and blend till smooth!
    • Tip: Most blenders will work more effectively if you put the liquids in first.
  2. Serve immediately while it’s chilled.


Nana’s Yummy Gluten Free Pikelets

Yummy Gluten Free Pikelets

Yummy Gluten Free Pikelets (light & fluffy)

Ingredients

Dry

  • 1/2 cup superfine white rice flour
  • 1/2 cup  Healtheries Gluten Free Bread Mix
    • Note: this already contains guar gum.
  • 1/4 cup sorghum flour
  • 1T sugar
  • Optional: 1T Maple Syrup
  • 1 1/2 tsp Baking Powder
  • Pinch salt

Liquid

  • 1/2 cup rice milk
  • 1 egg
  • few drops vanilla essence
  • 1 Tbsp rice bran oil

(Have more rice milk available.)

Allergies: dairy free, gluten free, soy free, nut free.

Directions

  1. Whisk the wet ingredients until frothy.
  2. Combine the dry ingredients and then mix in the frothed wet ingredients.
  3. Slowly mix in additional rice milk until you have a smooth consistency.
  4. Allow mixture to stand for a few minutes (it will thicken up).
  5. Heat a non-stick frying pan over medium heat. Wait until it is hot and then brush with butter or allergy-free spread (like Nuttelex).
  6. Drop level tablespoonfuls of the mixture into the pan and cook for half a minute or until bubbles appear on the surface.
  7. Turn over and cook other side for 1 minute until golden.
  8. Allow to cool and serve with butter / spread and honey or jam.


Note: There are several reasons that I choose to use the Healtheries Gluten Free Bread Mix instead of the Healtheries Gluten Free Baking Mix.

I prefer to use guar gum in my recipes and avoid xanthan gum; the latter is artificially derived and is often grown on an allergenic base (such as corn, soy, or wheat).

I like to control the rising agents in my baking so that I can tailor them to each recipe.

Frugality! The Bread Mix can be used to make both Gluten Free Bread and Gluten Free Baking whereas their Baking Mix can only be used for baking.

Home Remedy Porridge for sore throats and enflamed guts

Home Remedy Porridge

Home Remedy Porridge with Slippery Elm

This is a great recipe for helping your toddler (or adult) to eat when they’ve been vomiting, had diarrhoea,  have a sore throat, have food allergies, or have reflux. It’s also a useful recipe to try after surgery, i.e. for removing adenoids or tonsils. It also pairs well with the rehydration tonic.

Slippery elm can  help relieve inflammatory bowel conditions so it’s also useful for

  • Crohn’s disease, ulcerative colitis, and irritable bowel syndrome (IBS).

You may also want to try this as a baby food if your baby or toddler needs to be gluten free.

Ingredients

  • 1 1/2 Tbsp Quinoa Flour
  • 1 1/2 Tbsp Brown Rice Flour
  • 1 cup Rice Milk
  • Optional: 1 tsp Slippery Elm
  • Optional: boiling water
  • Optional: Maple Syrup

Allergies: gluten free, dairy free, soy free, egg free, nut free.

Directions

  1. Mix everything in a pot and cook over high heat (stir regularly).
  2. Bring it to a boil and then turn down low. Keep stirring regularly and add more liquid (either rice milk or boiling water) to keep a good consistency.
    • If you have an upset gut then it’s best to include the slippery elm. The slippery elm absorbs water so you will need to slowly add liquid while the porridge is cooking.
  3. Cook for approximately 5 minutes.
  4. Serve plain or as you generally like your porridge. I like this with a little maple syrup stirred in.

Candied Salted Caramel Pumpkin Seeds

Candied Salted Caramel Pumpkin Seeds

Candied Salted Caramel Pumpkin Seeds

I love this recipe! It’s a fantastic candied treat that’s great for parties and for holidays. If you have food allergies in the family, it’s also a great recipe to pass to grandparents who want to spoil the kids! It’s also ideal to take to kindergarten parties and pot lucks as it’s free of all major allergens!

Don’t be put off by the idea of pumpkin seeds – these are nothing like the raw ones that you get in salads. These are as different as corn is after it’s popped and are sweet, salty, and crunchy like M&Ms. They are dangerously addictive and are great eaten straight, sprinkled on fruit crumble, or on top of ice cream.

Ingredients

In the oven:

  • 2c pumpkin seeds
  • 2 1/2T sugar
  • 1/4 tsp cinnamon
  • 1/2 tsp ground ginger
  • Pinch nutmeg
  • 3T water
  • Oil for roasting dish

Caramel sauce

  • 1 1/2T allergy-free spread (i.e. Nuttelex) / butter
  • 2 1/2T brown sugar
  • 1 1/2 tsp salt

Allergies: gluten free, dairy free, soy free, egg free, nut free.

Note: If nut allergies are not a concern,this recipe will also work well with peanuts, cashews, and almonds.

Directions

  1. Pre-heat oven to 180’C and lightly oil a baking dish (I used a silicon flan / pie dish).
  2. Mix all of the oven ingredients together and pour into the baking dish. Note: the water is important because it helps the spices to stick to the pumpkin seeds (and the seeds will absorb the water a little as they puff up during cooking).
  3. Bake the pumpkin seeds for 20-25 mins until golden and crunchy.
  4. Once the pumpkin seeds are cooked, mix the caramel sauce ingredients together in a pot. Cook for 1-2 minutes until the ingredients have melted and turned a deep golden brown.
  5. Mix the caramel sauce and pumpkin seeds together until well coated. Spread on a tray and allow to  cool.

Blood Orange Icing (a.k.a. how to make pretty pink icing without using artificial colours)

Gluten Free Cupcakes with all natural pink icing

Gluten Free Cupcakes with all natural pink icing

My daughter is sensitive to red food colouring – as are many kids! For some reason New Zealand still allows artificial food colouring agents to be sold here that are banned in many parts of Europe. I’ve been doing more research (as you might have noticed from the post on why to be cautious about annatto as a colouring agent) and am experimenting with natural food colours.

One way to make pink icing is to use beetroot juice but I’m not a big fan of beetroot so instead decided to make a Blood Orange icing that has a beautifully delicate berry flavour and uses fruit tea!

The secret ingredient to this icing mix is Blood Orange fruit tea which uses a mix of

  • Hibiscus
  • Apple
  • Rosehips
  • Natural Flavouring
  • Stevia
  • Orange Peel

Not only do you get to make icing but you can also make yourself a cuppa in the process. Incidentally, this tea is also lovely cold, with sparkling water, or in fruit punch. You could also experiment with other fruit teas (like Blueberry & Blackcurrant) to make other colours.

Ingredients

  • 50g Butter or allergy free spread (i.e. Nuttelex)
  • 1c icing sugar
  • Blood Orange tea bag
  • Hot water

Allergies: gluten free, dairy free*, egg free, soy free, nut free.

Directions

  1. In a mug steep the Blood Orange tea bag in a small amount of boiling water (i.e. about 50 ml). Allow it to cool and it should have a concentrated deep red colour.
  2. Cream the butter and icing sugar.
  3. Slowly add the (cooled) blood-orange-water to the mix until you have the colour and consistency that you desire. (Add more icing sugar if needed).
  4. Ice your cupcakes (like these Gluten Free cupcakes!)

Note: You can also make this with just icing sugar and the Blood Orange mix to make a darker colour.


Gluten Free Cupcakes

Gluten Free Cupcakes with all natural pink icing

Gluten Free Cupcakes with all natural pink icing

I love experimenting with gluten free baking! As well as this vanilla cupcake recipe, I also have different recipes for chocolate cupcakes and berry muffins.

Ingredients

Cupcakes

  • 1c superfine white rice flour
  • 1T glutinous rice flour (also marketed as ‘sweet rice flour’)
  • 1/2 fine cornmeal (polenta) – use finely milled.
  • 1/2c sugar
  • 1 tsp guar gum
  • 2 tsp Baking Powder
  • 1/2 tsp Baking Soda
  • Pinch salt
  • 1/3c neutral oil (i.e. Rice Bran Oil)
  • 1 egg (or egg replacer)
  • Vanilla
  • 2/3c water

Allergies: gluten free, dairy free, egg free*, soy free, nut free.

Makes 8-10 cupcakes.

Directions

  1. Mix all the dry ingredients together.
  2. Whisk the egg (or egg replacer) until fluffy and pour in.
  3. Add the oil and vanilla. Mix.
  4. Slowly pour the water in while mixing.
  5. Spoon into cupcake cases and bake at 180’C for approx. 25 mins until golden.
  6. Allow to cool and ice. I used a Blood Orange icing with no artificial colours!


Tip: My current preferred method for cooking cupcakes is to fill a large cake tin with silicon cupcake cases (so that they are touching). This helps them to keep their shape and is super easy to get in and out of the oven.


Icing 

The icings that I use don’t have any artificial colours, glycerin, additives etc.

Chocolate Banana ‘Yoghurt’ (Dairy free)

Chocolate Banana 'Yoghurt'.jpg

Chocolate Banana ‘Yoghurt’

I was looking for dairy free alternatives to yoghurt and similar products. This is a similar recipe to the Chocolate Avocado Mousse but is the consistency of pouring yoghurt instead of mousse.

Note: This recipe is best made with a food processor (or possibly an electric beater)

Ingredients

  • 1 large banana
  • 50g cocoa powder
  • 3/4c coconut milk
  • 1 tsp vanilla extract
  • pinch salt
  • 3-4T brown sugar.

Allergies: gluten free, soy free, dairy free, egg free, nut free.

Directions

  1. Blend until smooth.
  2. Serve immediately or chill.

Sri Lankan Breakfast Roti


Makes 10 helpings. These are warm and savoury; leaving out the onion & chilli they can be paired with jam or a chocolate spread instead.

Ingredients

  • 3c flour
  • 1c cool water
  • 1c dessicated coconut (soaked in water)
  • 1T neutral oil (I like rice bran oil)
  • 1/4c finely chopped onions
  • 1/4c finely chopped chillies (optional)

Directions

  1. In a large bowl, combine the flour, salt, oil, and soaked coconut. Add the cup of water slowly until a soft dough forms. If using chilli and onion, add these now. Be careful not to overwork the mixture.
  2. Form the dough into 10 balls of equal size. Gently roll the dough into shape. In an oiled pan, fry in high heat until both sides are brown. Be careful not to overcook (like I did!), it should be soft rather than hard.

Allergens: soy free, dairy free, egg free, peanut free, tree nut free.

Source: M. Tharaneetharan, World Concern, Sri Lanka.

Mu Shu Pork – Chow Mein – Chop Suey all from one basic recipe!

Mu Shu Pork.jpg

Mu Shu Pork

I came across this recipe by Cybele Pascal  in a chapter of her allergy friendly cookbook about making takeaways at home. I haven’t heard of Mu Shu Pork before but apparently it’s a popular takeaway in the United States and based on a stir-fry dish made in northern China and eaten rolled in small pancakes rather than over rice. This recipe has a few adjustments (such as not including soy sauce or egg) in order to make it free of the top 8 allergies. The recipe is also very similar to how we make Chow Mein in New Zealand, it’s all about what you serve it with!

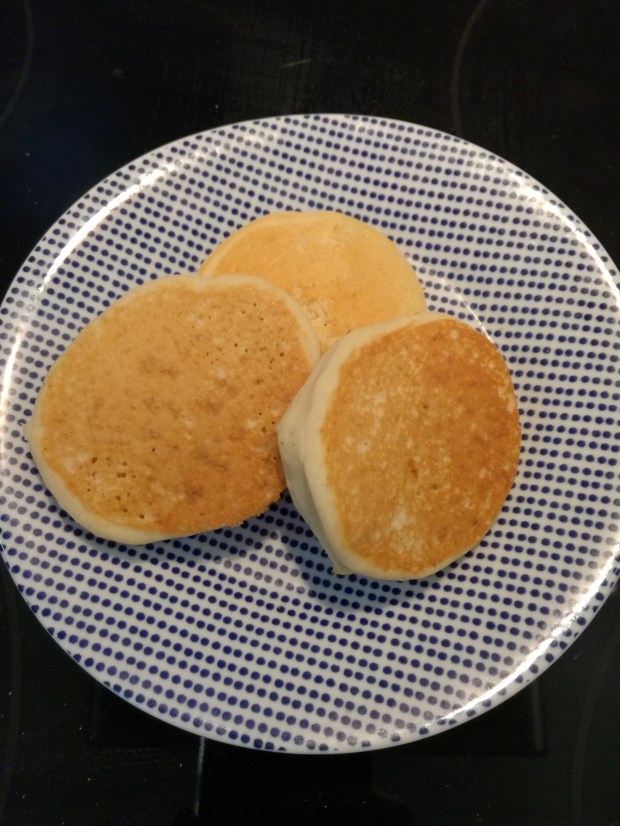
Mu Shu Pork: Serve with Chinese pancakes (delicious scallion pancakes can be picked up from the freezer section of most Asian supermarkets) OR use rice paper wraps OR use gluten free wraps or corn tortillas. *Food allergies mean getting a little inventive! I’ve used both rice paper (like making summer rolls) and gluten free wraps; both are delicious.

Chop Suey: Serve over rice. Consider garnishing with crunchy crispy Chinese noodles (from the snack section of the supermarket).

Chow Mein: Serve with noodles. You can cook with glass noodles (mungbean or rice vermicelli) or with thick egg noodles. Consider garnishing with crunchy crispy Chinese noodles (from the snack section of the supermarket).

Ingredients:

Stir Fry Sauce

  • 1/2 chicken or vegetable broth
  • 2T coconut amino acids (or soy sauce)
  • 2T neutral oil (i.e, rice bran oil)
  • 1T rice vinegar
  • 1T cornstarch, or tapioca starch, or superfine white rice flour
  • 1 tsp honey

Stir Fry

  • 1T neutral oil (i.e, rice bran oil)
  • 400-500g pork mince (ground pork)
  • 1c red onion, finely diced
  • 2T minced or grated ginger (or 2tsp ground ginger)
  • 2 large cloves garlic, finely chopped
  • 1c thinly chopped shiitake mushrooms
    • Can also use wood-ear mushroom or substitute in a local mushroom. Note: you can often buy dried shiitake mushrooms more cheaply than fresh; they’ll need 30 mins or so to soak in water before using.
  • 1/2 tsp salt
  • 3c shredded cabbage
  • 100g snow peas, sliced into thin vertical slivers
    • I subbed green runner beans.
  • 1c grated carrot
  • 1-2 green onions (spring onion), white and green parts, chopped.

Plum sauce (optional dipping sauce)

  • 1c plum jam
  • 1/2tsp garlic, finely minced
  • 2 tsp ginger, minced or grated
  • 2T cider vinegar
  • 1/4 tsp salt
  • 1T Sriracha or other chile-garlic sauce

Allergies: gluten free, soy free, dairy free, egg free, nut free.

Directions – Mu Shu Pork

  1. Mix up the stir fry sauce.
    • Tip: Put into a jar or small sealed container; put on the lid and shake until the honey and tapioca starch have dissolved.
  2. Heat the oil over high heat in a non-stick wok or frying pan.
  3. Add the pork, onion, and ginger. Cook, stirring, for 3 minutes until the pork is no longer pink and the onion is tender. Break up the pork with a spoon so that the mince is nicely crumbled.Add the garlic, mushrooms, and salt; cook for 5 minutes until the mushrooms start to brown.
  4. Add the cabbage, snow peas, carrot, and spring onions. Cook and stir for 2 minutes.
  5. Add the stir-fry sauce and stir. Cook for 3 minutes.
  6. Serve with chinese pancakes / rice paper wrappers / tortillas.


Directions – Plum Sauce

  1. Combine all ingredients in a pot and bring to a simmer over a high heat. Reduce to medium-low and cook for 5 minutes, stirring often.
  2. Let cool to room temperature and then puree in a blender.
  3. Makes about 1 cup that can be stored covered in the fridge for several weeks.

Yummy things to make with feijoas!


It’s feijoa season which means it’s time to indulge in fresh fruit, smoothies, and baking! Why not try some new recipes:


Tip: Instead of cutting the feijoas in half and scooping out the middle, try this method to maximize the amount of flesh that you’re getting. It ends up being much quicker when you’re trying to get lots of feijoa!

  1. Top & tail the feijoa.
  2. Stand it on it’s end and with a sharp knife cut away vertical strips of peel. It doesn’t have to be completely perfect as the peel is edible.
  3. Cut in half (or into sections) to serve to toddlers or for blending.