Discover Sweden – how to make Swedish Cinnamon Buns (kanelbullar)

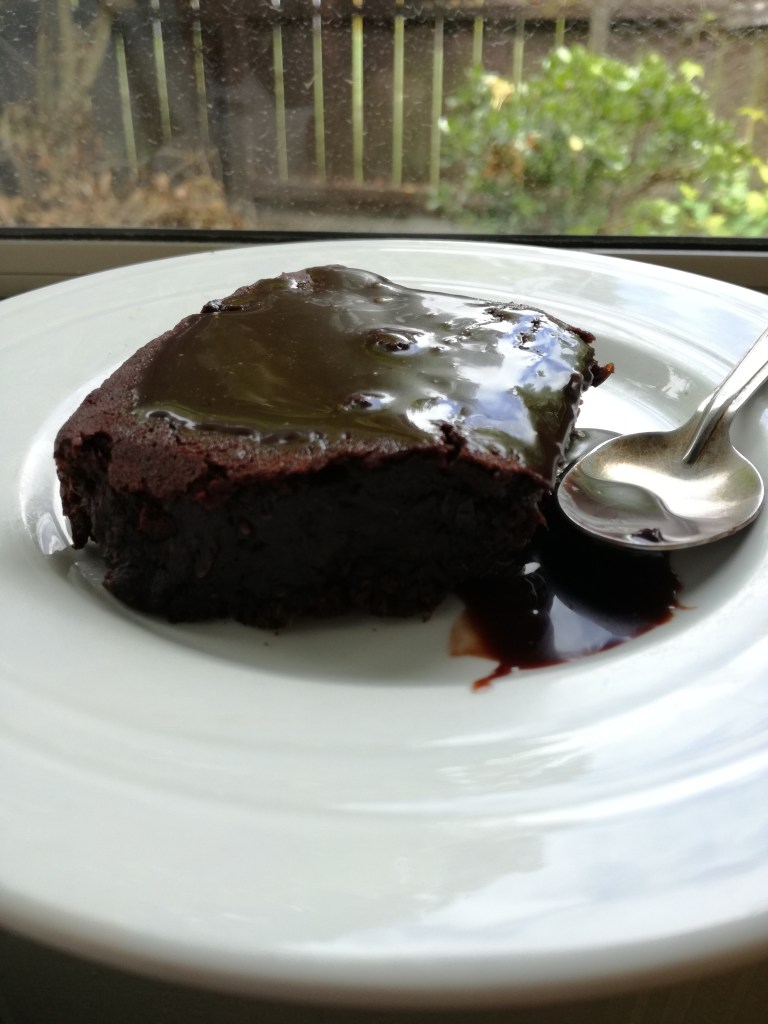
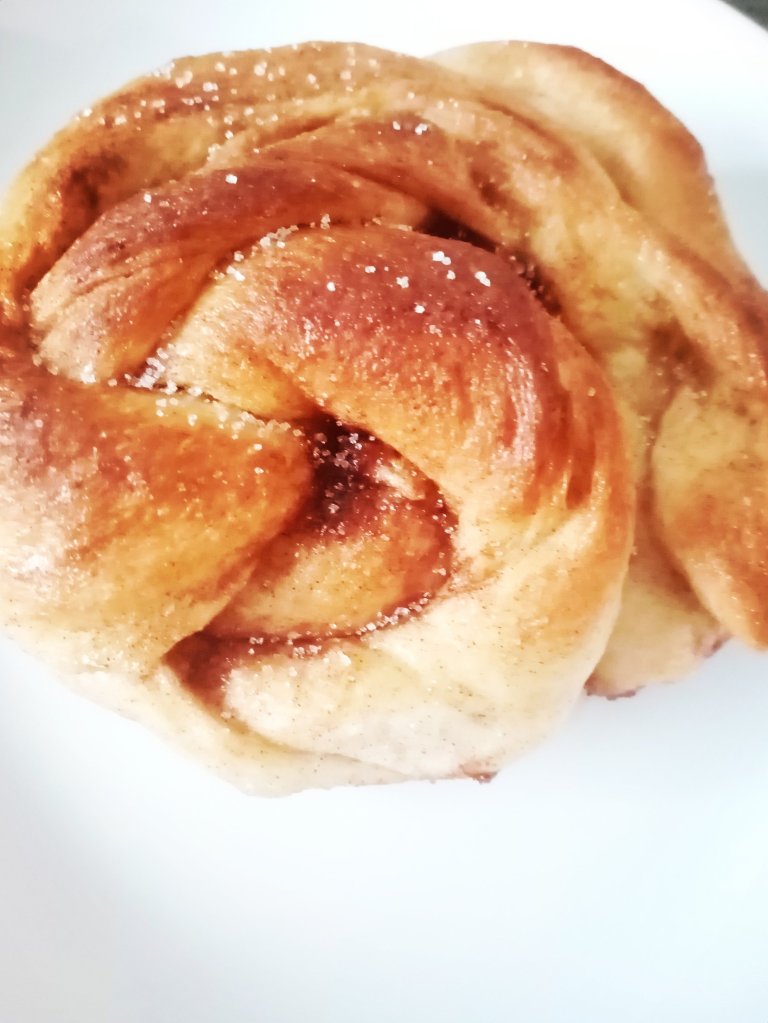
Swedish cinnamon buns differ from their American counterparts in several ways – the inclusion of cardamom, the wonderful looping and knotting to form them, and the simple glaze that traditionally uses Swedish pearl sugar. This is a small batch recipe that I made for family – feel free to double it!

Ingredients

Group 1 – Activating Yeast

  • 1 1/2 tsp surebake yeast
  • 1 1/2 Tablespoons sugar
  • 1/2 cup warm water (or milk)

Group 2 – Making Dough

  • 2 cups flour
  • 1 tsp ground cardamom
  • 1/2 tsp salt
  • 4 Tablespoons rice bran oil (or 1/4 cup melted butter)
  • 2 Tablespoons sugar
  • 3 Tablespoons water

Group 3 – Filling

  • 1/2 cup soft brown sugar
  • 1 Tablespoon ground cinnamon
  • 1/2 tsp ground cardamom
  • 1/4 cup buttery nuttelex (or butter, or margarine)
  • Few drops vanilla

Group 4 – Glaze (optional but traditional)

  • 1 egg + 1 Tbsp water + Swedish Pearl Sugar to decorate.

Allergy: free from dairy*, soy, nuts, egg*.

Note: We differed from traditional recipes by not using dairy or egg but I have included these in the recipe notes so that families can make their own choices.

Directions

  1. Combine Group 1 (yeast, sugar, warm water) in a bowl. Wait about 10 minutes until frothy and giving a yeasty smell (indicating that the yeast has activated). In winter, I use a metal bowl and sit it in a sink of hot water.
  2. Add Group 2 to Group 1. Into the bowl, add the flour, cardamom, salt, rice bran oil, and sugar. Combine. Add the 3 Tbsp of water. You will now be able to use fingers to mould into dough.
  3. Fold and knead the dough until smooth and elastic. Cover and place in a warm place until doubled in size. Tip: in winter, I do some kneading for the share joy of it and then place in the breadmaker on a dough setting!
  4. Use Group 3 to make the filling. Combine brown sugar, cardamom, cinnamon, nuttelex/butter, and vanilla. Mix until smooth.
  5. Folding and shaping:
    • Roll out the dough on a lightly floured surface and form it into a large rectangle. Evenly spread the filling over it.
    • Lift the top edge of the dough and fold the top 1/3 down to the middle; lift the bottom edge of the dough and lift up to the middle.
    • Roll the dough again into a large rectangle.
    • Cut the dough into 6 strips.
    • Pick up a strip, stretch and twist lightly, loop twice around the three middle fingers of your other hand, then once over the loop, and coil with the bottom tucked in.
  6. Place the knotted cinnamon buns onto a baking sheet and place in a warm place. Allow them time to rise until almost doubled in size.
  7. Preheat the oven to 180’C / 350’F.
  8. While the oven is heating, make up the egg wash if desired. Whisk the egg and water, then lightly brush over the scrolls. Sprinkle with crunchy Swedish pearl sugar.
  9. Bake for 15 – 20 minutes until golden brown. Serve warm.

Nutritional Information

Based on 6 servings.

Average Quantity
per Serving
Energy1692.7 kJ (404kcal)
Protein4.8 g
Fat, total17.9 g
– saturated4.1 g
Carbohydrate55.2 g
– sugars24.1 g
Advertisement

How to make cheese scones (keto + gluten free)

I love these gluten free cheese scones! They are tasty, versatile, great for lunchboxes, and only 4g of carbs per serve! I always make a double batch so I have some to freeze. They are also tasty with homemade butter on them 🙂

Ingredients

  • 100g almond flour
  • 2 eggs
  • 2 tsp baking powder
  • pinch of salt
  • 50g grated cheese (I recommend Colby)
  • 40g mozzarella (grated)

Allergies: gluten free, soy free, peanut free.

Directions

  1. Preheat oven to 200’C / 390’F. Grease or line a baking tray.
  2. Combine all ingredients in a mixing bowl.
  3. Divide into 4 even amounts. Roughly roll into balls. Place on tray and pat flattish.
  4. Cook for approx. 12-15 minutes (until golden brown on base). Remove and allow to cool.
  5. Delicious warm with butter; dipped with soup; or as a side with meat and salad.

NUTRITIONAL INFORMATION

Based on 4 servings per recipe; nutritional breakdown is approx:

Serving Size: 1 Serving

Average Quantity
per Serving
Energy1087.5 kJ (260 kcal)
Protein13.5 g
Fat, total21.5 g
– saturated5.6 g
Carbohydrate3.9 g
– sugars1.5 g
Dietary Fibre2.7 g
Sodium449.8 mg
Calcium366.7 mg

Healthy Hearts Chocolate Fudge Brownie

Healthy Hearts Chocolate Fudge Brownie Free from dairy, gluten, and soy.

I wanted to make something that tasted decadently chocolatey but without a lot of added sugar and minimizing ingredients that are common allergies. It can easily be adjusted to make it suitable for any food restrictions in the family, daycare, or school. Lentils contain a wide range of nutrients and are made up of over 25% protein!

Healthy heart Chocolate Fudge Brownies

Ingredients

  • 2 x 400g tin lentils (approx. 2 cups of drained lentils)
  • 1 cup chopped dates
  • 1/2 cup brown sugar
  • 1 Tbsp maple syrup
  • 1 egg
  • 1/2 cup rice bran oil
  • 1/2 cup almond meal + 1/2 cup fine rice flour
    • (or substitute 1 cup plain flour)
  • 1 cup dutch cocoa
  • 1/2 tsp salt
  • 1 tsp Baking Powder
  • 2 Tbsp chia seeds
  • Optional: 90g pureed green vegetables (spinach, peas, courgette)

Allergies: gluten free, dairy free, soy free, peanut free.

What type of lentils to use?

There are many types of lentils and many online recipes suggest using red lentils. This is probably because they are split, skinless, and can have a sweet nutty flavour. To be honest, I went with what what was affordable and convenient – tins of brown lentils!

How can I replace egg?

I used egg as I wanted the protein but for an egg free alternative, you could pre-soak the chia seeds in 6 Tbsp boiling water for 15-20 minutes or use something like Orgran’s Egg Replacer.

Directions

  1. Put oven on to pre-heat to 180’C / 375’F. Grease your brownie tray (I use rice bran oil).
  2. Rinse lentils thoroughly. The lentils will need to be cooked and their cooking time is going to depend on what form you’re using (i.e. dried lentils will need to be simmered for 15-20 minutes).
  3. Put the kettle on to boil while you chop up the dates (the measurement of 1 cup is after they’ve been cut up).
  4. The dates need to be soaked in boiling water until soft. Personally, I took a big pyrex dish, put in my (rinsed) soft brown tinned lentils + my roughly chopped dates + a small amount of water. I then put it in the microwave on High for 2 minutes, stirred, and then put back in the microwave for another 2 minutes.
  5. Pour the hot date / lentil mix into a food processor and blend till smooth.
    • A metal blade is ideal for smoothness but then you’ll need to change to a plastic blade (or wooden spoon) for combining the rest; if you’re not worried about a perfect puree then you can just use a plastic blade throughout.
  6. Mix in sugar and maple syrup. Taste test for sweetness.
    • Note: instead of sugar, you could just use 1/3 cup maple syrup. The dates will also add natural sweetness.
  7. Mix in egg and oil.
  8. Mix in almond meal, rice flour, dutch cocoa, salt, baking powder, chia seeds, and any optional ingredients. (I went for green veggies, someone else might go for chopped walnuts).
  9. Bake for 30-35 mins.

The gluten free version comes out as a soft, fudgey, chocolate slice; with normal flour it will probably be higher and a bit firmer. Blind taste testing by neighbour was successful both for approval rating and not guessing the lentils.

Recommended topping: a spoonful of Nature’s Charm Coconut Chocolate Fudge Sauce. It tastes amazing while also being vegan, dairy free, and soy free.

Sour Cream Scones / Quick Bread (Keto + Gluten Free)

What to call these? They have no sweetening, no flaky butter, and no cheesy flavour (as the mozzarella acts as a binder) so they’re a small quick bread which slices beautifully to top with salted butter, colby cheese, and Culley’s South Carolina Mustard. You can also quite happily top them with a few thinly sliced berries, or chia seed jam (depending on your dietary preferences). So it’s a bit like a UK scone, a bit like an English muffin, and a bit like a USA biscuit; and of course you don’t have to cook them in a muffin pan! For those on Keto – they are also only 4.1g carbs per serve 🙂

Ingredients

  • 100g almond flour
  • 50g coconut flour
  • 2 medium eggs
  • 1 tsp baking powder
  • 125g sour cream
  • 50g grated mozzarella
  • 1 tsp baking soda
  • 1 Tbsp apple cider vinegar
  • dash salt
  • Optional: 2 Tbsp – 1/4c water

Directions

  1. Pre-heat oven to 200’C / 390’F and grease muffin trays.
  2. Combine the almond flour, coconut flour, and baking powder in a bowl.
  3. Mix in the eggs, sour cream, and mozzarella.
  4. Add a little water to moisten (this will also impact how moist / dry these are once cooked and cooled).
  5. Allow to sit for 10 – 20 minutes so that the gluten free flours can absorb the moisture.
  6. Add baking soda and vinegar – enjoy the fizz!
  7. Quickly combine and spoon into muffin trays.
  8. Pop into pre-warmed oven. I like to do mine a bit like scones – intense heat at first for the initial rise and then drop the heat for the rest of the cooking; 200’C / 390’F for about 10 mins and then 170’C / 340’F for about 10-15 mins. Use a toothpick to test (it will come out clean once cooked).

Lovely warm. I’ve been pleased with how mine store in both fridge and freezer.

NUTRITIONAL INFORMATION

Based on 6 servings per recipe; nutritional breakdown is approx:

Serving Size: 1 Serving

Average Quantity
per Serving
Energy983.7 kJ (235 kcal)
Protein9.5 g
Fat, total18.5 g
– saturated6.6 g
Carbohydrate4.1 g
– sugars2.4 g
– starches1.4 g
Dietary Fibre4.8 g
Sodium414.4 mg
Calcium124.1 mg

Gluten Free Lemon Cake

This delicious gluten free lemon cake was inspired by both our study of Colombia, where corn flour is a key ingredient in many traditional foods, and our sun drenched lemon tree.

Ingredients

  • 1 cup GF cornmeal flour
  • 1 cup sugar
  • 2 cups gluten free plain flour
  • 1 1/2 tsp Baking Powder
  • pinch salt
  • 2 eggs
  • 120g Nuttelex (or margarine, or butter)
  • Zest of 1 lemon
  • Juice of 2 lemons
  • approx. 3/4 cup water (or rice milk, or milk, or greek yoghurt).

Allergies: gluten free, dairy free*, soy free, nut free.

Directions

  1. Line or grease a large spring-form cake tin. Preheat the oven to 180’C / 350’F.
  2. I like to keep things simple. Put everything in a big bowl in the order listed EXCEPT the water. Tip: a flour sieve is great for keeping out the lemon pips!
  3. Add 1/4 cup liquid and mix with an electric beater. Slowly keep adding water and mixing until you have a good cake batter consistency.
  4. Pour the cake batter into the cake tin, smooth, and bake for 30-35 mins (or until a toothpick / sharp knife comes out clean).
  5. Sprinkle with a little icing sugar, or whip up a lemon icing for a more lemony flavour.

Tip: I like to eat it warm from the oven and then freeze the rest to pull out as needed.

Tip: For a more lemony flavour, pierce many times with a toothpick when the cake is half cooked. Cover the top of the cake in a thin layer of sugar and squeeze a fresh lemon over the top; then place back in the oven. The lemon syrup will soak into the cake while it continues baking.

Yummy Chocolate beetroot muffins!

This is a versatile recipe that can be used to make moist scrumptious cupcakes, muffins, or mini-cakes.

Ingredients

  • 150g grated fresh beetroot
  • 2 eggs (whisked)
  • 1/2 cup rice bran oil
  • 1/4 cup water, rice milk, or cow milk.
  • 1 1/2 cup high grade flour
  • 3/4c sugar
  • 1/3 cup Dutch cocoa powder
  • 2 tsp baking powder
  • Optional: 2 tsp hemp seed protein powder

Allergies: dairy free*, soy free, nut free.

Directions

  1. Put oven on to pre-heat to 180’C / 375’F. Grease your muffin tray or springform mini-tins.
  2. Sift the flour, baking powder, cocoa powder, and sugar into a bowl. Add hemp seed protein powder (if using). Whisk.
  3. Add the grated beetroot, eggs, and rice bran oil. Mix to combine. It will still look a little dry. Add the water / milk and it should look just right once mixed in.
  4. Divide the mix amongst your muffin cases etc.
  5. Bake for 20-25 minutes (or until a toothpick / sharp knife comes out cleanly from the centre).

Allow to cool and then consider icing CHOCOLATE BUTTERCREAM ICING (ALLERGY FRIENDLY).

Light and fluffy Scones

These are the kind of light, fluffy, round scones that one imagines having with berry jam, clotted cream, and china cups of tea. They are made with flour and baked in the oven and rather different from the large, quartered, barley flour or oatmeal griddle scones from which they are descended.

My childhood has many pleasant memories of making scones in sunlit kitchens and they are wonderfully versatile as they can be served with everything from sweet honey to umami Marmite and cheese.

If you make kefir at home keep in mind that you can use it in baking! Although the probiotics will die in the heat, they will leave behind an enriched milk with little lactose and will add a lightness to your baking.

Ingredients

  • 75g butter
  • 3 cups plain flour
  • 6 tsp baking powder
  • 1/4 tsp salt
  • 3 Tbsp wheat germ
  • 1 Tbsp sugar
  • 1 to 1/2 cups milk (or 3/4 cup milk kefir + 3/4 cup milk)

Directions

  1. Start oven pre-heating to 220’C / 428’F. Grease a baking tray or line with baking paper.
  2. Measure and cut butter into a mixing bowl.
  3. Sift in flour, baking powder, and salt. Add wheat germ and sugar.
  4. Rub the butter into the flour until it resembles golden breadcrumbs.
  5. Add 3/4 cup of milk (or kefir). Mix to combine.
  6. Slowly add up to 3/4 cup of additional milk; stop to knead as you add the extra liquid. You want to draw all the dry ingredients into the mix without it getting too wet and sticky.
  7. Pull off the dough into approximately 12 pieces. Roll into rough balls in your hand and then flatten slightly. Place on prepared baking tray.
  8. Bake at 220’C / 428’F for 10 minutes. The scones should rise a great deal. Check if they are cooking evenly (and adjust their placement in the oven if not). Reduce the heat to approximately 180’C / 350’F and bake for another 5-6 minutes until golden.

Flavours of the World: How to make Japanese onigiri

Onigiri is delicious and easy to make!

One of the wonderful things about homeschooling is that being in the kitchen can definitely be part of the curriculum! We’re studying Japan at the moment and one of the suggestions in our Kiwico Atlas Discover Japan box was to try our hand at onigiri.

At it’s simplest, onigiri is a fun gluten free snack that uses a sticky rice to create a treasure box sandwich around a delicious filling of your choice. They are wonderfully easy to make and can be as creative (or quick) as you like.

The key ingredient that you will need is Japanese Short Grain Rice. This is sometimes marketed as ‘sushi rice’ in Western supermarkets although this is actually a misnomer, the same rice can be used to make sushi but while sushi uses vinegar, salt, and sugar to provide seasoning, onigiri uses plain steamed rice and relies on the nori (dried seaweed) and filling for flavour.

Ingredients

Your choice of fillings; for instance:

  • Smoked salmon and cream cheese
  • Tinned tuna chunks + mayonnaise + cooked corn
  • Bonito flakes and soy sauce
  • Cooked chicken and avocado
All kinds of onigiri designs are possible

Think about what design you would like to use for your onigiri. If you want to keep it simple, use scissors to cut the nori sheets into smaller and shorter strips that you wrap around the base of the onigiri as a handhold. You can also get creative and decorate them into whatever you can imagine! There are fascinating videos on YouTube with plenty of ideas – be aware that fancier designs may utilize special tools to cut the seaweed and moulds to press the rice into. These can often be picked up cheaply online or from stores specializing in Japanese homewares.

Directions

  1. Cook your rice fresh and allow to cool slightly (it should be warm while making the onigiri). I like to use a rice cooker and make just enough rice for the meal.
  2. Prepare your filling while the rice is cooking.
  3. Have a bowl of water available to wet and wash your hands (the rice is sticky!).
  4. Traditionally, salt is rubbed onto both hands and helps to flavour the rice while you shape it. You then scoop some warm rice onto one hand, make it into a flattish nest shape, place 1-2 tsp of filling in the middle, then gently squeeze into a ball or triangular shape. Tip: If this feels a bit tricky, try lining a small bowl with gladwrap and laying the rice on top. Apply filling to centre, pop a little more rice on top, and then pull the gladwrap up at the corners (into a raindrop shape) and mould the rice (keeping the filling in the centre).
  5. You can then decorate the onigiri as you like.

Tip: You don’t need to use any nori but it does provide a pleasant umami flavour. You may prefer to simply dip your onigiri in soy sauce or coconut amino acids (an allergy friendly substitute). You may also like to sprinkle a furikake seasoning onto your onigiri; there are a range of flavours.

Flavours of the world: How to make Hojarascas Mexican Cookies

How to make delicious Mexican Hojarascas cookies!

One of the wonderful things about homeschooling is that making cookies can definitely be part of the curriculum! We’re studying Mexico at the moment and were sitting in the garden working with clay after watching videos about pottery. Miss decided to make and paint cookies – which then started us researching different types of Mexican cookies.

We settled on hojarascas (oh-ha-rascas) a kind of cinnamon sugar shortbread cookie. The name comes from a Spanish word referring to Autumnal leaves falling from the trees (and the crackling, crunching sound as they crumble beneath feet).

We started with a traditional recipe, and then adapted it to a Kiwi kitchen and making a small batch of about 18 cookies.

Ingredients

  • 100g butter
  • 1/4 cup sugar
  • 1 egg
  • 1/2 Tablespoon baking powder
  • 1 tsp ground cinnamon
  • 1.5 cups high grade flour
  • Topping: 1/2 cup sugar + 2tsp ground cinammon

Directions

  1. Preheat the oven to 180’C / 350’F and line a cookie tray with baking paper.
  2. In a large Pyrex bowl, soften or melt the butter.
  3. Add the sugar and mix well.
  4. Add the egg, cinnamon, and baking powder. Stir to combine.
  5. Slowly mix in the flour until you have a soft dough.
  6. You can can roll it out and use cookie cutters if you want to, but I like to just roll small balls with my fingers and softly flatten them.
  7. Mix the sugar and cinnamon topping on a plate and gently press the cookies into the mix on both sides.
  8. Place the cookies on the tray and bake for 10-15 mins (my oven took exactly 13 minutes!).
  9. Place on a cooling rack and sprinkle with leftover cinnamon-sugar mix. (You could also wait until they are cooled, place the cinnamon-sugar in a ziploc bag, and shake the cookies gently.)

Notes

There are many versions of hojarascas cookies online and although some use butter, traditionally they use lard or shortening. Most recipes have the sugar and cinnamon mix added after baking, whereas I added mine beforehand to help it adhere more firmly. Some recipes add vanilla, or star anise, orange zest, or nuts (like pecans) but the cinnamon and sugar are consistent throughout – it does mean that you can experiment with many variations if these become a firm favourite in your household.

You can also experiment with the ratios of cinnamon:sugar and whether you’d like the cinnamon weighted more to the cookie or topping. I made the cinnamon flavour in the cookie quite mild but others may like it stronger.

Cheesy Oat Muffins

Cheesy Oat Muffins

These delicious muffins have protein, calcium, fibre and are delicious served warm with butter or dipped into winter soup.

Ingredients

Allergies: soy free, egg free*, nut free.

Directions

  1. Start the oven pre-heating to 180’C / 350’F and grease the muffin pans.
  2. Whisk the eggs, milk, and oil.
  3. Add the salt, sugar, and oats.
    • Tip: If you prefer a fine texture to your baking, use an electric hand beater to combine. This will help to break the oats into a finer texture (without demolishing them into oat flour).
  4. Add the wheat bran, wheat germ and cheese. Sift in the flour and baking powder. Mix well to combine.
  5. Spoon the muffin mix into the greased muffin trays and pop into the pre-heated oven.
  6. Bake for 25-35 mins until the muffins are cooked through (test with a knife or skewer to see that it comes out clean).
  7. Allow muffins to cool on a wire rack.

These are brilliant served warm with butter and are still lovely for breakfast in the morning. Consider freezing leftovers to heat up as needed.