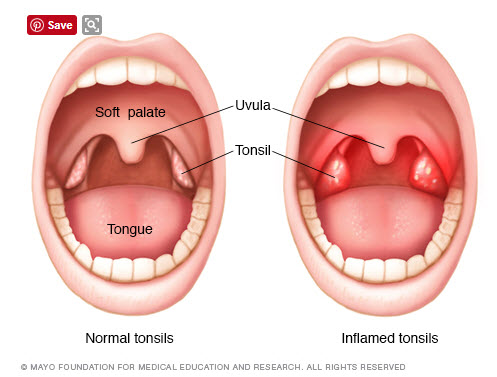
How inflamed tonsils compare with normal tonsils
What are tonsils?
Tonsils are soft tissue located at the back of your throat; they are part of the body’s lymphatic system (so are adenoids). When they are working properly, they help to recognise bacteria and viruses entering through the mouth and produce white blood cells to fight off infection.
Tonsils are particularly useful during childhood while the body is still encountering new bacteria and viruses for the first time and building up the immune system. Doctors seem to be of differing opinion as to how useful they are as adults; I’ve some that have called them redundant and unnecessary, I’ve also met other doctors who view removing them as an absolute last resort.
Why do tonsils need removing?
Tonsils may temporarily swell while fighting infection, sometimes they become so swollen that they result in a very sore throat and fever (tonsilitis), they may also partially obstruct the airways and not respond to non-invasive treatmeants.
Surgery may be recommended to help treat:
- Multiple case of tonsillitis (seven cases of tonsillitis or strep in the last year, or five cases or more over each of the last two years).
- Breathing problems related to swollen tonsils
- Frequent and loud snoring
- Periods in which you stop breathing during sleep (sleep apnea)
- Bleeding of the tonsils
- Trouble swallowing chewy foods, especially meats
- Cancer of the tonsils
Back in the 1980s, having your tonsils out was kind of a childhood rite of passage. It was a very common procedure and often parents had already experienced a tonsillectomy in their own childhood. Medical opinion has now swung in a different direction and there is a more stringent list of criteria that often needs to be met (as well as requiring parent consent / advocacy). For a balanced medical opinion, try this post by Christopher Johnson (a pediatric intensive care physician) .
What is tonsil grading?
Surgery is most likely to be recommended if tonsils are consistently swollen at Grade 3 or Grade 4 coupled with other complications (such as snoring and/or sleep apnea).

What are the 4 grades of swollen tonsils?
Basically tonsils are graded based on how much of the airway they block.
- Grade 0 = tonsils are within the the tonsillar fossa
- Grade 1 = tonsils obstruct 0-25% of oropharyngeal airway
- Grade 2 = tonsils obstruct 26-50%
- Grade 3 = tonsils obstruct 51-75%
- Grade 4 = tonsils obstruct 75%
What are the possible side effects of swollen tonsils?
- Fever / temperature. Keep in mind that children can react in their own individual ways – they may keep getting low grade temperatures instead of a fever.
- Runny nose and congestion (as well as the sore throat).
- Difficult or painful swallowing.
- Swollen and tender glands (lymph nodes) on the sides of the neck.
- Bad breath.
- Fever and chills.
- Tiredness and headache.
- Stomach upset or pain.
- Mouth breathing, noisy breathing, and/or snoring (due to enlarged tonsils blocking the airways). Obstructive sleep apnea. The swollen tonsils and/or adenoids can intermittently block airflow. It sounds like your child is silent and then there’s a big noisy sucking in of air.
-
In Miss 2 it can be so loud that I can hear it through her closed bedroom door and can sound like something’s fallen off a shelf and hit the floor! It’s a crappy and frightening thing as a parent that can result in just sitting with them in the dark either to check that they are breathing or to give them a gentle nudge to help them breathe again. If you’ve spent time with them hooked up to an oxygen saturation monitor then you’ll be familiar with what a stark difference there is between their oxygen levels when alert and upright versus lying prone to sleep.
- Fatigue. They might seem like they’re getting enough hours of sleep but in reality the quality of sleep is poor because their body is struggling to get enough oxygen through the night. It’s a bit like starting each day on a half tank of gas.
- Developmental delays. Sleep is critical for young children. During those early years, they are rapidly growing and learning. They need sleep to focus during the day; to have time for their brain to make connections between all the things they have learned or experienced; and their brain releases a growth hormone while they sleep. Poor sleep, fatigue and pain/discomfort, trouble hearing: these can make it harder for them to stay on track.
- Behavioural difficulties. Poor sleep, fatigue and pain/discomfort, trouble hearing: these can result in daily misery that they don’t know how to express.
Keep in mind that young children (i.e. toddlers) may not be able to describe their symptoms to you and it may not even occur to them to do so (especially if they chronic health issues). They may also be confused by referred pain; the ears and throat share nerves (as well as being linked by eustachian tubes) so they may say their ear is sore when the infection is actually in their throat. Another possibility is if they keep exhibiting teething type behaviour well after all their teeth are in (i.e. chewing on fingers or a dummy constantly, lots of drool) combined with a temperature and bad breath – the cause may actually be their tonsils!
What does surgery (a tonsillectomy) involve?
Surgery will normally take place at a hospital (probably as an outpatient). The doctor will review medical history in advance and make recommendations about pausing medications. You will normally be advised not to take anti-inflammatory medications within 7 days of surgery. They will also discuss post-operative pain medication.
The day of the surgery will involve a period of fasting; food or water won’t be permitted because they can impact the anesthetic. It’s a good idea to have family support and a game plan of how to distract your child; an older child may understand why they can’t eat but a toddler is likely to just focus on the fact that they are off routine and they are HUNGRY!
During surgery, your child will be under a general anesthetic. The surgeon will enter through the mouth and the tonsils will be removed with an electrical cauterizing unit. You can watch videos of surgery on YouTube but they can be a bit difficult to stomach; I preferred this video of a digital tonsillectomy surgery.

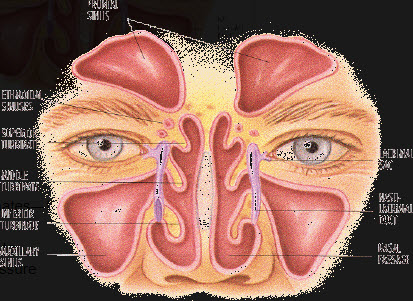
Adenoids and tonsils
Often the adenoids will be removed at the same time as the tonsils (if they are also swollen); this is termed an adenotonsillectomy. Click here for information about the adenoids.
What happens after surgery?
Depending on the age of your child, they may keep them in the hospital overnight for monitoring or they may go to a recovery room and then go home the same day. You should be given a pamphlet with information about post-op care (i.e. like this tonsillectomy guide).
Your child may feel quite groggy and tired for the next few days and also have some nausea; vomiting once or twice is normal but contact your doctor if vomiting persists.
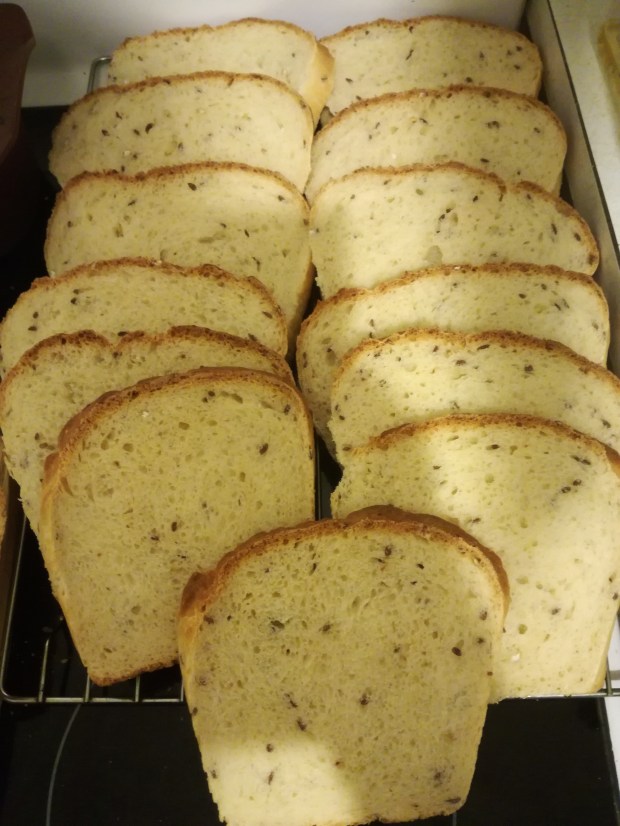
A light, cool diet for the next few days is generally recommended (avoid hot liquids or spicy food) but doctors will often recommend that children eat whatever they want – the abrasion from bread or crackers will actually help to clean the area. (That’s not to say there won’t sometimes be screaming pain because a sharp cracker edge has just struck the surgical site).
Some doctors will prescribe antibiotics. They will normally be prescribed painkillers (like Pammol and Tramadol) and anti-inflammatories (like Nurofen); if your child won’t take the fully funded options consider buying over-the-counter replacements (for kids) that have been flavoured. It is important to keep on top of their medication (including waking them up around the clock for a few nights) as the pain is severe; it will often peak somewhere around around Days 5-9 due to the way the membranes heal and can be excruciating.
It’s important to keep them rested and hydrated – even if this means just getting small regular sips of water, lemonade ice-blocks, or melty ice=cream into them; overall, the fluids are more important than food.
Common side effects will include:
- Swollen tongue
- Bad breath (like a hyena!)
- White coating on the tongue
- White scabs over the tonsils
Your doctor will talk you through potential complications and when to seek immediate medical care – i.e. if bleeding occurs (it can be life threatening); they may be able to resolve with medication or surgery may be required.
They need lots of rest for two weeks to promote healing and will be off school during this time due to the risk of infection. They will also generally have several weeks off sports, exercise, and swimming.
Keep in mind that removing tonsils may only be one part of a wider treatment plan. If the chronic inflammation was linked to allergies then you will still need to work with a doctor to create an ongoing allergy treatment plan.


")


