In studying Colombia, we were fascinated to learn about traditional maracas made from natural materials. These beautiful instruments are often large hollowed-out gourds with a wooden handle and might contain pebbles, or in the Andes mountain, smaller maraca called gapachos use seeds from the gapacho plant. It’s interesting to see how they contrast with the brightly painted wooden maracas that we are familiar with.
We decided to have a go making our own maraca using a few simple materials from around the house. We did a few different engineering builds and this was what we found worked best for us.
Materials you will need
Making your maraca
Start with a balloon
You’ll want to start by snuggling the empty end of a balloon onto the narrow end of a funnel. Pour in some dry rice or beans (give it a little shake to help them go in). Remove the funnel and blow air into the balloon. Kids are fascinated to watch what appears to be a solid shape still expand as the air pushes the sides out.
Tip: Blow up the balloon to the size of a really big coffee mug; the kind you reach for when the kids have been up till super late and then are awake before dawn the next day. We’ve found that you get better stability of the handle if you don’t make the balloon too big.
Attach a handle
Once you’ve tied off the balloon, take two popsicle sticks and tape these together to make a handle. I found it easiest to stick the balloon upside down and stretch the knot vertical along the base of the popsicle sticks to begin taping it. You’ll then want to use long pieces of tape (like compass points) to attach the handle to the balloon; add some horizontal lines of tape as well for extra support. When you’ve finished, the handle should be capable of standing tall in the air (though probably not strong enough to flip the maraca and give it a shake).
Make paper mache paste
I like to use a large plastic tray and my fingers. You’ll want to mix together equal parts flour : water; I also add salt as a preservative. I like to make mine fresh each day so I use 1/2 cup of flour plus about 1/2 cup water to begin with. You want to stir well so that you have a thick paste (you may need to add a little more water).
The great thing about adding your own paste is that you can be creative! We like to add different colours of glitter to each layer.
Start adding layers
Rip your paper into strips. It’s a good idea to have a mix of medium and short strips (with some variety of width). A small balloon is not the easiest surface to work on for this first layer so kids may need some adult assistance.
Tip: Do you need to use newspaper when doing paper mache? The answer is no. It’s a nice form of recycling but really you just need a porous paper that isn’t glossy. You know what else is brilliant for paper mache? Piles of old paintings and drawings (when you reach the point that there are too many to adorn the walls); these make for a fun and super colourful way of doing the layers!
Aim to paste on one layer of paper at a time. Remember to run strips from the handle down to the balloon, around the base of the handle, and along / around the handle itself.
Tip: I like to lay my strips on the paste (in the tray) and then pull it up, run my fingers along both sides to remove excess paste, and then place it on.
After each layer, leave your balloon for 24-48 hours to dry; placing it in the Hot Water Cupboard can help the drying process. It’s important that it has this time to air to avoid creating a habitat for mould. Paper mache projects teach patience.
You’ll only need 4-5 layers for the project. The top layer will ultimately be what is decorated.
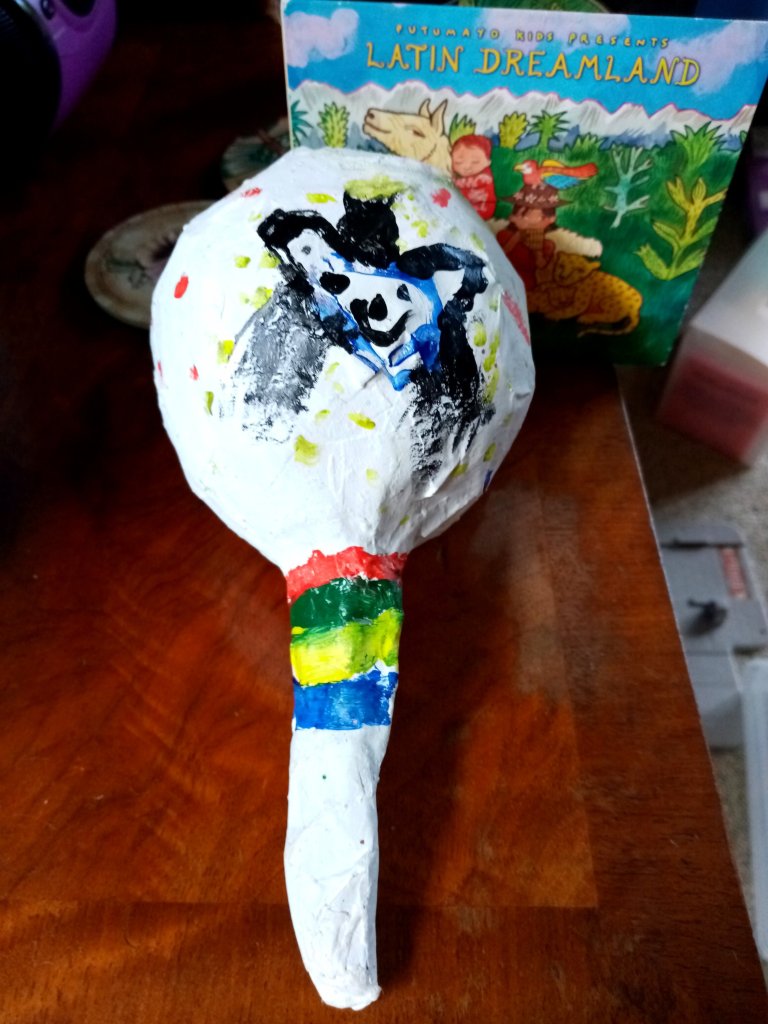
Decorating your maraca
Kids can have so much fun with this! Here are just a few ideas:
Tip: If using paint, make sure that you leave plenty of time to dry between layers. Poster paint can be great for foundation layers but the water content means it has a longer drying time. We did several layers of white poster paint and then used acrylics for the detailing.
Engaging kids
This is a very sensory (and time consuming) activity and not all aspects will appeal to all kids. This is a great opportunity to brainstorm all the different roles that would be involved in bringing this to market in the real world. If your child would prefer an adult to do the goopy paper mache part, help your child play to their strengths and interests by finding a project role that interests them.
Do they like planning? Every project needs a project manager to identify steps, keep the team on task, and create a report.
Do they like numbers? Consider allocating a budget for materials (especially decorations). Consider what kinds of costs you might have for a larger run (i.e. 10 or 100 maraca); what price point would you set your maraca at? How might price impact sales and profits?
Do they like art and design? They might enjoy being the hands-on graphic designer and/or art director. This could involve getting creative with the paste as it is mixed and decorating the finished maraca once it is dry. They might want to draw inspiration from Colombia’s beautiful birds; the stunning natural wonder of Caño Cristales (the rainbow waterfall); or the brightly coloured town of Guatapé.
Do they like big ideas? Would they like to be marketing director? This means working alongside the graphic designer to consider what style of art and use of colour would be a good idea. What will make this maraca unique?
Do they like building and creating things? As engineer, they might want to test different strategies for connecting the balloon and popsicle sticks to create a single stable unit capable of being shaken vigorously.