Discover Kenya – How to make and play Mancala

Mancala is a popular boardgame that has been played for hundreds of years in many parts of Africa; in East Africa the game is often referred to as ‘Bao’. We decided to make our own board as part of our Kenya study. There are many variants but essentially this is a ‘move and capture’ game where you want to end up with more tokens than your opponent.

Mancala boards can range from digging pits in the earth, to simple wooden boards, to stunningly carved and engraved affairs using wood or tin. They are also easy to make at home with a few simple materials!

How to make a Mancala board

Materials

  • 12-hole egg carton
  • Scissors, tape / glue.
  • Optional: paint
  • 48 tokens.

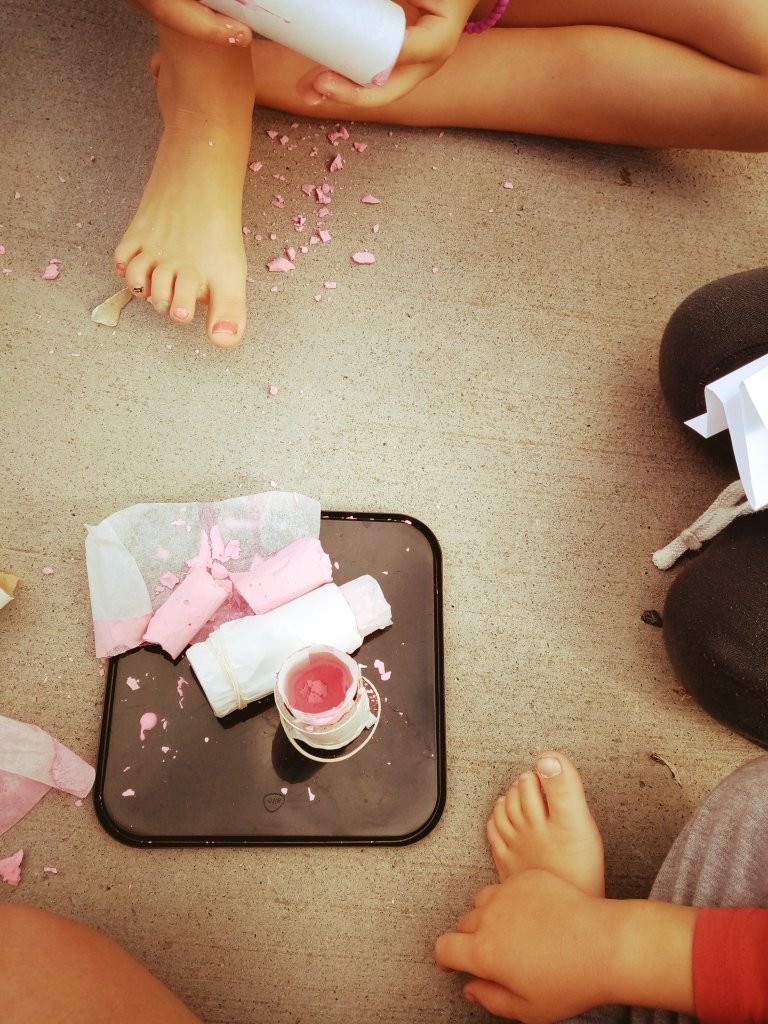
The great thing about making your own Mancala board is that you can customise and decorate it; Miss 6 chose to paint ours a vibrant pink and add some lizard spectators. The tokens can be whatever you want; aim for around small marble size. This home-made game board is great for practising fine motor skills and pincer movements!

  • scoop out and dry seeds from pumpkin or butternut
  • small river stones
  • small sea shells
  • marbles
  • beads

Directions

  1. Remove the lid of the egg carton.
  2. Optional: Paint your egg carton and allow it to completely dry.
  3. Cut the lid in half. Attach one half at each end using tape and/or glue. These create a long ‘mancala’ for each player to place their captured pieces.

How to play Mancala

There are many variants to Mancala; this is the version that has worked best for us:

  • Set up the gameboard by dropping four tokens (or ‘seeds’) into each ‘hole’ / ‘pit’. The six pits closest to your Mancala are controlled by you; the further six pits and Mancala are controlled by your opponent.
  • The player who begins chooses one of their ‘pits’ and picks up all of the tokens in it. They then proceed in an anti-clockwise direction and drop a token in each pit as they move forward. They do not drop a token in their opponent’s mancala. They do drop a token in their own Mancala. We like to think of this as sowing seeds.
  • If their turn finishes by dropping a token in their own Mancala, they get another turn. Players can use this to their advantage and may strategically repeat it several times before play passes.
  • If their turn finishes by dropping a seed in an opponent’s empty ‘pit’, they capture (‘harvest’) the token they just dropped and all the tokens in the ‘pit’ opposite. They place the tokens in their Mancala; then play passes to their opponent.
  • If their turn finishes by dropping a token in one of their own pits, or an opponent’s pit that contains tokens, then play passes.
  • The game ends when one player cannot move. Each player then collects (‘harvests’) all the tokens (‘seeds’) in their six pits (or ‘field’) and moves them to their Mancala. Players may strategically anticipate this end game result in how they move their pieces.
  • Players count the tokens in their Mancala at game’s end. Highest score wins.
Advertisement

How to make a Black-Figure Greek Vase: Classics for Kids

We made this as part of our Discover Greece unit 🙂 Ancient Greek black-figure vases are both beautiful and they help to provide insight into the culture, mythology, iconography, and daily activities of the time. You can read details of the artistry process here or here.

This black-figure pottery activity for kids is a simplified version that can be done with just a few cheap materials!

Materials

  • Small terracotta pot (i.e. from a garden store)
  • Pencil and eraser
  • Black permanent marker (fine tip)
  • Red crayon
  • Black acrylic paint
  • Paintbrush
  • Rubber bands
  • Something to scratch with (like a dull nail or a metal crochet hook)

Directions

  1. If your terracotta pot doesn’t have a natural lip, use rubber bands to create top and bottom strips. Colour these strips in with a red crayon.
  2. Lightly water a small amount of black acrylic paint into a smooth paste. Paint this over the crayon (the rubber bands should help to keep the paint neatly in line). Allow to dry.
  3. Look at photos of Greek vases online and think about what story you want to tell. Will you draw figures? animals? daily life? a mythic adventure? Begin by drawing with pencil in the untouched inner band of pottery. Make adjustments as you go. When you are happy with your work, trace the outlines with black permanent marker and then colour them in as solid shapes.
  4. Choose a Greek geometric pattern to scratch into the painted top band of your project. Use a metal tool (like a dull nail) to carefully scratch away the paint – revealing the red crayon beneath.
  5. Display your art work!

Discover Colombia: How to make a maraca

In studying Colombia, we were fascinated to learn about traditional maracas made from natural materials. These beautiful instruments are often large hollowed-out gourds with a wooden handle and might contain pebbles, or in the Andes mountain, smaller maraca called gapachos use seeds from the gapacho plant. It’s interesting to see how they contrast with the brightly painted wooden maracas that we are familiar with.

We decided to have a go making our own maraca using a few simple materials from around the house. We did a few different engineering builds and this was what we found worked best for us.

Materials you will need

Making your maraca

Start with a balloon

You’ll want to start by snuggling the empty end of a balloon onto the narrow end of a funnel. Pour in some dry rice or beans (give it a little shake to help them go in). Remove the funnel and blow air into the balloon. Kids are fascinated to watch what appears to be a solid shape still expand as the air pushes the sides out.

Tip: Blow up the balloon to the size of a really big coffee mug; the kind you reach for when the kids have been up till super late and then are awake before dawn the next day. We’ve found that you get better stability of the handle if you don’t make the balloon too big.

Attach a handle

Once you’ve tied off the balloon, take two popsicle sticks and tape these together to make a handle. I found it easiest to stick the balloon upside down and stretch the knot vertical along the base of the popsicle sticks to begin taping it. You’ll then want to use long pieces of tape (like compass points) to attach the handle to the balloon; add some horizontal lines of tape as well for extra support. When you’ve finished, the handle should be capable of standing tall in the air (though probably not strong enough to flip the maraca and give it a shake).

Make paper mache paste

I like to use a large plastic tray and my fingers. You’ll want to mix together equal parts flour : water; I also add salt as a preservative. I like to make mine fresh each day so I use 1/2 cup of flour plus about 1/2 cup water to begin with. You want to stir well so that you have a thick paste (you may need to add a little more water).

The great thing about adding your own paste is that you can be creative! We like to add different colours of glitter to each layer.

Start adding layers

Rip your paper into strips. It’s a good idea to have a mix of medium and short strips (with some variety of width). A small balloon is not the easiest surface to work on for this first layer so kids may need some adult assistance.

Tip: Do you need to use newspaper when doing paper mache? The answer is no. It’s a nice form of recycling but really you just need a porous paper that isn’t glossy. You know what else is brilliant for paper mache? Piles of old paintings and drawings (when you reach the point that there are too many to adorn the walls); these make for a fun and super colourful way of doing the layers!

Aim to paste on one layer of paper at a time. Remember to run strips from the handle down to the balloon, around the base of the handle, and along / around the handle itself.

Tip: I like to lay my strips on the paste (in the tray) and then pull it up, run my fingers along both sides to remove excess paste, and then place it on.

After each layer, leave your balloon for 24-48 hours to dry; placing it in the Hot Water Cupboard can help the drying process. It’s important that it has this time to air to avoid creating a habitat for mould. Paper mache projects teach patience.

You’ll only need 4-5 layers for the project. The top layer will ultimately be what is decorated.

Decorating your maraca

Kids can have so much fun with this! Here are just a few ideas:

Tip: If using paint, make sure that you leave plenty of time to dry between layers. Poster paint can be great for foundation layers but the water content means it has a longer drying time. We did several layers of white poster paint and then used acrylics for the detailing.

Engaging kids

This is a very sensory (and time consuming) activity and not all aspects will appeal to all kids. This is a great opportunity to brainstorm all the different roles that would be involved in bringing this to market in the real world. If your child would prefer an adult to do the goopy paper mache part, help your child play to their strengths and interests by finding a project role that interests them.

Do they like planning? Every project needs a project manager to identify steps, keep the team on task, and create a report.

Do they like numbers? Consider allocating a budget for materials (especially decorations). Consider what kinds of costs you might have for a larger run (i.e. 10 or 100 maraca); what price point would you set your maraca at? How might price impact sales and profits?

Do they like art and design? They might enjoy being the hands-on graphic designer and/or art director. This could involve getting creative with the paste as it is mixed and decorating the finished maraca once it is dry. They might want to draw inspiration from Colombia’s beautiful birds; the stunning natural wonder of Caño Cristales (the rainbow waterfall); or the brightly coloured town of Guatapé.

Do they like big ideas? Would they like to be marketing director? This means working alongside the graphic designer to consider what style of art and use of colour would be a good idea. What will make this maraca unique?

Do they like building and creating things? As engineer, they might want to test different strategies for connecting the balloon and popsicle sticks to create a single stable unit capable of being shaken vigorously.

How to make body paint with kids

It looks like we have an early start to summer with hot sunny days in the garden to appreciate our Spring flowers. Spending time outside has been a big part of our Discovering Spring unit as we explore life cycles (plants and insects), do gardening, make art with our flower press, and visit farms to see the baby animals that have been born.

It’s also a great time to explore making hand made body paint using a few simple ingredients. This is a messy play activity that is best done outdoors.

Materials (per colour)

  • 1 Tablespoon cornstarch
  • 1 Tablespoon flour (or rice flour)
  • 1 Tbsp water
  • A squirt of shaving foam
  • A few drops of food colouring
  • Spoon, bowl, paintbrush

Tip: We like using shaving foam in art; we also use it to make marbled paper. Used in this recipe, it creates a puffy consistency that can also be used for textured painting on paper. If you would like a smoother, more liquid consistency, use 1 Tbsp suntan lotion instead.

Directions

  1. In a small bowl (or cup), place the cornstarch, flour, water, and food colouring. Add a small squirt of shaving foam.
  2. Mix well until smoothly combined. Add a little rice bran oil or shaving foam if too thick.
  3. Use a paintbrush to draw designs. A hand mirror is useful for kids that would like to do their own. Try looking for inspiration outside to create flowers, leaves, and insects!

Discovering Spring – Flower Press and Life Cycles Box (ExperisenseNZ review)

I love the ExperisenseNZ Life Cycles box which I purchased for $27. I was inspired by our annual Spring unit on seasonal cycles, growing food and flowers in the garden, and observing garden mini-beasts. We were thrilled to watch the hard work we had done earlier in the year, creating new wildflower beds to support our favourite pollinators, burst into colourful bloom.

We wanted to preserve some of our flowers and were excited at the idea of buying a flower press to create seasonal art and gifts. A classic press seems to cost around $24 so I was thrilled to get the ExperisenseNZ kit which comes with a flower press and a number of additional activities.

What is the life cycle of a sunflower?

We love sunflowers with their stately and colourful beauty. It’s also fun being able to harvest their seeds; either to dry and sow again, or, to feed to the birds in Autumn.

The kit comes with a laminated life cycle wheel for discussing the sunflower’s life cycle stages. It also comes with a generous amount of sunflower seeds and some compostable pots to get you started.

Tip: Seedlings make great Christmas gifts!

What is a butterfly life cycle?

We made marbled paper and then followed the instructions in the kit to make a beautiful butterfly life cycle. Our wall poster shows the stages from egg, to caterpillar, to cocoon (or pupae), to butterfly.

Tip: Spring is a great time of year to consider growing Swan Plants to watch the Monarch Butterfly life cycle in action!

What is a ladybug life cycle?

What I like about the kit including both Butterfly and Lady Bug life cycles is that the two insects look quite different to each other in their stages. They also differ in what they eat! For instance, a Monarch butterfly caterpillar will eat a huge number of milkweed leaves; whereas, a Ladybug larve will voraciously eat aphids, tiny worms, and insect eggs.

We liked the rainbow foil print on this life cycle so much that we decided to laminate it and add it to our resource collection (rather than use it for a paper plate craft).

How to press flowers

We very much enjoyed using our flower press! We used our pressed flowers to make beautiful bookmarks.

Tip: Gather a variety of flowers on a sunny dry morning. Check flowers for dewdrops (moisture will impact the drying process). Avoid flowers that are very bulky i.e. cut the tips from lavender or choose rose petals rather than a whole rose. Remember that wild flowers, like oxalis, can be as beautiful dried as garden grown.

Interested in more homeschool box reviews?

ExperisenseNZ

#1 Exploring Maths through Art

#2 Exploring Space through Art

#3 Exploring the Human Body through Art

#4 Exploring Science through Experiments

Discover the World with ATLAS Crate

#1 Introducing the World

#2 Discover Japan

#3 Discover France

Explore STEM with Kiwi Crate

#1 Arcade Box (and the Claw!)

#2 The Amazing Animation Box (make your own 19th century movie with a Zoetrope!)

#3 The Mechanical Sweeper Box (make your own baleen whale!)

#4 The Disc Launchers Box (play games with physics!)

#5 Kaleidoscope Puzzles (explore symmetry and mirrors!)

Christmas gifts: How to make pressed flower bookmarks

Pressed flowers are a wonderful way of making gifts from the heart. They are also a wonderfully creative way for children to make personalised Christmas, birthday, or thank you gifts for friends, families, and teachers.

Materials

  • Flower Press
  • Fresh flowers to press
  • Coloured card
  • Glue stick
  • Laminator and laminating pouch
  • Hole punch, ribbons, beads

Tip: For extra fun, think about making your own beautiful marbled paper for the bookmarks!

Directions

  1. Gather a variety of flowers on a sunny dry morning. Check flowers for dewdrops (moisture will impact the drying process). Avoid flowers that are very bulky i.e. cut the tips from lavender or choose rose petals rather than a whole rose. Remember that wild flowers, like oxalis, can be as beautiful dried as garden grown.
  2. Follow the instructions with your flower press to layer flowers between the drying sheets and screw the press tightly shut. I like to store mine in the hot water cupboard to help the drying process (which can up to two weeks).
  3. Gently take the layers of the flower press apart and carefully remove the dried flowers. I like to lay them on a flat wooden tray. We use gentle hands but you may want to use tweezers.
  4. Cut coloured carboard or cardstock to your desired size; we like to have a variety of colours to choose from.
  5. Enjoy the creative process of arranging the flowers!
  6. Once you have decided on your arrangement, you will need to fix the flowers in place. If you are going to use a laminator (as we did) then all you need is a glue stick – a gentle glue is all that’s needed as it’s simply to keep the flowers in place while the laminator pouch feeds through the laminator. Alternatively, use a strong fast-drying craft glue that will dry clear.
  7. We arranged several bookmarks in each laminating pouch and then fed each A4 pouch through the laminator. This helps to protect the delicate dried flowers (and preserve them from future moisture).
  8. We then cut the completed laminated sheets to size. We liked some of the bookmarks plain; with others, we cut holes with the holepunch, threaded through ribbons, and tied beads to the end.

How to make beautiful marbled paper with kids

Making beautiful marbled paper is a fun and easy craft to do as a family!

One of the things I love about homeschooling is the way you can be multi-modal and explore areas like science or maths through art. Kids love to learn by being creative and hands on!

This is a fun and easy messy play activity that is cheap to do and makes beautiful decorative paper that you can use for upcycling crafts, making cards or christmas crackers, or to theme in with other activities. This green and yellow design was done to explore Spring and daffodils.

Materials

  • Plain paper (A4 printer paper works great)
  • Shaving foam (cheap is great!)
  • Food colouring / dye (2-3 colours)
  • Large plastic or tinfoil tray
  • Mixing stick (i.e. an iceblock stick or plastic knife)
  • Scraper (i.e. shower squeegee, plastic knife, iceblock stick, hands)

Directions

  1. Spray shaving foam (about an inch deep) to cover a tray at least A4 in size.
  2. Generously drip food colouring onto the foam.
    • Discuss first what colours you will use; it’s a good idea to start with 2-3 colours and build up from there (to avoid eager mixing creating a muddly brown!)
    • Ask younger children to predict what might happen when certain colours are mixed together; i.e. red and yellow (orange); blue and red (purple).
  3. Press the paper firmly onto the foam making sure that all parts of the paper make contact.
  4. Scrape as much foam off the paper as you can.
  5. Leave the paper to dry.

Voila! You have beautiful marbled paper!

Tips

This is an all year round activity, however, you will want to adjust your clean up methods to the season! In summer, consider doing this outside in the warm sun on the grass – hose down your kids afterwards and peg paper to dry on the washing line. In winter, consider doing this in the garage or kitchen on top of a tarpaulin – have paper towels (or a hot shower) ready for clean up and lie paper on a clothes drying rack.

Sensory kids may have different parts of this activity that they like to participate in or watch. It’s a great idea to have some washable toys on hand that can use to play in the shaving foam once you’ve finished with the paper – this may be your kids favourite part! If it’s summer, consider letting them use the left over shaving foam to create a slip’n’slide on the trampoline or a messy ‘snowball’ fight.

World Studies: How to make your name using a secret Inca code!

How to make your name in a secret Inca code!

Ways of recording information

The Inca civilisation had a complex administration system keeping detailed records of supplies, people, tributes, and stored goods. They also maintained over 40,000km (25,000 miles) of paved roadways with an State chaski messenger relay system.

As well as a rich oral culture, detailed records and messages were kept using quipus (kee-pooz). Instead of a system of written symbols (such as hieroglyphics or an alphabet), the Inca had a woven system of multi-coloured knots suspended from a central string. Different kinds of knots, their colour, and their position had different meanings that translated into a numerical system.

Creating a simple number cipher

To explore the concept of recording information without using a written language, we will begin by creating a simple number substitution cipher where A=1, B=2, C=3, etc. This will then get translated into a series of knotted beads.

Simple number substitution cipher

Weaving words

Materials

  • Coloured yarn
  • Beads
  • Scissors

Directions

  1. Start by choosing a word that you want to record (such as a name); as in English, you will read this from left to right (with each letter being read from top to bottom).
  2. Weave a simple plait to act as your top anchor; it’s a good idea to have a loop at the left end so that it’s clear where to start reading from.
  3. Knot a piece of yarn to the top anchor (you can slip it through the plait before tying it to help make sure it doesn’t move). Attach the relevant number of beads to correspond with the letter you are recording and knot beneath them so that they don’t slide off.
    • Letters A – I (numbers 1-9) will be represented by a corresponding number of beads close to the top anchor (i.e. A =1 bead).
    • Letter J (10) will be be represented as a single bead further down the strand.
    • Letters K-S (11-19) will be represented by a single bead further down the strand (representing one 10) with a knot to hold it in place, an approx. 5 cm gap, and then a group of beads to represent the ‘ones’ (i.e. S/19 will be one bead = 10, and then a group of nine beads = 9), and a knot to hold in place.
    • Letters T – Z will be represented by two beads further down the strand (representing two 10) with a knot to hold in place, an approx. 5 cm gap, and then a group of beads to represent the ‘ones’ (i.e. Z/26 will be two beads = 20, and then a group of six beads = 6), and a knot to hold in place.
  4. Keep following Step 3, with a separate piece of yarn for each letter.

Example:

Lily (12/9/12/25) = One top anchor with four strands hanging from it. Reading from left to right, these will hold the following beads: low 1 (10) + 2 (2); high 9 (9); low 1 (10) + 2 (2); low 2 (20) + 5 (5).

Sam (19/1/13) = One top anchor with three strands hanging from it. Reading from left to right, these will hold: low 1 (10) + 9 (9); high 1 (1); low 1 (10) + 3 (3).

Tip: Older kids may want to create their own variation of this code by creating meaning based on the colour, size, or type of beads being used.

Want to find out more about the Inca?

One of my favourite books is proving to be Inca Discover the culture and geography of a lost civilisation. It’s well laid out, has plenty of pictures and infographics, and (very importantly) it has lots of ideas for easy to complete projects to help develop learning. This craft is inspired by one of their projects.

A wonderful animated short video for children is The Rise and Fall of the Inca Empire.

Want another project? Why not try making your own Inca Rope Suspension Bridge. This particular project references the Inca using rope bridges made of woven grass to cross narrow river canyons (such as the Keshwa Chaca – Quecha Bridge).

Want to learn more about Quipus? Try this short National Geographic video: Threads that Speak – How the Incas used strings to communicate.

Homeschool STEM: How to make your own rope suspension bridge

Make your own Inca Rope Bridge.

What do you do all day when you homeschool?

Well, lots of things really. It also differs so much from family to family. One unifying factor tends to be the freedom and flexibility to embrace a learning style that works for your particular child (or children). We tend to do lots of hands-on project based learning that weaves together different disciplines. This project for instance encompasses literature, world studies, art, engineering, and problem solving.

We flowed down the Amazon River, away from Brazil’s Pantanal and portion of the Amazon rainforest, to Peru with its vibrant surf culture, Cabillitos de Totora, and the towering Andes mountains – historically home to the Inca civilisation. We have a number of resources from documentaries, to Twinkl, to books; one of my favourites is proving to be Inca Discover the culture and geography of a lost civilisation. It’s well laid out, has plenty of pictures and infographics, and (very importantly) it has lots of ideas for easy to complete projects to help develop learning. [My only wish for improvement would be the addition of colour to make it more visually appealing for children].

This particular project references the Inca using rope bridges made of woven grass to cross narrow river canyons (such as the Keshwa Chaca – Quecha Bridge).

Materials

  • A shoebox or similar (We made excellent use of a KiwiCo box!)
  • Yarn or string
  • Pencils
  • Scissors
  • Ruler
  • Craft materials for decorating the landscape (such as construction paper, markers, or paint).

Directions

  1. Imagine your box is a deep canyon with a river at the bottom. You can decorate it pretty much however you like (from marker pens, to paint, to showers of glitter). We opted for blue construction paper glued in as the river, and crumbled green construction paper as a mountainous landscape in the distance.
  2. Use a sharpened pencil to create a hole near the top edge of one side of the box (and a matching hole on the other side). I was delighted to find that my Kiwico box width was exactly the length of my pencil which made the whole hole making process delightfully easy! I was happy doing things by eye, but a ruler will come in handy if you’d like to be more exact.
  3. Measure a piece of yarn or string so that it will travel from one hole to the other with length left over at each end. This will form one of your handrails.
  4. Thread the yarn through the hole and secure it with a large double knot. Then thread it through the opposite hole and knot it again (check the tension to ensure it is tight).
  5. For your second handrail, move along the box about the length of your little finger. Make another hole (plus one opposite) so that you can repeat Steps 3 and 4.
  6. Now you’re going to make the bottom of the bridge. Imagine a triangle (base facing the sky). Find the mid-point between two holes, measure down about 5cm, and create a new hole (see photo). Create a matching hole on the opposite side of the box. Thread the string through and knot if off (making sure to keep it taught. I used a pencil on each side to help weight the bridge (twisting to add tension).
  7. The final step is making the sides. Cut lengths of yarn (around 15cm). Tie each length to a handrail, loop it twice around the bottom, continue up to the other handrail, loop it around, and then knot. Techniques will vary; I opted to loop mine back and do two sliding knots on the upward slant of the ‘V’. Repeat this process until have traversed the canyon!

Involving kids…

You can tailor this project to the age and interest of the children involved. A simple way to get them involved is by asking them, ‘What would you make a bridge out of?’ and then talking about their answer (and relating it to the real world if applicable – easy to do if they say wood, stone, or steel, trickier if they say marshmallow clouds!).

Ask them at each stage of the process what else they think the bridge needs. After explaining that the first piece of yarn is a handrail, they will hopefully start thinking about the other hand and the feet!

Give them a couple of toys to test the bridge as it is built. Explain that testing designs is an important part of engineering. They may well delight in seeing the figures plummet to the depths below and swim to shore to try again. We found the best ‘to scale’ figure was a Playmobil child crossing the river to meet a grazing Peruvian llama at home in its Andean highlands.

Life in Lockdown – Decorate our streets!

Making homemade chalk is easy a great way to connect as a family!

Life in New Zealand has changed rapidly. Our borders are closed, domestic travel restricted, our schools and shops closed, and we are asked to remain at home in order to restrict the spread of Covid-19. Cars are now to be used only for essential travel (the doctor, pharmacy, or supermarket) and people may only leave their house to walk nearby. Social distancing is everything.

Our big field trip for today was walking to the top of the driveway and drawing pictures that the kids in the houses nearby can see from their windows. Creating chalk, with a few simple ingredients from the supermarket, has been both art and science. It’s also a way to share a little love and kindness with the community around us.

Why not bring a little colour to yours?

Life in lockdown: Share some love and decorate our streets!

How to make home made chalk

Ingredients

  • Cornflour
  • Water
  • Food colouring
  • Cardboard tubes
  • Waxed paper / baking paper
  • Scissors
  • Sellotape or rubber bands

Note: Alternative ingredients include plaster of paris + tempera paint, or a 1:2 ratio of very finely crushed eggshell + flour.

Directions

  1. Prepare your moulds. Toilet paper rolls are a good size; I find a bread knife does a good job of sawing longer cardboard inner tubes into parts.
  2. Cover the bottom of your cardboard tubes with waxed paper and tape / elastic band into place. You then want to roll more waxed paper and slot it inside (you may need to trim to size).
  3. Pour cornstarch into a bowl and then add food colouring of your choice. Slowly add water and mix well. You want to add just enough water to create a very thick [viscous] mixture.
  4. Pour or spoon the mix into your moulds.
  5. Pop into a hot water cupboard (or somewhere warm to dry). You want as much of the water to evaporate as possible to dry before use (about 24-48 hrs).
  6. You can then removed from the moulds and let the kids have fun!

Tip

If you add too much water then it will have difficulty drying (and remaining contained within the moulds). Never fear! Treat it as a chemistry and physics lesson all-in-one for the kids. You have just created a non-Newtonian fluid 🙂 You can take your ooblek outside for messy play fun with the kids. Pour it into your hands and watch how it becomes a solid if you clench your fist but magically liquefies if you release the pressure!