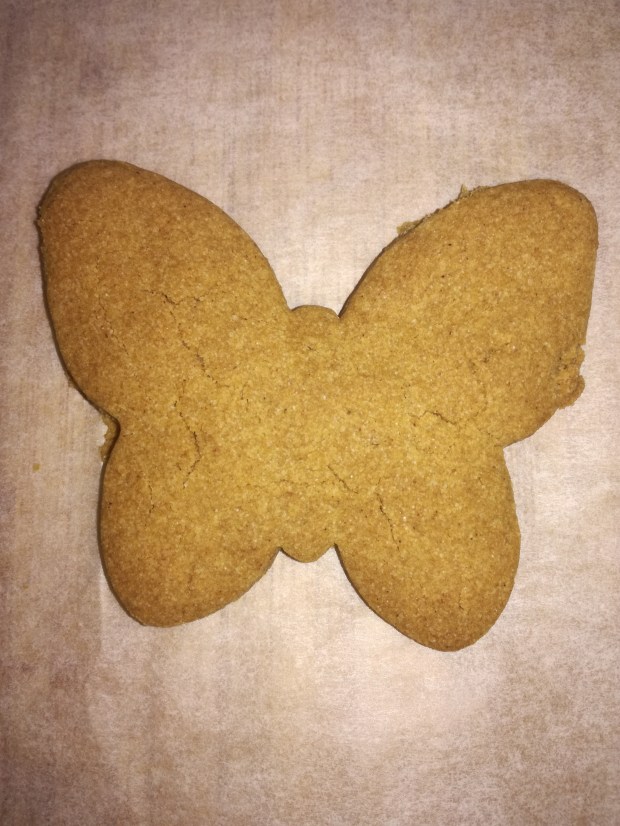
How to make an easy and cheap instrument at playgroup (Musical Maracas)

Making musical maracas

Making musical maracas

Making musical maracas

Making musical maracas

What you need

  • Paper plates (small).
  • Felts, crayons, paint, stickers etc.
  • Wooden beads, sea shells, bells etc.
  • Stapler.

Directions

  1. Help your children to decorate the outside of the plates (don’t forget to write their names on!).
  2. Fold the plate in half (like an empanada) and staple along the edges. Leave a gap at the top.
  3. Hold it upright with the gap at the top. Help your children to drop beads, bells, shells etc. inside their musical instrument; one big toddler sized handful will be about enough.
  4. Staple up the gap, put on some music, and shake!

Note: This is a great activity to do on a rainy day or with a playgroup. For younger toddlers choose larger items to put inside and play with under supervision only; i.e. keep choking hazards in mind.

Gingerbread / Spice Cookies (Allergy Free)

Gingerbread cookies

Gingerbread cookies

Ingredients

  • 2 cups plain flour (I have also used Healtheries GF Bread Mix)
  • 1 tsp Baking Soda
  • 1 tsp Baking Powder
  • 2 tsp ginger
  • 1 tsp cinnamon
  • 1/2 tsp allspice
  • 150g butter or allergy free spread (I use Nuttelex)
  • 3/4 cup brown sugar
  • 2 – 3 Tbsp Maple Syrup or Golden Syrup
  • Drop vanilla
  • Pinch salt

Note: These make a light more-ish spices gingerbread cookie (as opposed to one denser and chewier). Maple syrup will provide a more delicate flavour, golden syrup a more traditional one. The flavour notes are easy to experiment with, you can add more ginger and a pinch of nutmeg. I’ve made these a lot as my daughter loves them and this is her favourite combination.

Allergies: dairy free*, gluten free*, soy free, egg free, nut free.

Directions

  1. Cream ‘butter’, sugar, maple (or golden) syrup, and vanilla.
  2. Add flour, baking soda, baking powder, salt, and spices.
  3. Knead everything together. It will gradually turn from breadcrumbs to a soft cookie dough. Add a little water if you need to but just a tablespoon at a time.
  4. Refrigerate for 30 – 60 mins. You can leave it in a ball or roll it out. It’s tempting to try cutting it but (and I speak from experience) it doesn’t work very well at room temperature.
  5. Preheat oven to 180’C while rolling out the cookies.
  6. Place cookies on a baking sheet / lightly oiled baking tray.
  7. Bake for 12-15 mins.
  8. Take out from oven and allow to cool briefly before placing on cooling rack to continue cooling.

Tip: If you want a fancy (and easy) dessert reserve some of the cookie dough. Serve balls of French vanilla ice cream with little balls of cookie dough and a warm gingerbread cookie.

Note: These cookies are soft coming straight out of the oven and will harden overnight. They are delicious either way. They also freeze well.

Gingerbread cookies with chocolate icing

Gingerbread cookies with chocolate icing

Making playdough insects (portable playgroup fun!)

Playdough and straw caterpillar

Making playdough insects

Why not spend a rainy afternoon making homemade playdough and designing your own insects (or animals, or monsters!). It’s a cheap activity that’s also easily transportable to playgroup. Younger toddlers will have fun pushing the legs in and pulling them out again; preschoolers will have fun making their designs happen. Think about putting out some library picture books to help give them ideas!

What you 

  • Playdough (try making your own!)
  • Straws
  • Scissors
  • Knife (bamboo or wooden ones are great!)
  • Optional: Googly eyes (from craft stores)

Make your own rainbow crayons!

Making rainbow crayons.jpg

Making rainbow crayons

Have you ever seen those PinInterest posts where they talk about how easy it is to make your own crayons? They tell the truth! These are a great idea for a special & personalized gift, or as favours in homemade christmas crackers (bonbons), or just because it’s a rainy day!

Ingredients

  • Silicon mould tray
    • Be careful to choose one that can go in the oven.
  • Crayons
    • This can be a great way to use up spare crayons or crayon ends.
  • Optional: glitter & sparkles!

Directions

  1. Break your crayons into small pieces (i.e. adult thumb nail); you may need to use a knife.
  2. Pop them into the silicon mould. Have a think about what kind of colours you want (i.e. rainbow? ocean theme with various shades of blue & green?)
  3. Add sparkles & glitter shapes if you want.
  4. Bake in the oven at 200’C. Keep a close eye on them as you only need it in there until the crayon has melted into a thick liquid (i.e. you’re not trying to get it to bubble & boil).
  5. Remove from oven and allow to cool.
  6. Pop out of the moulds and have fun!
Rainbow heart crayons.jpg

Rainbow heart crayons

Hint: Wondering what to use the silicon mould tray for afterwards? It’ll probably need to get relegated to your arts & crafts box (rather than cooking in the kitchen). The good news is that it’s great for paint!

Silicon moulds as artists easel.jpg

Silicon moulds as artists easel

Gluten Free Cupcakes

Gluten Free Cupcakes with all natural pink icing

Gluten Free Cupcakes with all natural pink icing

I love experimenting with gluten free baking! As well as this vanilla cupcake recipe, I also have different recipes for chocolate cupcakes and berry muffins.

Ingredients

Cupcakes

  • 1c superfine white rice flour
  • 1T glutinous rice flour (also marketed as ‘sweet rice flour’)
  • 1/2 fine cornmeal (polenta) – use finely milled.
  • 1/2c sugar
  • 1 tsp guar gum
  • 2 tsp Baking Powder
  • 1/2 tsp Baking Soda
  • Pinch salt
  • 1/3c neutral oil (i.e. Rice Bran Oil)
  • 1 egg (or egg replacer)
  • Vanilla
  • 2/3c water

Allergies: gluten free, dairy free, egg free*, soy free, nut free.

Makes 8-10 cupcakes.

Directions

  1. Mix all the dry ingredients together.
  2. Whisk the egg (or egg replacer) until fluffy and pour in.
  3. Add the oil and vanilla. Mix.
  4. Slowly pour the water in while mixing.
  5. Spoon into cupcake cases and bake at 180’C for approx. 25 mins until golden.
  6. Allow to cool and ice. I used a Blood Orange icing with no artificial colours!


Tip: My current preferred method for cooking cupcakes is to fill a large cake tin with silicon cupcake cases (so that they are touching). This helps them to keep their shape and is super easy to get in and out of the oven.


Icing 

The icings that I use don’t have any artificial colours, glycerin, additives etc.

Making play dough is easy

Home made play dough

Home made play dough is super easy to make. It’s cheap, keeps well, you can choose what colours you want, and it doesn’t colour little hands the way commercial play dough often does. It also retains its colour much better if you’re using more than one colour rather than turning into an amorphous purple-brown.

Ingredients

  • 1c plain flour
  • 1/4c salt
  • 1T cream of tartar
  • 1T oil
  • 1/2 tsp food colouring
  • 1c boiling water

Note: This makes a small batch, just double if you want a big batch.

Directions

  1. Mix dry ingredients.
  2. Mix in oil.
  3. Slowly add boiling water. (You may not need all of. It should be smooth and pliable not sticky).
  4. Store in air tight container.

Orange play dough

Combining colours