Discovering Spring – Flower Press and Life Cycles Box (ExperisenseNZ review)

I love the ExperisenseNZ Life Cycles box which I purchased for $27. I was inspired by our annual Spring unit on seasonal cycles, growing food and flowers in the garden, and observing garden mini-beasts. We were thrilled to watch the hard work we had done earlier in the year, creating new wildflower beds to support our favourite pollinators, burst into colourful bloom.

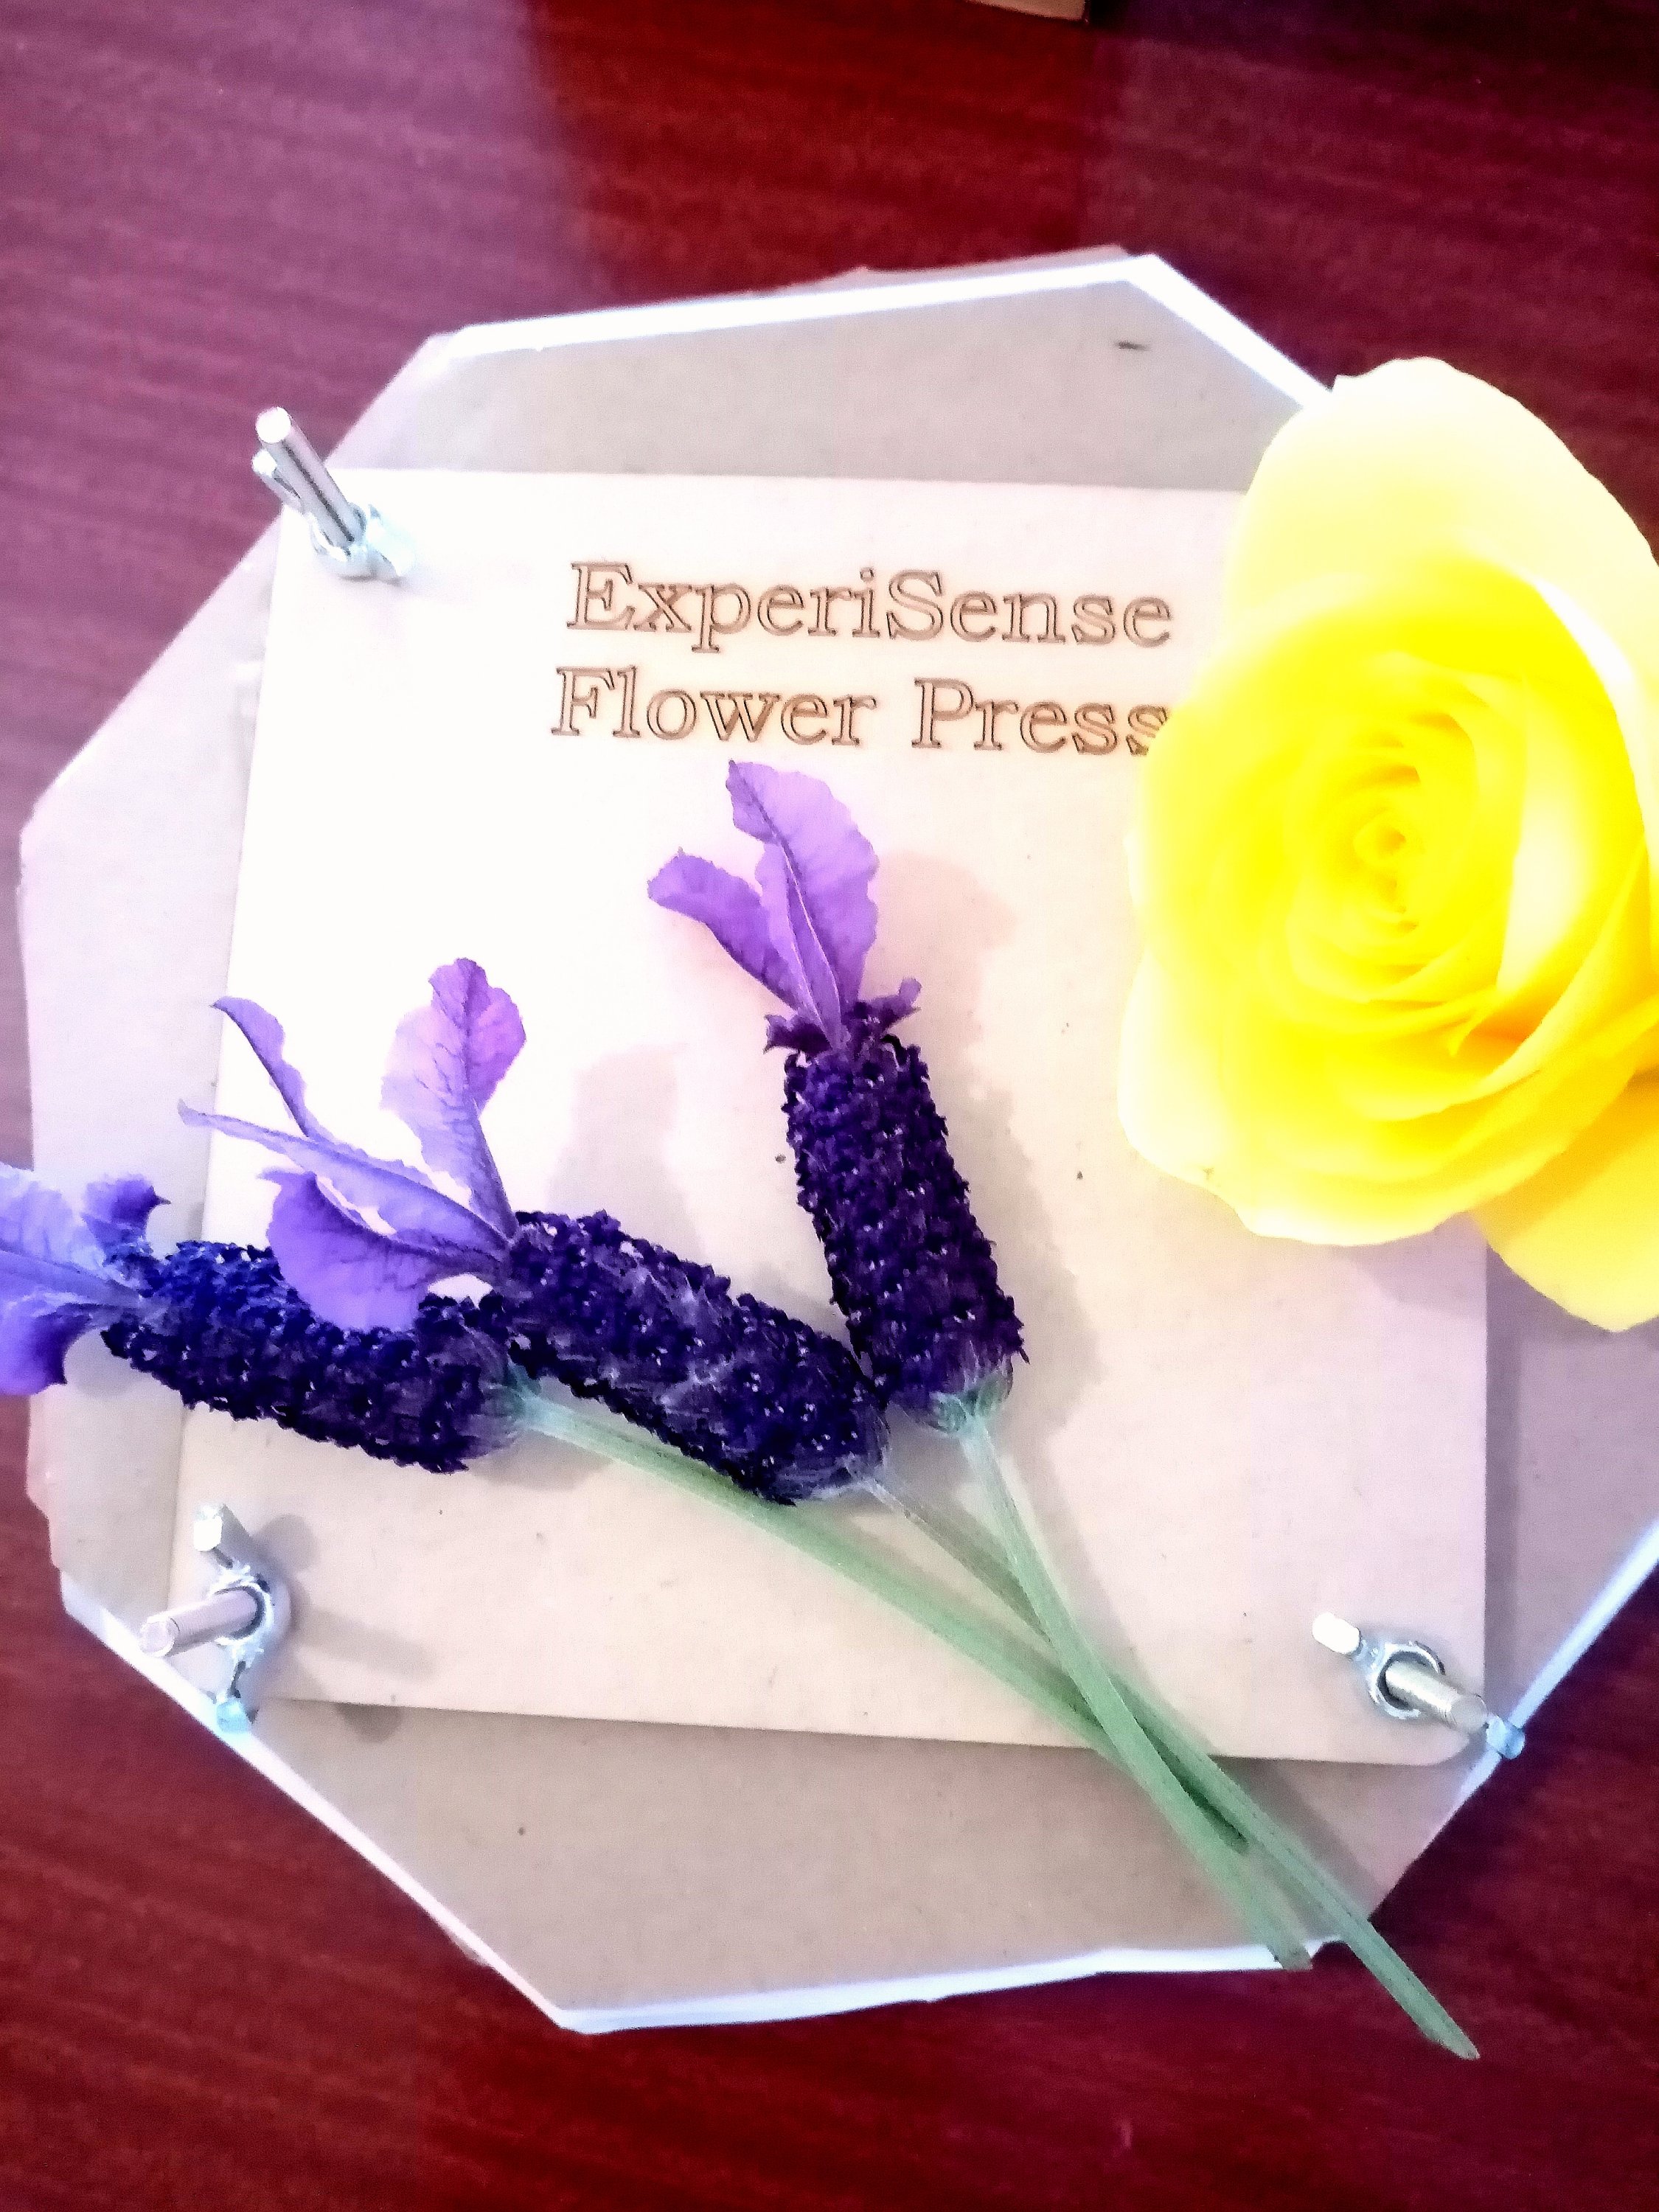
We wanted to preserve some of our flowers and were excited at the idea of buying a flower press to create seasonal art and gifts. A classic press seems to cost around $24 so I was thrilled to get the ExperisenseNZ kit which comes with a flower press and a number of additional activities.

What is the life cycle of a sunflower?

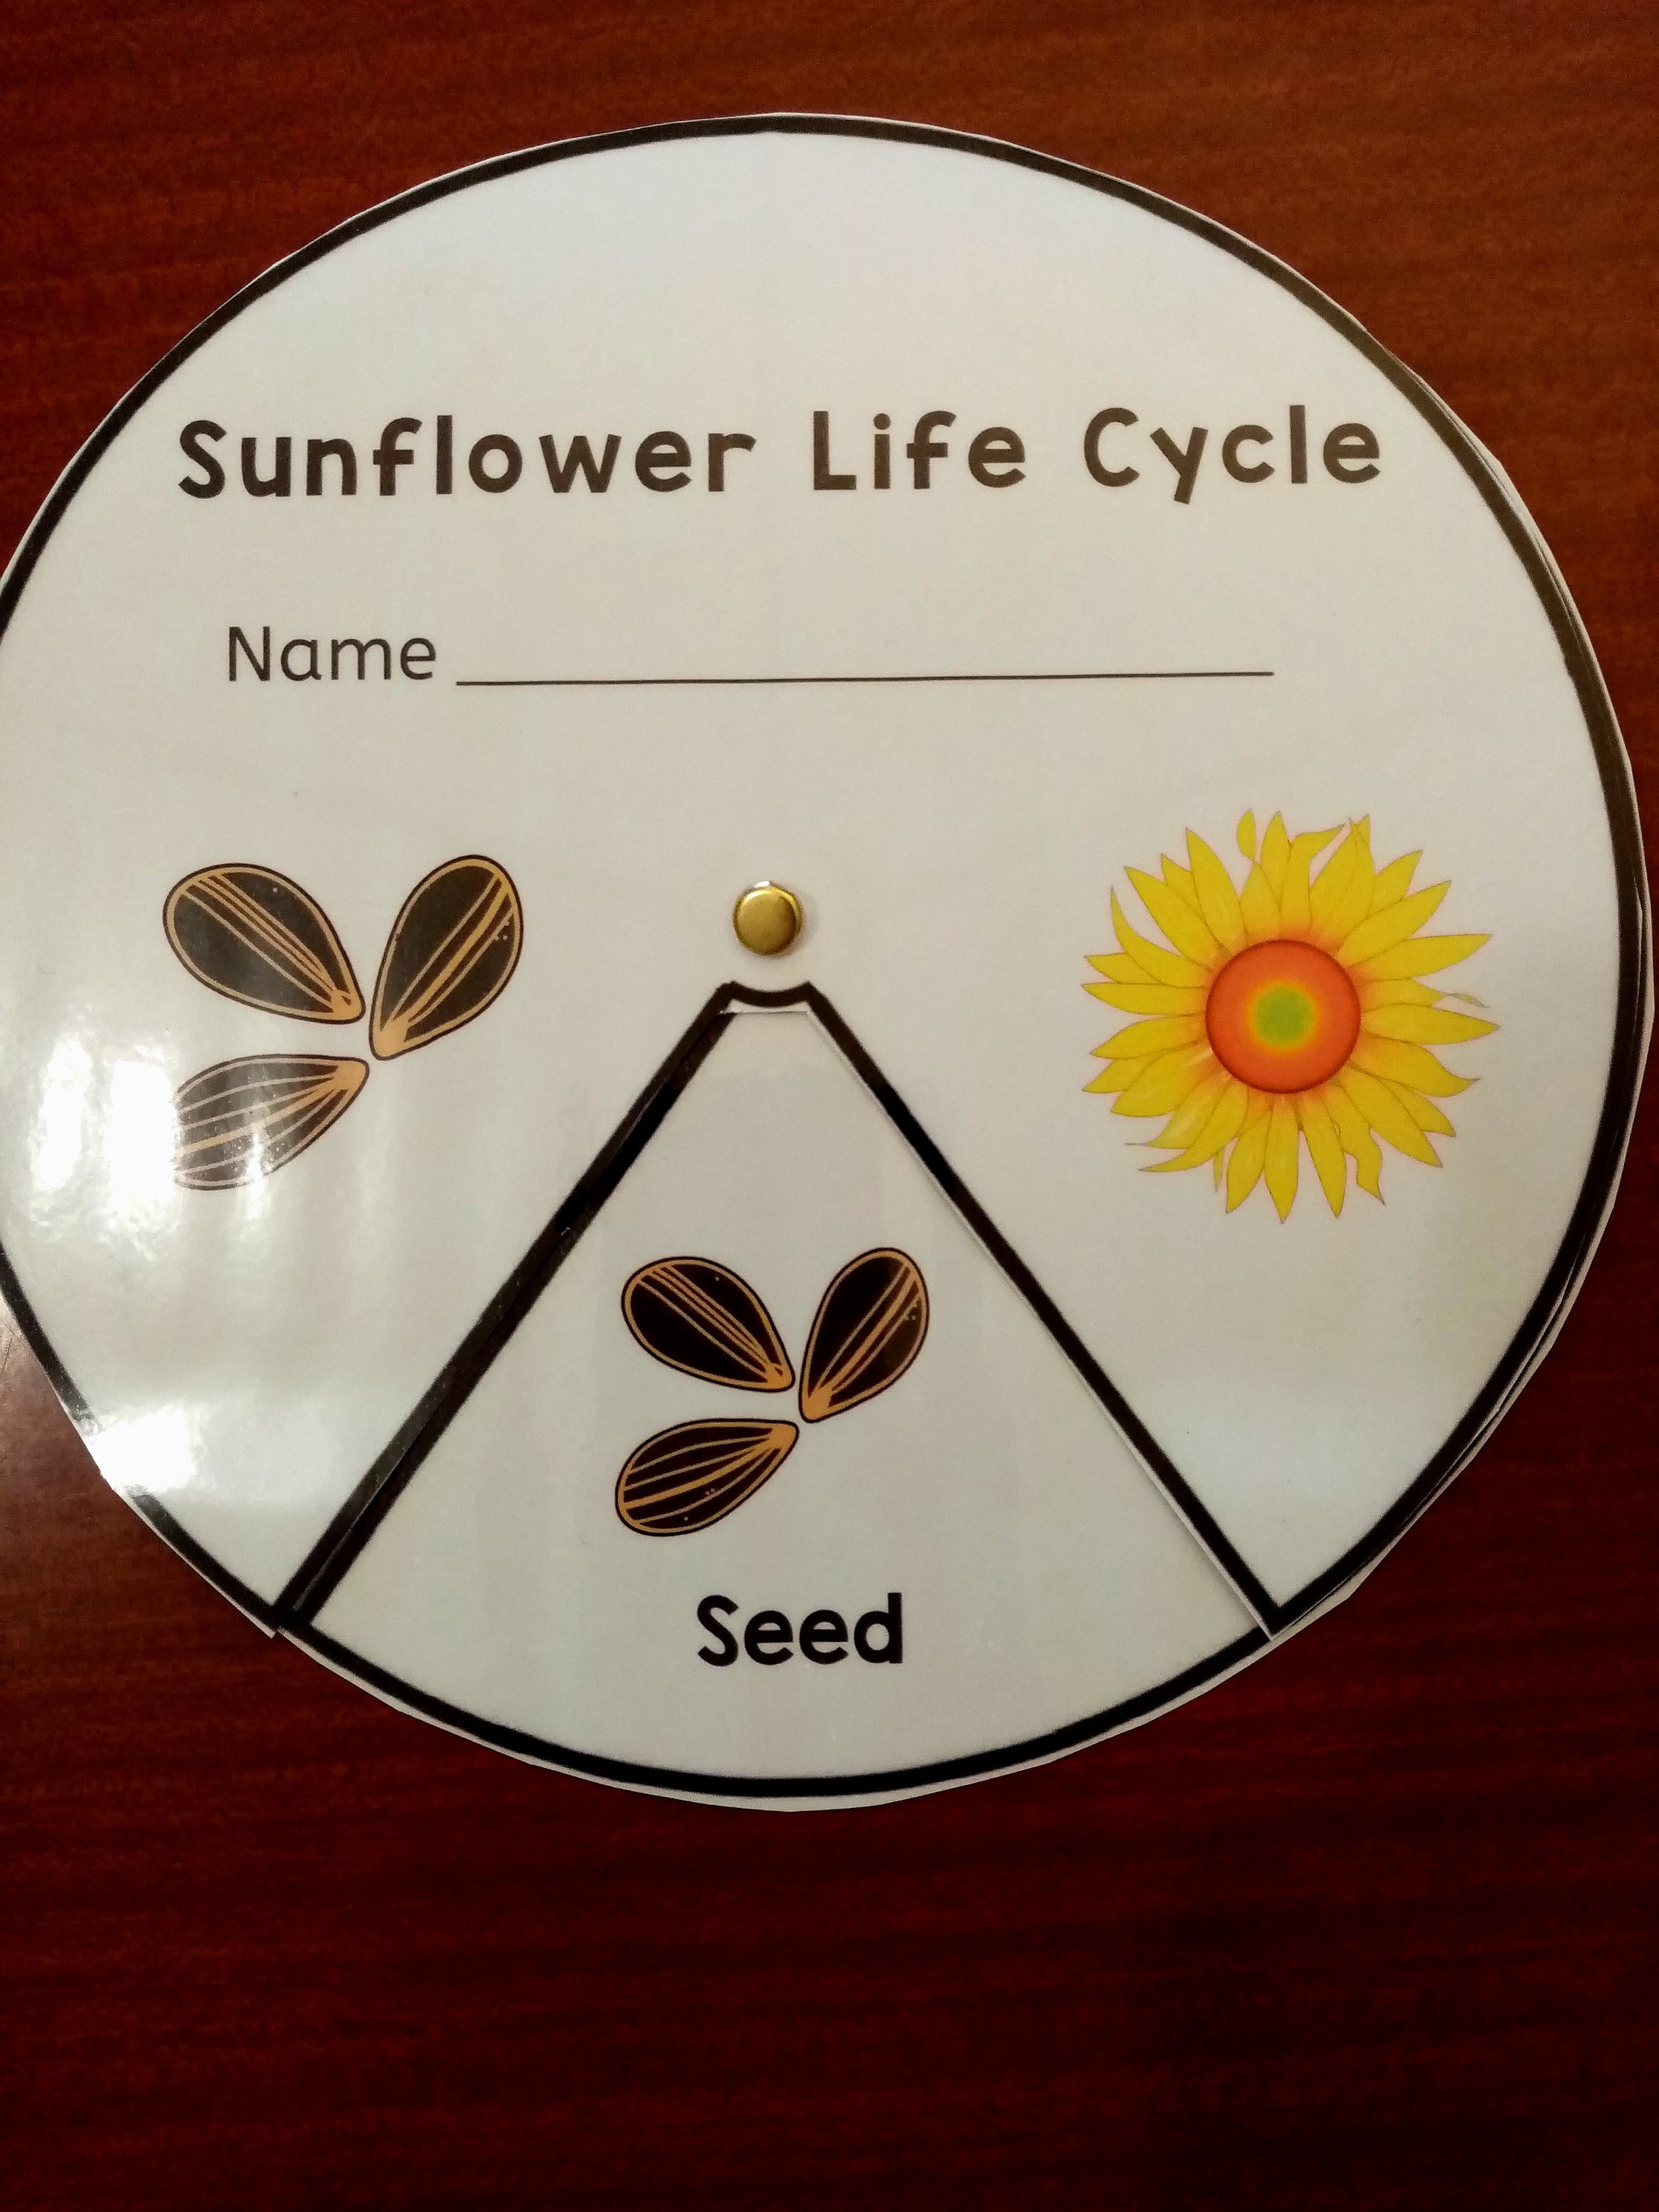
We love sunflowers with their stately and colourful beauty. It’s also fun being able to harvest their seeds; either to dry and sow again, or, to feed to the birds in Autumn.

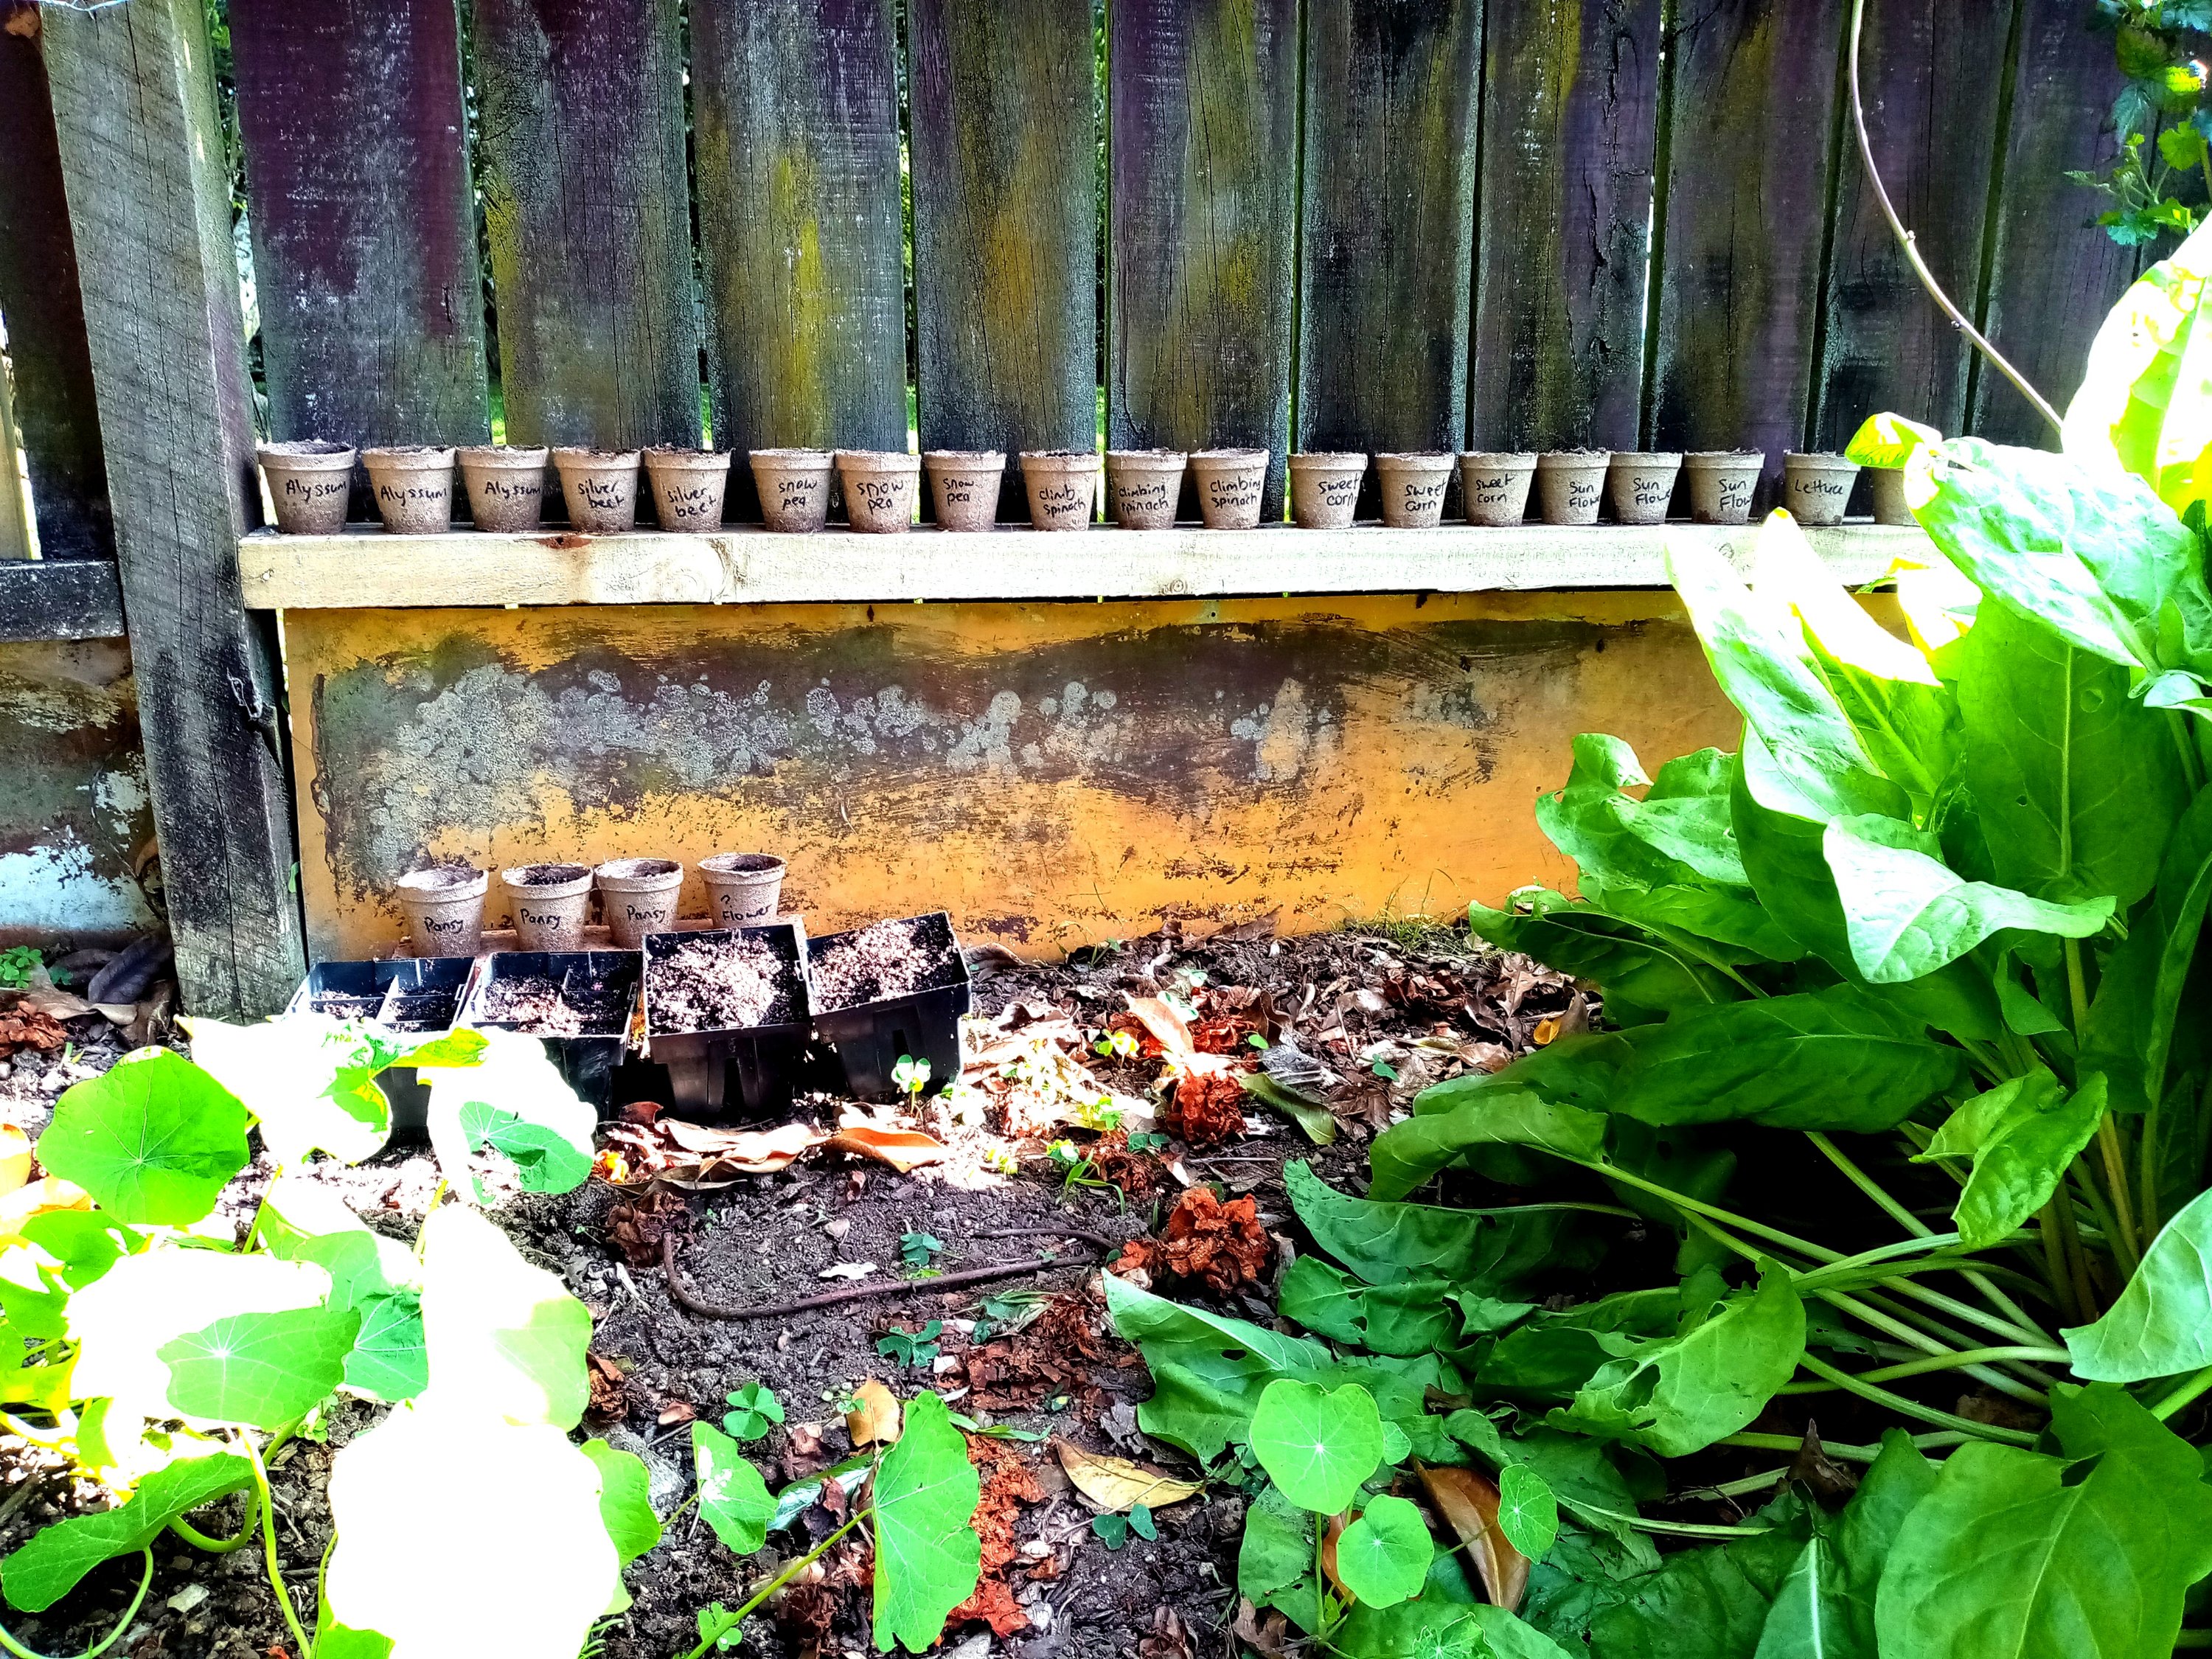
The kit comes with a laminated life cycle wheel for discussing the sunflower’s life cycle stages. It also comes with a generous amount of sunflower seeds and some compostable pots to get you started.

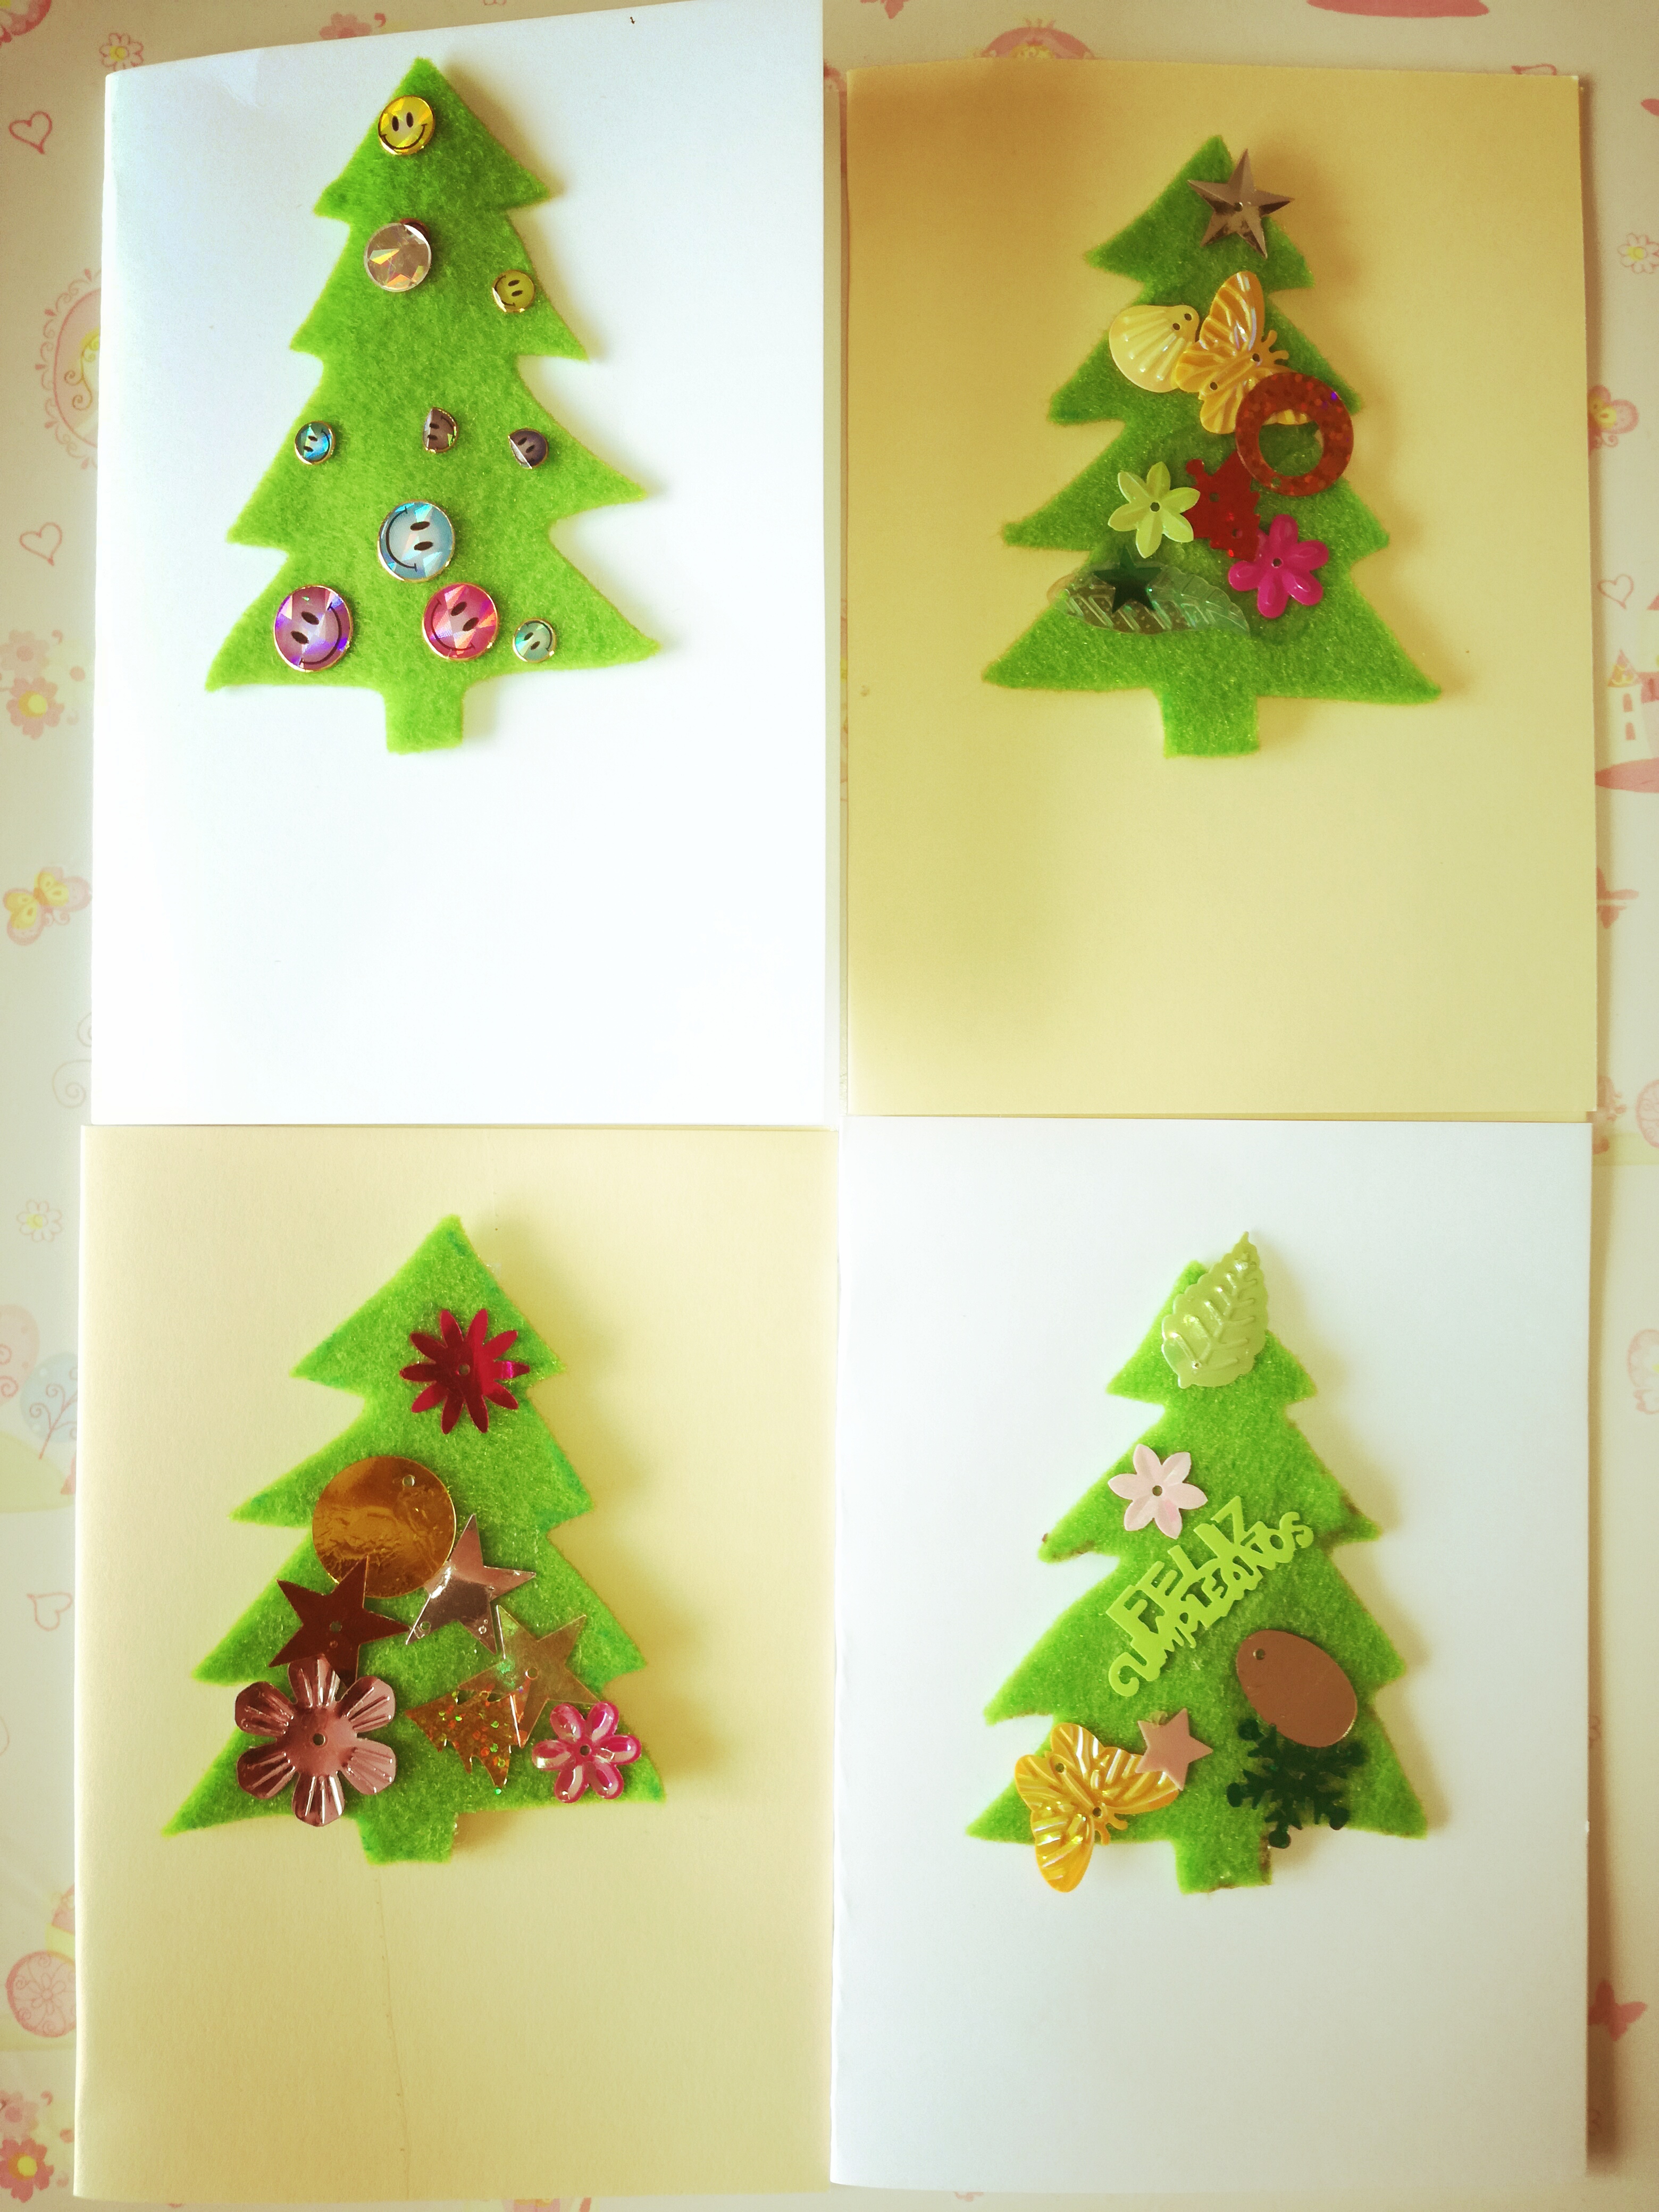
Tip: Seedlings make great Christmas gifts!

What is a butterfly life cycle?

We made marbled paper and then followed the instructions in the kit to make a beautiful butterfly life cycle. Our wall poster shows the stages from egg, to caterpillar, to cocoon (or pupae), to butterfly.

Tip: Spring is a great time of year to consider growing Swan Plants to watch the Monarch Butterfly life cycle in action!

What is a ladybug life cycle?

What I like about the kit including both Butterfly and Lady Bug life cycles is that the two insects look quite different to each other in their stages. They also differ in what they eat! For instance, a Monarch butterfly caterpillar will eat a huge number of milkweed leaves; whereas, a Ladybug larve will voraciously eat aphids, tiny worms, and insect eggs.

We liked the rainbow foil print on this life cycle so much that we decided to laminate it and add it to our resource collection (rather than use it for a paper plate craft).

How to press flowers

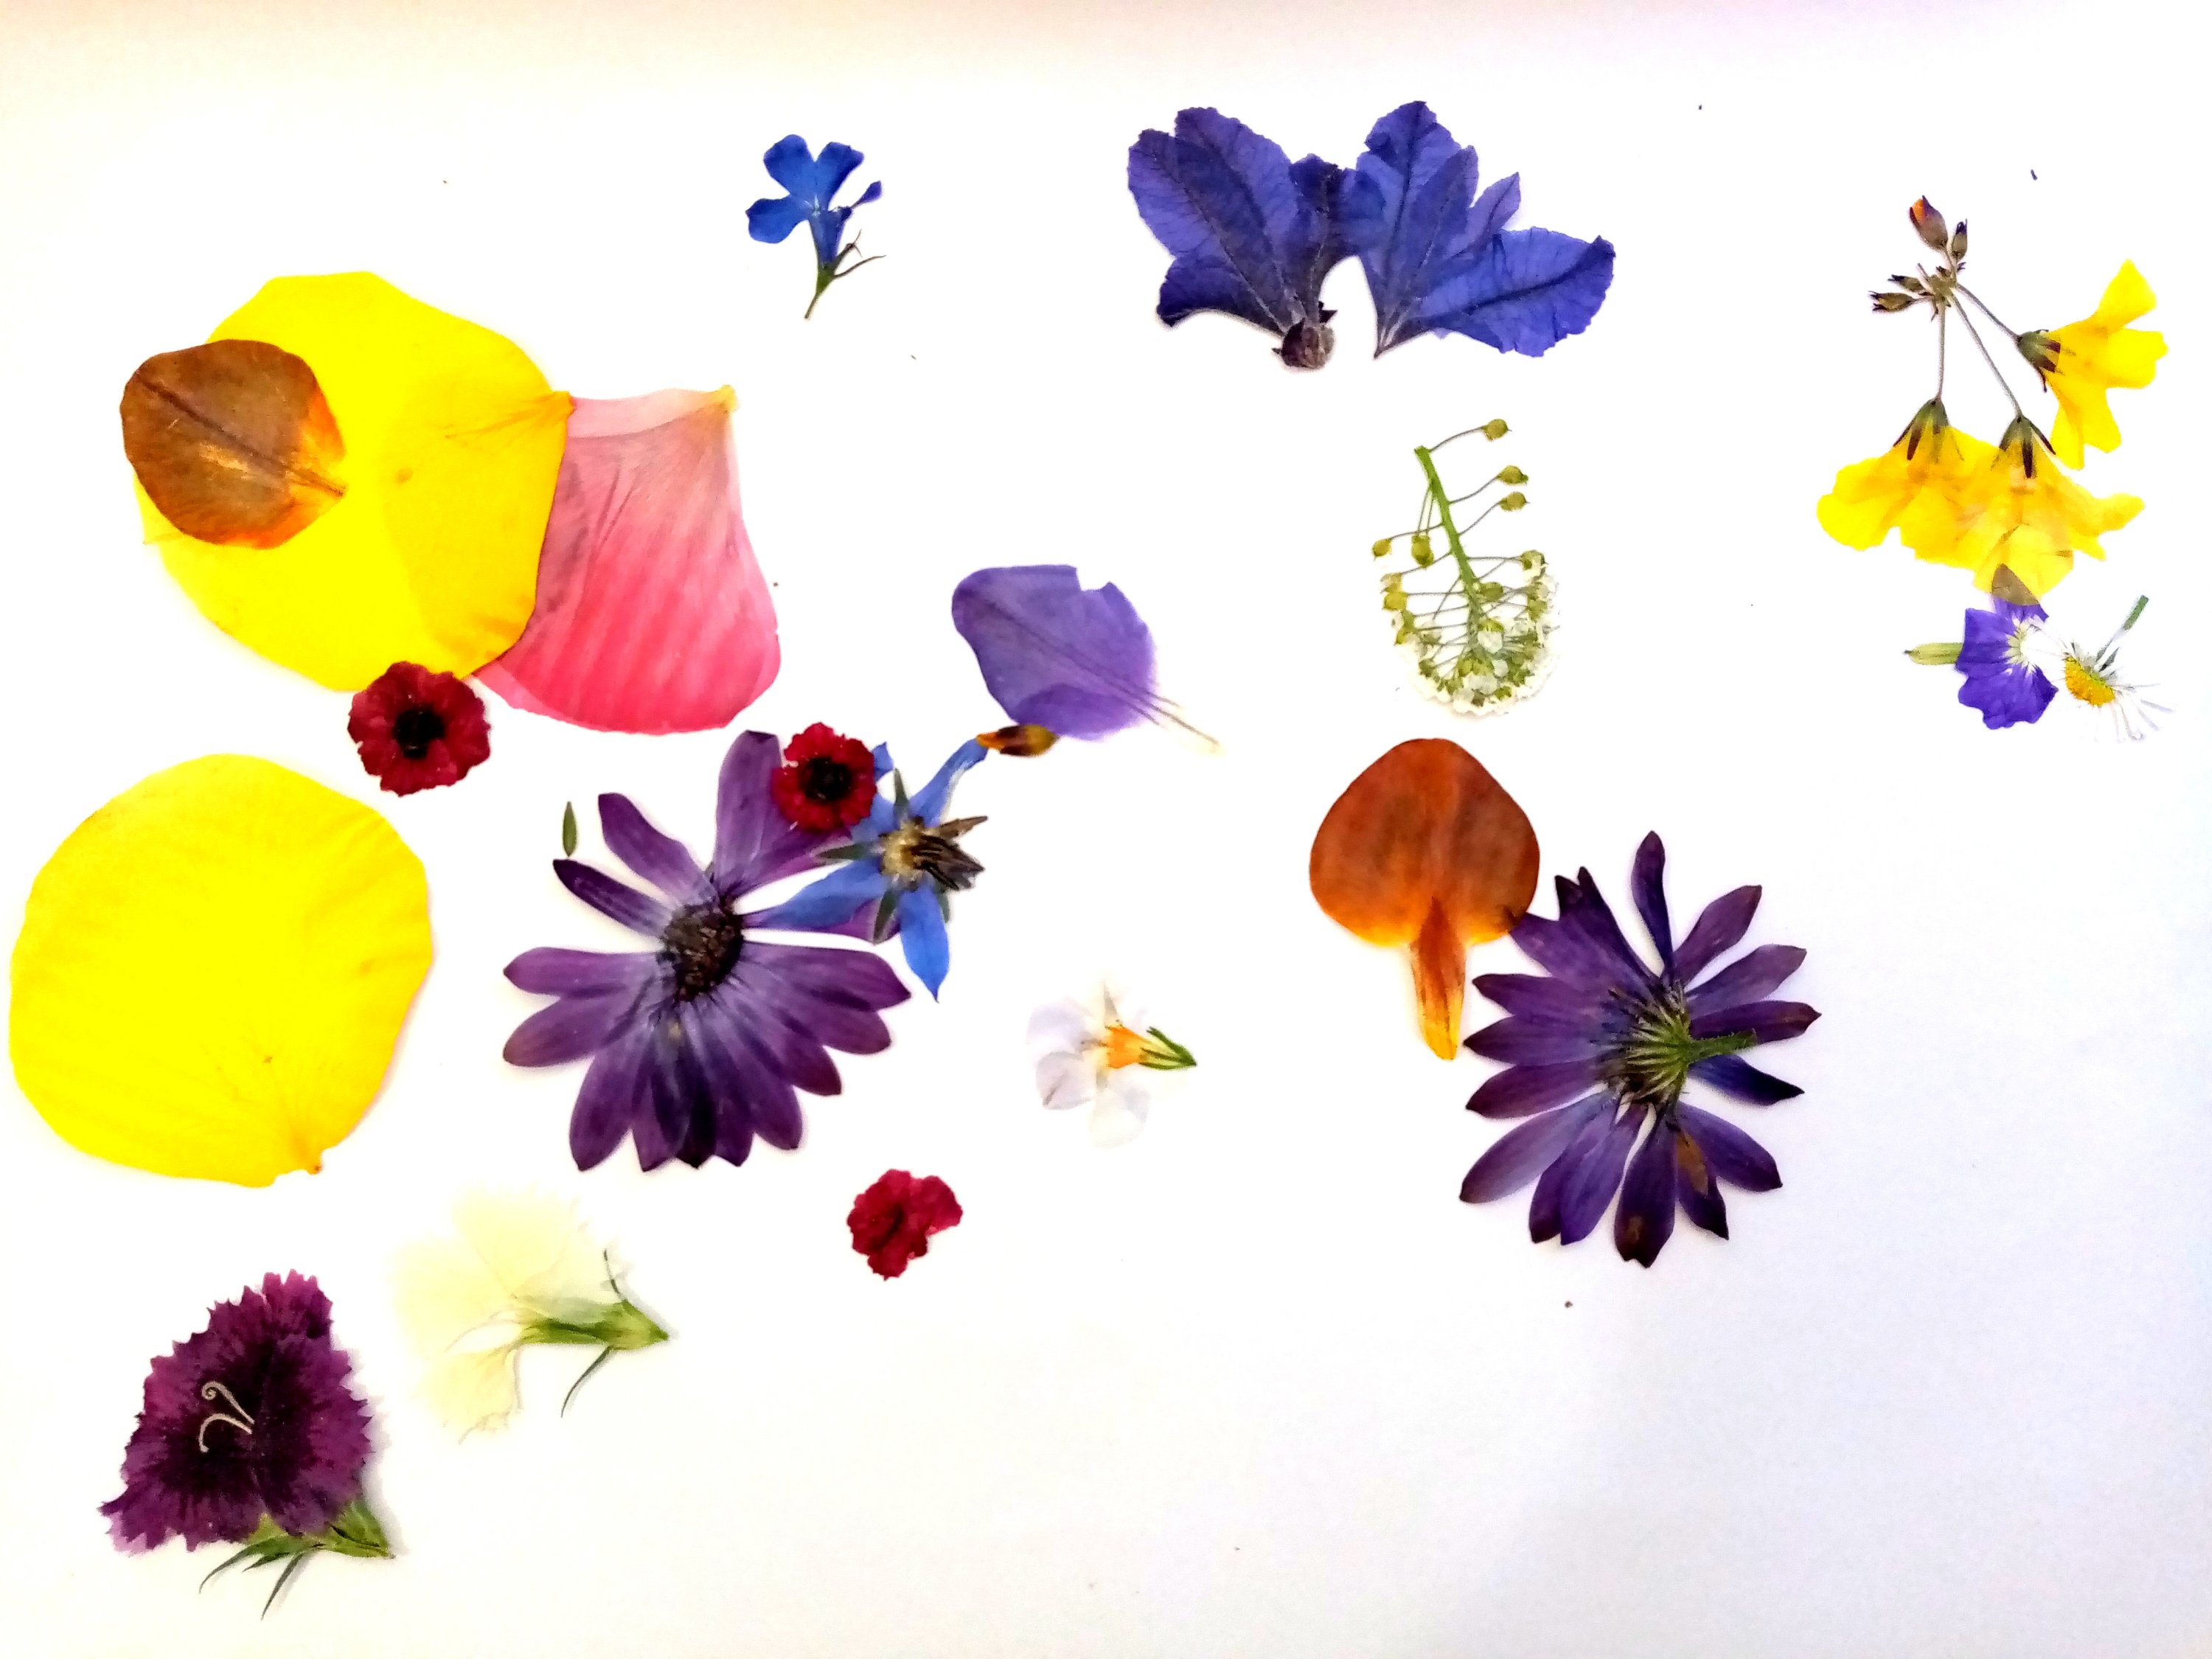
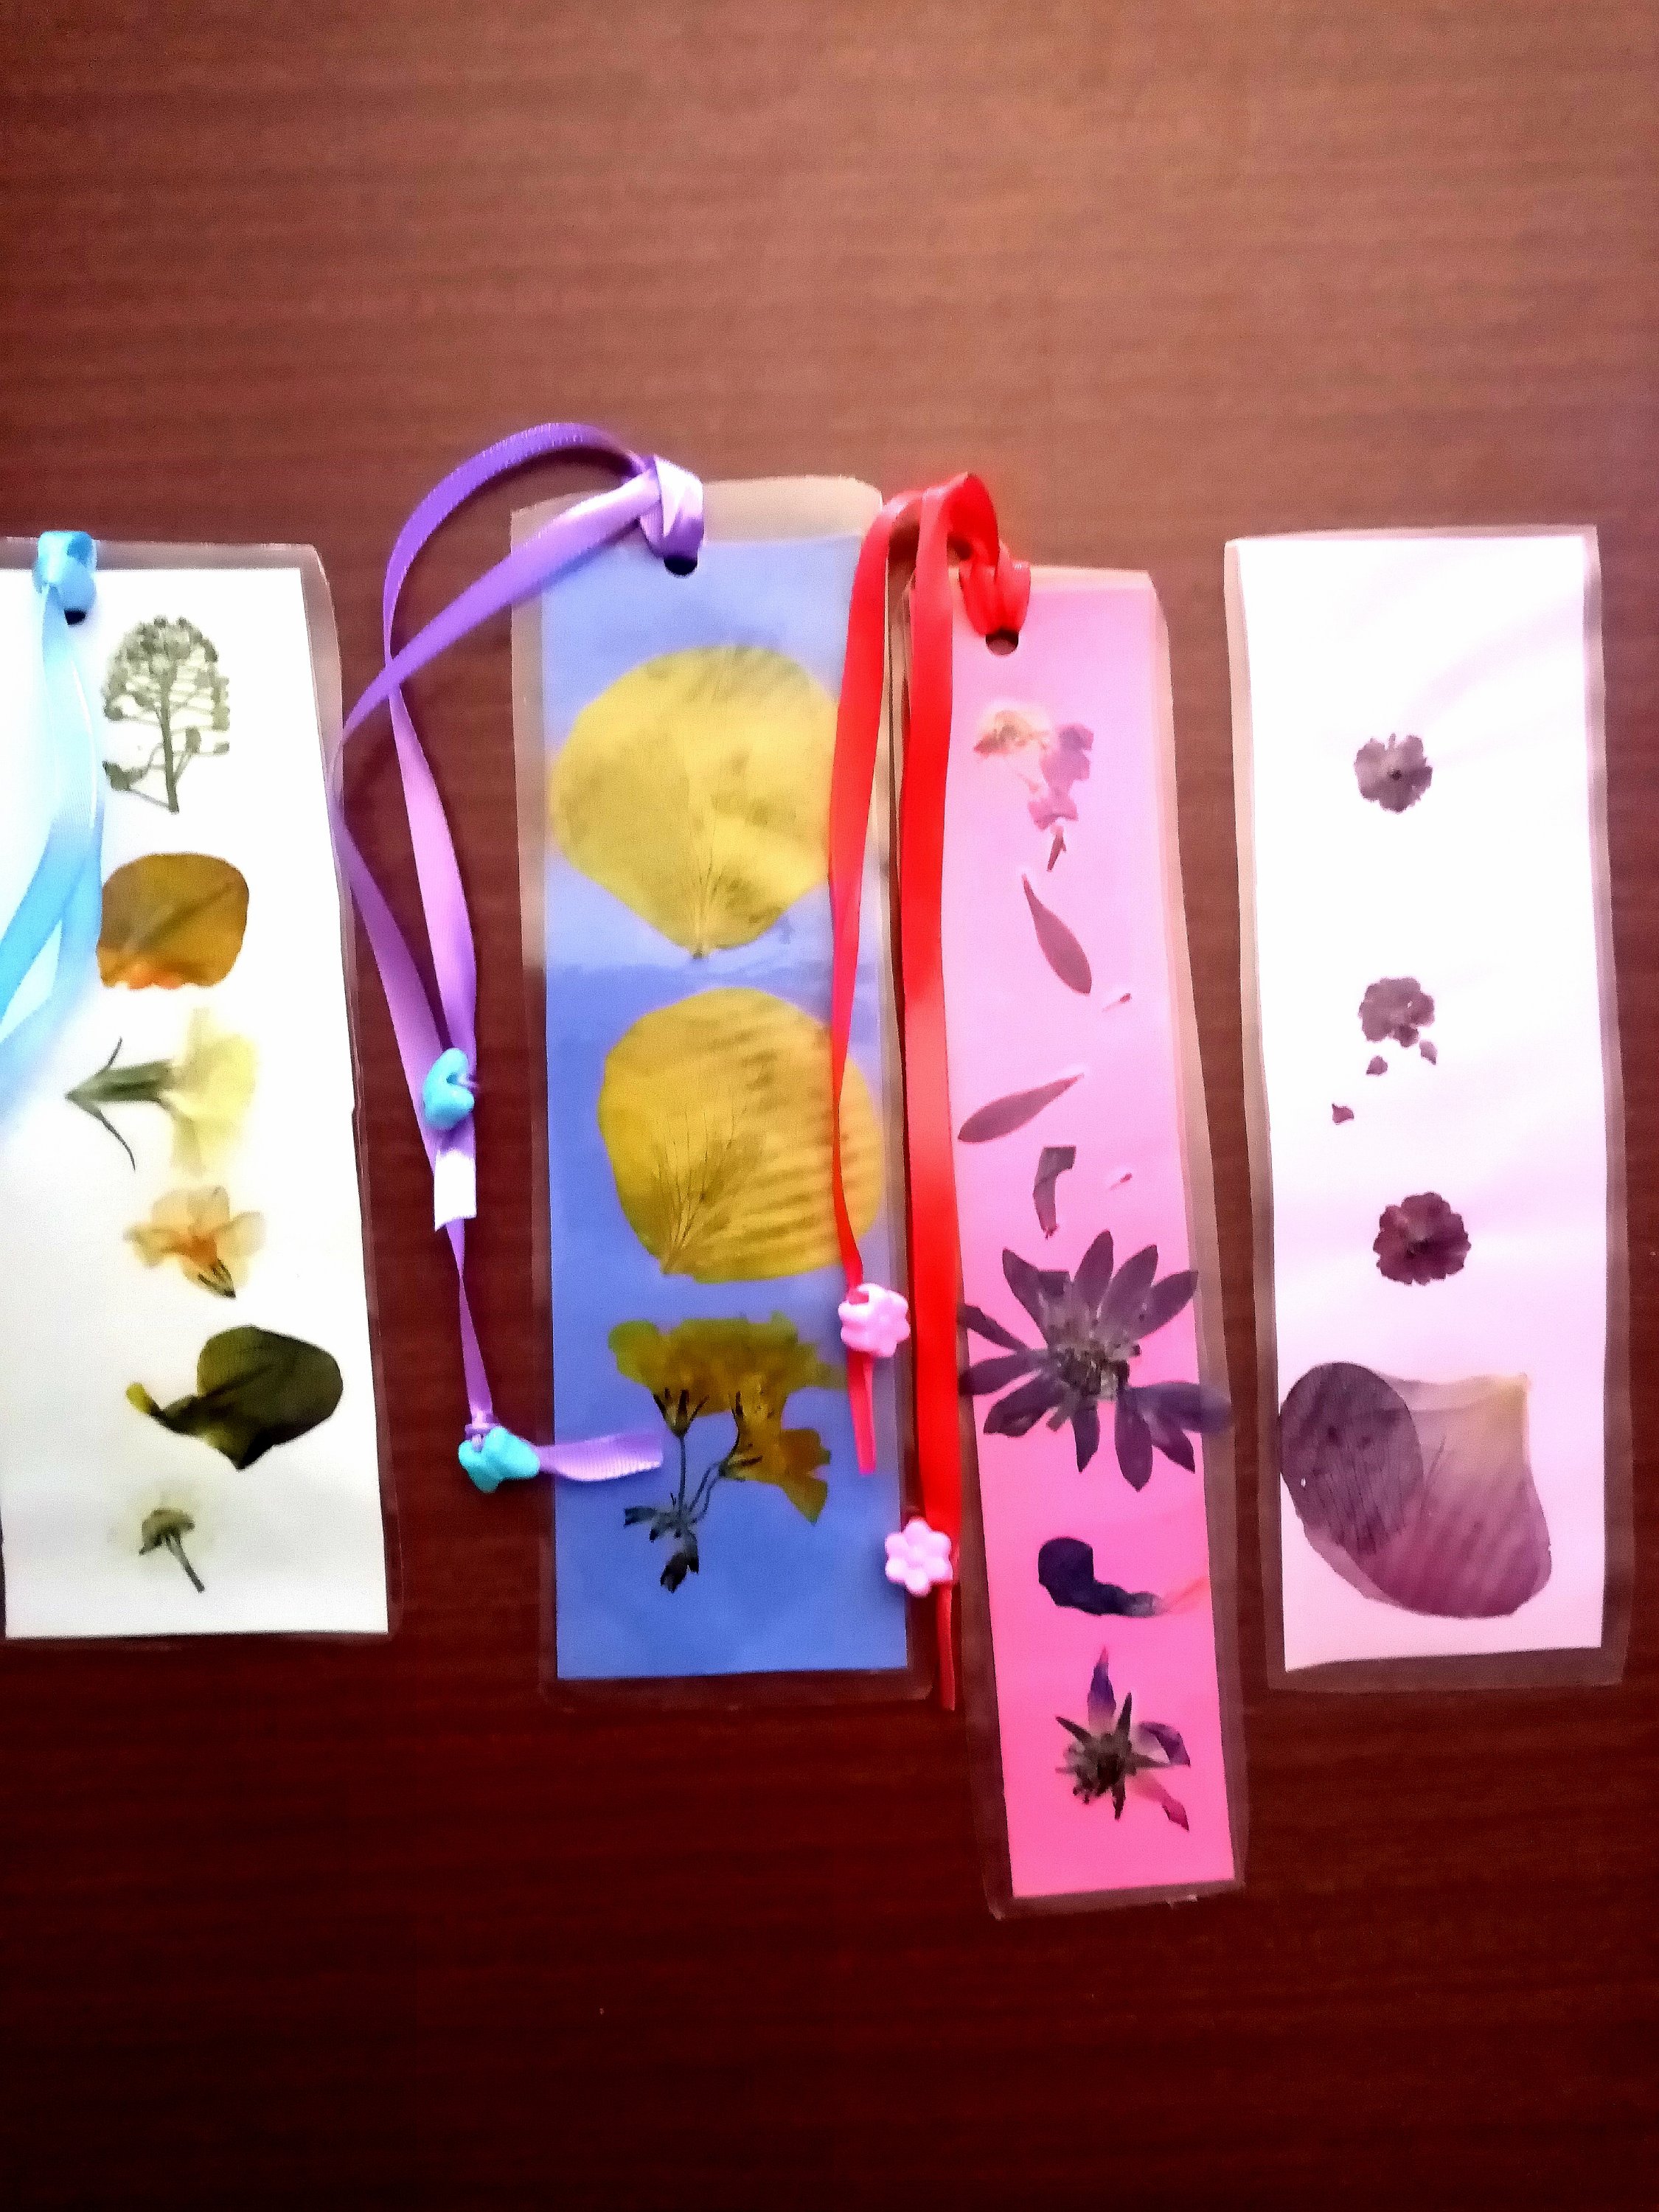
We very much enjoyed using our flower press! We used our pressed flowers to make beautiful bookmarks.

Tip: Gather a variety of flowers on a sunny dry morning. Check flowers for dewdrops (moisture will impact the drying process). Avoid flowers that are very bulky i.e. cut the tips from lavender or choose rose petals rather than a whole rose. Remember that wild flowers, like oxalis, can be as beautiful dried as garden grown.

Interested in more homeschool box reviews?

ExperisenseNZ

#1 Exploring Maths through Art

#2 Exploring Space through Art

#3 Exploring the Human Body through Art

#4 Exploring Science through Experiments

Discover the World with ATLAS Crate

#1 Introducing the World

#2 Discover Japan

#3 Discover France

Explore STEM with Kiwi Crate

#1 Arcade Box (and the Claw!)

#2 The Amazing Animation Box (make your own 19th century movie with a Zoetrope!)

#3 The Mechanical Sweeper Box (make your own baleen whale!)

#4 The Disc Launchers Box (play games with physics!)

#5 Kaleidoscope Puzzles (explore symmetry and mirrors!)

Advertisement

Christmas gifts: How to make pressed flower bookmarks

Pressed flowers are a wonderful way of making gifts from the heart. They are also a wonderfully creative way for children to make personalised Christmas, birthday, or thank you gifts for friends, families, and teachers.

Materials

  • Flower Press
  • Fresh flowers to press
  • Coloured card
  • Glue stick
  • Laminator and laminating pouch
  • Hole punch, ribbons, beads

Tip: For extra fun, think about making your own beautiful marbled paper for the bookmarks!

Directions

  1. Gather a variety of flowers on a sunny dry morning. Check flowers for dewdrops (moisture will impact the drying process). Avoid flowers that are very bulky i.e. cut the tips from lavender or choose rose petals rather than a whole rose. Remember that wild flowers, like oxalis, can be as beautiful dried as garden grown.
  2. Follow the instructions with your flower press to layer flowers between the drying sheets and screw the press tightly shut. I like to store mine in the hot water cupboard to help the drying process (which can up to two weeks).
  3. Gently take the layers of the flower press apart and carefully remove the dried flowers. I like to lay them on a flat wooden tray. We use gentle hands but you may want to use tweezers.
  4. Cut coloured carboard or cardstock to your desired size; we like to have a variety of colours to choose from.
  5. Enjoy the creative process of arranging the flowers!
  6. Once you have decided on your arrangement, you will need to fix the flowers in place. If you are going to use a laminator (as we did) then all you need is a glue stick – a gentle glue is all that’s needed as it’s simply to keep the flowers in place while the laminator pouch feeds through the laminator. Alternatively, use a strong fast-drying craft glue that will dry clear.
  7. We arranged several bookmarks in each laminating pouch and then fed each A4 pouch through the laminator. This helps to protect the delicate dried flowers (and preserve them from future moisture).
  8. We then cut the completed laminated sheets to size. We liked some of the bookmarks plain; with others, we cut holes with the holepunch, threaded through ribbons, and tied beads to the end.

Christmas Gifts: Growing Seedlings

‘Tis the season for thinking about Christmas gifts and parents often ask about personalised gifts for teachers and family. Why not tie in the ‘season for giving’ with talking about the seasons of nature! Different plants grow at different times of the year so there are fun options for kids to grow anywhere in the world.

Seeds are easy and cheap to grow; we’ve done everything from windowsill growing, to pots, to scatter sowing wildflowers in a specially prepared patch of ground. They’re a wonderful way to teach children about plant life cycles and the rhythms of nature. Kids love to watch seeds slowly germinate and sprout into seedlings; it’s also a very apt way to teach children about the value of patience and that some things simply cannot be rushed! If you’re growing a vegetable, it also provides them an opportunity to harvest, prepare, and eat something that they’ve grown themselves.

When choosing plants to grow with children, you may want to select those with larger seeds for easier handling. These include vegetables like pumpkin, sugar snap peas, watermelon, sweetcorn; and flowers like sunflowers, sweet pea flowers, and nasturtiums. There are also many wonderful plants with smaller seeds. You may want to include vegetables like lettuce, spinach, silverbeet, and tomatoes; flowers like alyssum, pansies, poppies, and borage.

If you’re growing as a gift, why not plant the seedling in a terracotta pot decorated with paint or permanent marker. If you’re growing in the garden, remember that you will need to attract pollinators to help plants like tomatoes bear fruit. How bees see colour differs to human so yellow, blue, and purple flowers will work best for helping bring bees to your garden. Many garden stores will also sell wildflower mixes that will bring both bees and butterflies to your garden – as well as creating a gorgeous array of colour!

Easy Christmas Gifts for Kids to make

Upcycled tin cans can make all kinds of things!

Upcycling tin cans is a great way to get kids involved in Christmas gift giving (and it’s cheap!). They can be filled with craft projects, candy canes, coins, colouring pencils or pens, or seeds for the spring!

Whether you’re homeschooling, or just enjoy learning with the kids, it’s easy to integrate S.T.E.A.M. into this project. Skip to the end for ideas!

Materials

  • 420g tin can (15oz), empty, washed, and dried.
  • Scrapbooking paper
  • Measuring tape (dressmakers)
    • OR string.
  • Pencil
  • Ruler
  • PVA glue (white glue)
  • Scissors

Directions

  1. Prepare your tin can. Tip: Choose one where your can opener left smooth edges! Remove the old label (warm water can help).
  2. Select your scrapbooking paper.
  3. Use a flexible dressmakers tape to measure the circumference and height of your can (or a piece of string which you can lie against a ruler).
  4. Once you have your measurements, mark out a rectangle on your paper. I like to add several centimetres (an inch) to the length and height of what I’m going to cut out as this allows a margin of error and means you can do a pretty fold at the top.
  5. Wrap the paper around the tin can and make sure the pattern will align correctly with how you plan to orient the tin. When you’re ready do a vertical line of PVA glue (the residue of the old glue will give you an idea of how wide you want to spread your glue). Wrap the paper around and smooth it down. Add more glue where the end of the paper meets and overlaps the start of the paper.
  6. If you’ve allowed an overlap at the top, cut a vertical slit (to the metal edging) at the four compass points. Apply glue to the inside of the paper and then fold down smoothly into the can.
  7. Once the glue is dry, you can fill it with all kinds of things!

Learning through play

Maths

  • 3D Shapes: Cylinders can both stack and roll. Compare this with other 3D shapes like a sphere (ball) or a cube (dice).
  • Measurement: Curved surfaces can be more challenging to measure – we can use a flexible piece of string to wrap around the cylinder and then lie it flat against a ruler or piece of paper. The curved face of the cylinder will transform into a rectangle when it’s drawn.

Fine Motor Skills

School skills are being practised with cutting and gluing. A fun way to practice fine motor skills is to fill the finished can with pom-poms and then fish them out with mini-tongs.

Creativity

As well as choosing pretty scrapbooking paper, you could use a hot glue gun to add ribbons, lace, colourful buttons, and all kinds of things to your creation! Googly eyes and a marker pen make an easy face and then stand pipe cleaners / chenille sticks in the tin as hair.

Making Christmas Cards & Decorating Christmas Trees with Children

Christmas Tree Cards

Decorating Christmas Trees

Christmas Crafts for kids

I posted recently about making our own Christmas Crackers (bonbons). I also like making our own Christmas cards. It’s nice because it’s an activity in itself and you can theme it around your children’s skills / ages. Christmas stickers or stamps are good way place to start with toddlers; or save their paintings through the year and turn those into cards!

Christmas Tree cards

This year, I decided to print a Christmas tree template and trace around it on a sheet of green felt. I also picked up a shiny bag of beautiful decorations that included everything from stars, to shells, to butterflies, to Christmas greetings. I wanted to make Christmas tree cards that would let Miss 3 be creative and feel involved.

Christmas Tree cards

Christmas trees and decorations

Ingredients

  • Green felt
  • Stickers / glitter / craft shapes
  • Card stock / paper
  • Scissors
  • Craft Glue / P.V.A. / glue gun
  • Blu-tak
  • Baking paper
  • Double sided sticky foam squares (like for scrapbooking)

Directions

  1. Create a Christmas tree template on paper / cardboard. Trace around it on green felt and cut out all of the trees that you need. (An adult will need to do this for toddlers / preschoolers; older children may be able to do all of the steps themselves).
  2. Blu-tak the felt onto a large sheet of baking paper. This helps keep them in place while busy little hands decorate them and also raises them off the paper a little in case the glue soaks through.
  3. Glue the decorations onto the trees. Craft glue will need to set over night, whereas a glue gun has the advantage of setting almost immediately.
  4. Make plain cards by folding the card stock / paper. Once the glue is dry, use the double sided sticky foam squares to attach the trees to the cards. These have a nice effect as they raise the tree slightly and make the cards look a bit prettier but you can just as easily glue the trees on if you wish.
  5. Ta da! Now you have a beautiful collection of cards and each one is unique.

Decorating Christmas Trees

Decorations on Christmas Trees


Making Christmas Crackers (Bonbons)

How to make Christmas Crackers (Bonbons)

I posted last year about how easy it is to make your own Christmas Crackers (bonbons). I love that personalizing them means that you have full creative license to create different themes each year. Last year, we did a Christmas theme for the visual aesthetic and I hand decorated wooden beads (my daughter still has them!). This year I thought I would celebrate New Zealand’s summer with an ocean theme.

Ingredients 

  • Cracker snaps
  • Cardboard tubes (inner tubes from paper towels are perfect,  just cut in half).
  • Your choice of cracker filling.
  • Blue crepe paper
  • Shells
  • Twine
  • Sellotape
  • Scissors
  • Super glue (or glue gun)

Note: Davids Emporium  sells cracker snaps for 30 cents each just ask at the sales counter.

For the inside, I did little plastic bags containing: Christmas joke, stickers, and a miniature Christmas cookie / Christmas pudding etc. These will inevitably get gifted to the dollhouse 🙂  They are adorable and were a wonderful find in the button / crafts section, again at  Davids Emporium.

Directions

  1. Take a cracker snap and place it inside in your tube (it should stick out each end with a comfortable amount to pull on). Lightly sellotape it at each end to hold in place.
  2. Assemble your cracker filling and slide it into the tube. I put mine in a tiny sealed plastic bag.
  3. Roll the tube in crepe paper and tie at each end with twine;  make sure that you have enough paper at each end to cover the cracker snap that is sticking out & to comfortably pull it.  Super glue (or glue gun) on the sea shells.

Candied Salted Caramel Pumpkin Seeds

Candied Salted Caramel Pumpkin Seeds

Candied Salted Caramel Pumpkin Seeds

I love this recipe! It’s a fantastic candied treat that’s great for parties and for holidays. If you have food allergies in the family, it’s also a great recipe to pass to grandparents who want to spoil the kids! It’s also ideal to take to kindergarten parties and pot lucks as it’s free of all major allergens!

Don’t be put off by the idea of pumpkin seeds – these are nothing like the raw ones that you get in salads. These are as different as corn is after it’s popped and are sweet, salty, and crunchy like M&Ms. They are dangerously addictive and are great eaten straight, sprinkled on fruit crumble, or on top of ice cream.

Ingredients

In the oven:

  • 2c pumpkin seeds
  • 2 1/2T sugar
  • 1/4 tsp cinnamon
  • 1/2 tsp ground ginger
  • Pinch nutmeg
  • 3T water
  • Oil for roasting dish

Caramel sauce

  • 1 1/2T allergy-free spread (i.e. Nuttelex) / butter
  • 2 1/2T brown sugar
  • 1 1/2 tsp salt

Allergies: gluten free, dairy free, soy free, egg free, nut free.

Note: If nut allergies are not a concern,this recipe will also work well with peanuts, cashews, and almonds.

Directions

  1. Pre-heat oven to 180’C and lightly oil a baking dish (I used a silicon flan / pie dish).
  2. Mix all of the oven ingredients together and pour into the baking dish. Note: the water is important because it helps the spices to stick to the pumpkin seeds (and the seeds will absorb the water a little as they puff up during cooking).
  3. Bake the pumpkin seeds for 20-25 mins until golden and crunchy.
  4. Once the pumpkin seeds are cooked, mix the caramel sauce ingredients together in a pot. Cook for 1-2 minutes until the ingredients have melted and turned a deep golden brown.
  5. Mix the caramel sauce and pumpkin seeds together until well coated. Spread on a tray and allow to  cool.

How to make your own Christmas Crackers 

Making your own Christmas Crackers (or Bonbons) can be a lot of fun, cost effective,  and a nice way to really personalise them. It can also be a relief as a parent with a young toddler because you can tailor them to be age appropriate (i.e. avoiding choking hazards).

Ingredients 

  • Cracker snaps
  • Cardboard tubes (inner tubes from paper towels are perfect,  just cut in half).
  • Your choice of cracker filling.
  • Wrapping paper
  • Ribbon
  • Sellotape
  • Scissors

Note: Davids Emporium  sells cracker snaps for 30 cents each just ask at the sales counter.

You can have a lot of fun choosing what you want to put inside your crackers depending on your budget, ages, and family interests. You might love silly kids jokes (like: What does a duck eat at Christmas? Quackers!), or love Minties, or want to do a toy car each. Party / variety shops can be useful, so can buying stuff from the supermarket when it’s on sale.

I decided to include in each cracker a little note, balloon, a wooden animal (from the button section of the craft store) and a chocolate. My toddler loves balloons and the chocolates are my mum’s favourite flavour. I also decided to add little wooden beads as decorations that I knew my toddler would enjoy playing with afterwards.

Directions

  1. Take a cracker snap and place it inside in your tube (it should stick out each end with a comfortable amount to pull on). Lightly sellotape it at each end to hold in place.
  2. Assemble your cracker filling and slide it into the tube. I wrapped mine in the note & then used an elastic band to hold it together.
  3. Roll the tube in paper and tie at each end;  make sure that you have enough paper at each end to cover the cracker snap that is sticking out & to comfortably pull it.  I found Christmas paper & ribbon to be ideal. You could also try something like crepe paper, twine, and hot glue on sea shells. You can be as creative as you like!