Rainy day play: Making a spider

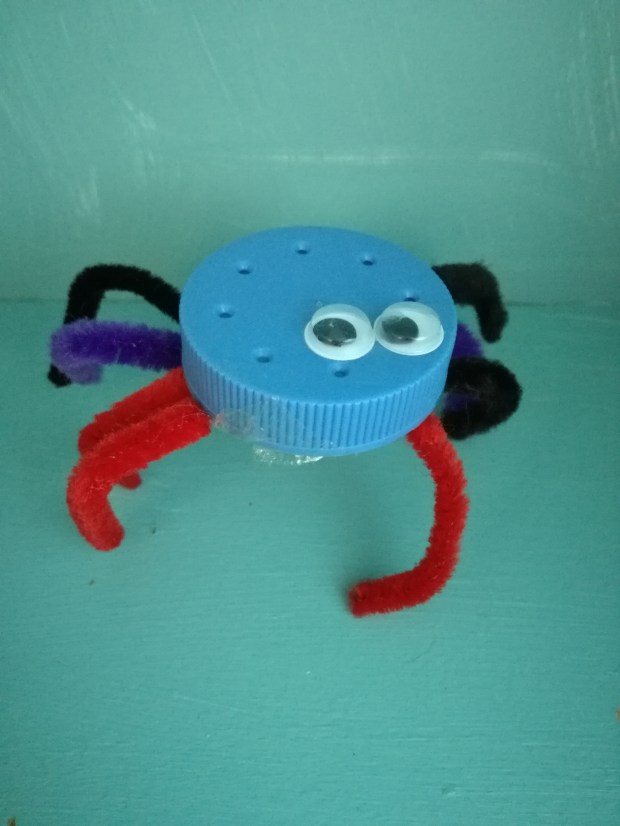
Easy to make spider

Make a simple spider!

Kids love playing with craft materials. Why not spend a rainy afternoon making spiders, insects, or monsters; you could tie it in with a trip to the library to find some books for inspiration!

Materials

  • Pipe cleaners
  • Milk bottle lid
  • Googly eyes
  • Sellotape
  • Craft glue / glue gun
  • Scissors


Directions

  1. Cut your pipe cleaners to length and sellotape (or glue gun) them to the base of the milk bottle lid. Bend them to give them knees / feet so that it can stand.
  2. Glue on some googly eyes.
  3. Take the spider exploring!


Why not share with them 20 Fun Facts about Spiders for preschoolers or watch a short educational video clip about spiders aimed at preschoolers and kids.

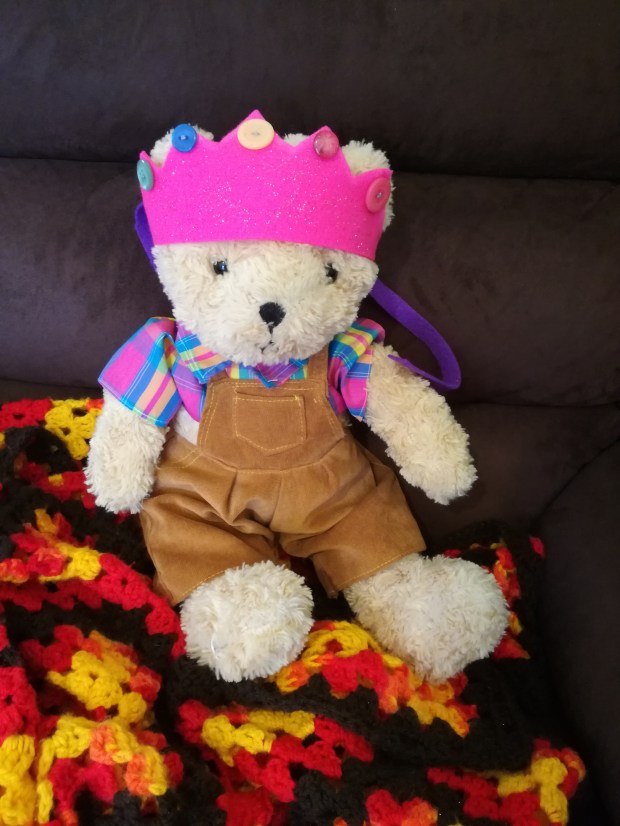
Making a magical felt crown

Easy sewing projects - making a felt crown or tiara!

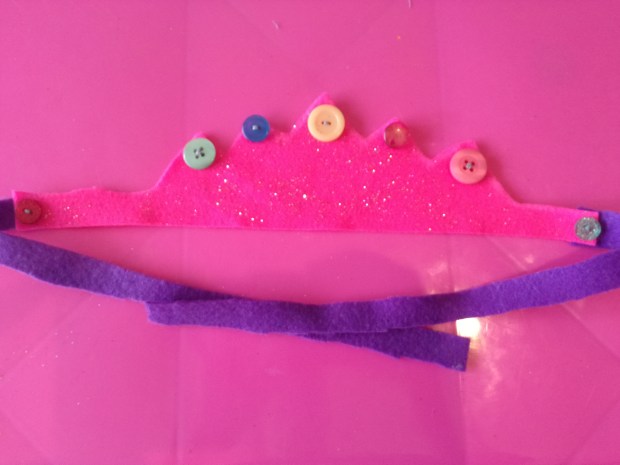
Beautiful glittery felt crown

Making a beautiful glittery felt crown or tiara is an easy sewing project. You can do it all in an afternoon either hand sewing or using a sewing machine and glue gun. Toddlers will have fun choosing all the colours and decorations! Older kids can be supervised to make this themselves 🙂

Materials

  • Felt
  • Buttons
  • Chalk / dressmaker’s pencil
  • Ruler
  • Scissors
  • Thread
  • Optional: glitter
  • Sewing needle / sewing machine / glue gun

Directions

  1. Using your ruler and chalk, draw a pattern on the felt. You need the crown / tiara + two rectangles for straps. The straps bed to be long enough to tie at the back of your child’s head.

    Measure, draw, and cut your fabric

    Pieces of felt cut out for the crown

  2. Let your child choose decorations for their crown. You can choose whether to handsew buttons on (stronger) or hot glue gun them. Sprinkle on done rainbow glitter for extra magic! (The glitter will stick to the felt, at least for a while).
  3. Sew the straps on each side. You can either use a needle or a sewing machine.
  4. Ta da!

    Finished felt crown

    Beautiful crown ready to wear!


Making a drawstring bag


Making a drawstring bag

Making a drawstring bag for marbles

Making a drawstring bag is a fun and easy project to do with kids! I still remember the soft nubby green cloth of the drawstring bag of marbles my brother and I shared as kids. I wanted to make something similar for Miss 3 and gaining access to a sewing machine at kindy seemed like a great opportunity.

There is an easy project to follow in this book by Jane Bull, My Sewing Machine. I didn’t think to look so I actually designed my own project for this bag. My daughter’s sensory sensitivities mean she doesn’t like being in the same room as the sewing machine when it’s operating but she likes looking at the sewing book and she liked helping me with the pattern, cutting, and pinning.

Making a drawstring bag (for marbles)

Materials

  • Paper, sellotape, pencil
  • Fabric
  • Cord or ribbon
  • Ruler
  • Pins
  • Chalk / fabric pencil
  • Scissors (paper, fabric, pinking)
  • Safety pin

Tip: Shop around to find good prices for fabric. Sometimes you’ll find fabric in unexpected places – I bought a giant polyester fleece blanket for NZD$3 / USD$2. It was perfect for making a drawstring bag for marbles (though I wouldn’t use it to make a dress).

Design

I made up a design template using paper, scissors sellotape, and pencil. I could see there were two different ways of approaching the bag and decided to have the fold at the bottom and seams up the sides; this results in the cord being on on two sides (instead of one) which I thought would be easier for Little Miss.

Making a paper template

Making a paper template for the drawstring bag

Once I’d worked out the design, and order of sewing seams, I transferred the template into the fabric. My fabric pencil didn’t work on the fleece but chalk did 🙂

Fabric cut and pinned for the drawstring bag

Fabric cut and pinned

I kept my seams about 1.5cm from the edges, allowed plenty of space for the cord, and made sure the fabric was ‘wrong side’ facing out (not as important with this fleece but good practice).

Sewing the bag

I made sure the threads were all set up and then my sewing order was:

  1. Sew short end (for cord).
  2. Sew other short end (for cord).
  3. Loop silky cord through safety pin. Miss 3 loved helping wriggle the silver fish (safety pin) through the ‘tunnel’. We did that on both sides and then I tied the loose ends.
  4. Sew each of the long sides. I started with a curve at the bottom and then went up to the drawstring (enough to just go over that seam but not go over the cord). Then I turned the fabric around and did a small zig-zag back to reinforce.
  5. The nice thing with this fabric is that I didn’t need to hem or worry about fraying like I werewolf with cotton. I did use the pinking shears to cut the bottom corners off (being careful of the curved corners I’d stitched).

    Drawstring bag sewn (wrong side facing out)

    Inside the bag

  6. Turn bag right side out!

    How to make a drawstring bag!

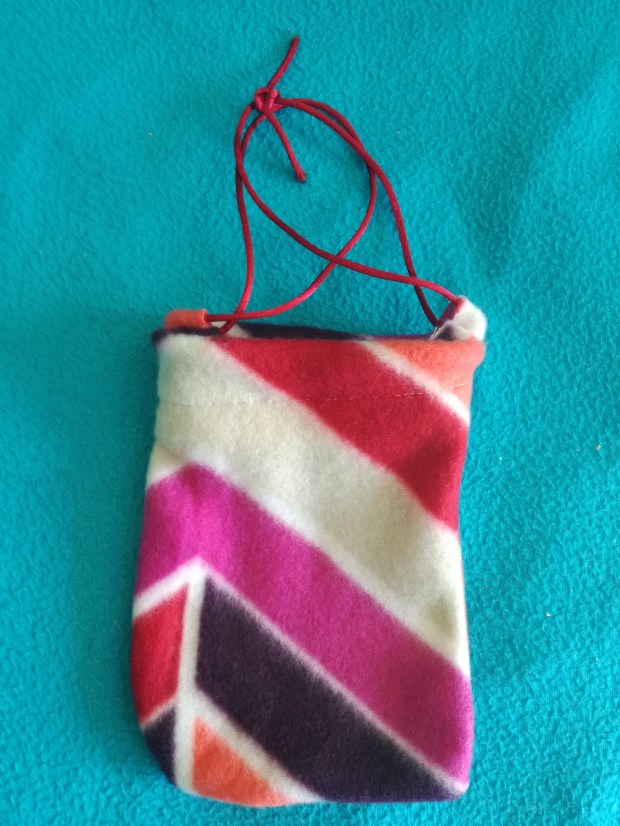
    Drawstring bag for marbles

Bag of marbles

Next week we can go on a treasure hunt expedition to buy marbles for the bag we made!
Rainy day play: Make a fishing game!

Make an indoor fishing game!

Make an indoor fishing game!

Indoor fishing can be a great way to develop fine motor skills and imaginative play! You can buy fully stocked Gone Fishing kits or you can make your own. We picked up our fish very cheaply (as they were factory seconds) and then let our imaginations run wild with the materials we had at home.

The Fish

We were fortunate enough to pick up our fish cheaply. You could also use a saw or sandpaper and glue gun to fashion a vague fish shape from scraps of wood. The metal eyelet is the same as what’s used when stringing up net curtain cords.

We decorated our fish with: several colours of paint, glitter glue, googly eyes, coloured feathers, and plastic gems.

Tip: This is a great craft project for teaching your toddler patience. We worked on ours over about 5 days. We needed to do the base colour on one side and then let it dry overnight; flip it over the next day and repeat the same. You need more time to let things dry when you’re using craft glue but can speed things up by using a glue gun.

The Fishing Rods

You can make these with lengths of dowling. Use an electric drill to make a hole about 1cm from the top and thread some twine through that has a paper clip tied to the other end. Alternatively, you could glue gun the twine to the rod (if you don’t have a drill).

The paper clip is surprisingly effective; I can catch my fish with it and Miss 2 will normally ‘manually’ catch her fish but will also attempt to catch it without ‘helping’ the hook.

Our rods have multiple shades of paint and glitter glue on them (as well as plastic gems) and also needed drying each night in the hot water cupboard. I stood them upright in a small glass baby food jar (we have several that we use for crafts).

Learning to sew

A step by step beginner's guide to sewing

A step by step beginner’s guide to sewing

I recently gained access to a sewing machine. My previous experiences were the 10 lessons we did as a class, decades ago, when I was in Intermediate School. My Nana was a dressmaker and money is tight so I’d love to learn a new skill.

I decided my best approach, since I don’t have a mentor, was to look through the local library. I found a brilliant book by Jane Bull, My Sewing Machine. It’s a step-by-step guide for beginners, ostensibly for 8-12 year olds since it was in the children’s section, with lots of photos and easy projects. It explains the different parts of the sewing machine and how to thread it.

Setting up the sewing machine probably seems really simple if you’re familiar with one but it’s not intuitive for me. There are a lot of steps, compared to hand sewing, and forgetting one of them leads to catastrophe! (Not really, but it can cause a lot of frustration as the needle just tattoos holes in the fabric or the threads turn into a tangled cat’s ball).

The sewing machine is located at our lovely new kindy. I had a pair of fascinated 4 year olds avidly watching my every step (no pressure!). It’s actually a nice learning experience for the kids being able to talk to them about how I don’t know how to use it and that we can work it out together. It’s not just about teaching them how to sew, it’s teaching them the process of learning. I’m talking with them about going to the library, following the instructions in the book, and asking for help when I can’t work out something myself.

Thankfully, one of the student teachers is a sewer; I’ve been able to run to her for help a few times when everything’s turned to custard!

How to make a vegan chocolate spread that is allergy free and tastes amazing!

Chocolate Buttercream Frosting

Chocolate Buttercream Frosting. I use Nuttelex + coconut milk to make a vegan, allergy free frosting that tastes amazing!

If you have a child with food allergies then you may find it difficult to source safe versions of products like Nutella. Alternatively, you may have a child attending a nut free kindergarten or school in which case Nutella isn’t permitted (as it contains hazelnuts). If you want to use a treat spread, for school lunches or parties, then this recipe will help you make your own!

Ingredients

  • 115g allergy friendly spread like Nuttelex (buttery taste)
  • 2 cups icing sugar
  • 1/2 cup Dutch Cocoa Powder
  • 1/2 tsp vanilla essence
  • 1 – 5 Tbsp  coconut milk

Allergies: gluten free, dairy free*, soy free, egg free, nut free. Vegan*.

Directions

  1. Whip the Nuttelex.
    • I like to use the food processsor (with a plastic beating tool rather than the metal cutting one).
  2. Sift in the cup icing sugar, and cocoa powder. Add the vanilla and 2 Tbsp milk.
  3. Beat until smooth.
    • I like to pulse it slowly in the food processor.
  4. Mix in more coconut milk, 1 Tbsp at a time, until you have a good thick smooth consistency.
  5. Store in an airtight container in the fridge.

Easy Banana Muffins (or Banana Cake) that can be made vegan and allergy free!

Banana cupcakes & gingerbread spice cookies

Banana cupcakes & gingerbread spice cookies. Made vegan and allergy free.

Banana cake has long been one of my nemesis; I just haven’t had the knack. I’m so glad to have finally found a recipe that works! It also has the wonderful bonus of being dairy, egg, soy, and nut free! I have also made it gluten free 🙂

Ingredients

  • 2 mashed / pureed ripe bananas*
  • 5 Tbsp neutral oil (I use rice bran)
  • 1/2 cup water + 1/2 cup water
  • 1 1/2c plain flour (or Healtheries Gluten Free Bread Mix).
  • 3/4c sugar
  • 1 tsp baking powder
  • 1/2 tsp salt
  • 1 tsp baking soda
  • 1 Tbsp vinegar (I use apple cider)

Tip: The riper the bananas, the better this will work! As the bananas ripen they convert starch to sugar. Really ripe bananas will mash more easily, be sweeter, and have a more intense banana flavour.

Gluten Free: You can, of course, use a different gluten free flour! The reason that I’ve listed that one is because it contains guar gum but no raising agents (as the recipe includes those). You could, for instance, substitute superfine rice flour and add guar gum. Personally, I don’t use xanthan gum as it can be grown using soy as a base. You may need to experiment a little with gluten free flours to get the cake just right (you may want to start with muffins as it’s easier to tell when they’re cooked). Keep in mind that gluten free baking is often moister, denser, and may require a longer baking time.

Allergies: soy free, dairy free, egg free, nut free, gluten free*

Directions

  1. Preheat oven to 180’C and prepare muffin trays / cake tin.
  2. Mash your bananas until you have a smooth texture. Tip: A food processor can do this quickly for you but you’ll want to do the actual mixing by hand.
  3. Mix in the oil and 1/2 cup water.
  4. In a separate bowl, sift the flour, sugar, baking powder, baking soda, and salt.
  5. Add the wet ingredients (banana, oil, water) to the dry ingredients. Add the vinegar.
  6. Stir till just combined. (Slowly add additional water if required).
  7. Quickly get into cupcake cases, muffin trays, or cake tin, and pop in oven.
  8. Bake until skewer comes out clean. Approximately 12 – 15 mins for muffins and 30-40 mins for cake.

Icings: Check out these ideas for completely natural icings that don’t use any artificial additives and are easy to make.

Tips: I’ve made this recipe several times. Lessons learned: using the plastic batter-stirrer-attachment-thingy for the food processor makes for a denser end product (so does over stirring by hand); the rising effect that you get from the vinegar + baking soda means that you want to get this into the oven quickly (instead of having a lengthy sidebar with your toddler about how baking is really just chemistry in the kitchen).

Making natural icings for kids

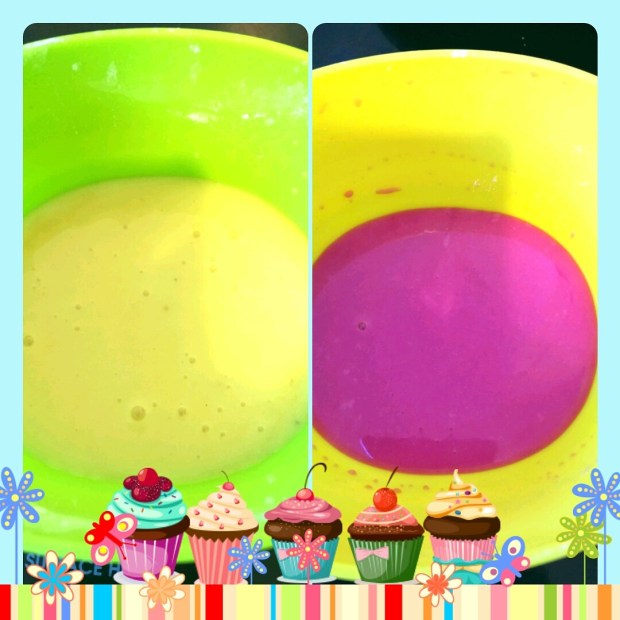
All natural colourful icing for kids with no artificial colours or additives

Tropical jungle mango & pear icing | Princess pink beetroot icing

Chocolate Buttercream Frosting

Chocolate Buttercream Frosting. I use Nuttelex + coconut milk to make a vegan, allergy free frosting that tastes amazing!

Making all natural icings is easy and is a great way to avoid issues with allergies, chemical sensitivities, or the fact that countries like New Zealand and Australia still allow artificial food dyes that are banned in Europe due to health concerns. My daughters 3rd birthday party used three all natural icings that were vegan, free of all the top allergens, and contained no artificial additives.

Allergies: gluten free, soy free, dairy free, egg free, nut free, additive free.

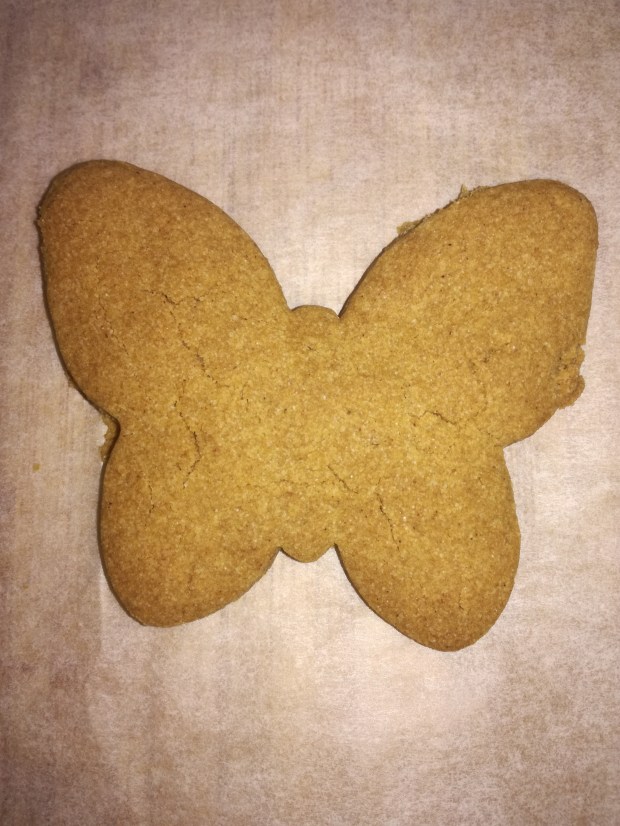
Gingerbread / Spice Cookies (Allergy Free)

Gingerbread cookies

Gingerbread cookies

Ingredients

  • 2 cups plain flour (I have also used Healtheries GF Bread Mix)
  • 1 tsp Baking Soda
  • 1 tsp Baking Powder
  • 2 tsp ginger
  • 1 tsp cinnamon
  • 1/2 tsp allspice
  • 150g butter or allergy free spread (I use Nuttelex)
  • 3/4 cup brown sugar
  • 2 – 3 Tbsp Maple Syrup or Golden Syrup
  • Drop vanilla
  • Pinch salt

Note: These make a light more-ish spices gingerbread cookie (as opposed to one denser and chewier). Maple syrup will provide a more delicate flavour, golden syrup a more traditional one. The flavour notes are easy to experiment with, you can add more ginger and a pinch of nutmeg. I’ve made these a lot as my daughter loves them and this is her favourite combination.

Allergies: dairy free*, gluten free*, soy free, egg free, nut free.

Directions

  1. Cream ‘butter’, sugar, maple (or golden) syrup, and vanilla.
  2. Add flour, baking soda, baking powder, salt, and spices.
  3. Knead everything together. It will gradually turn from breadcrumbs to a soft cookie dough. Add a little water if you need to but just a tablespoon at a time.
  4. Refrigerate for 30 – 60 mins. You can leave it in a ball or roll it out. It’s tempting to try cutting it but (and I speak from experience) it doesn’t work very well at room temperature.
  5. Preheat oven to 180’C while rolling out the cookies.
  6. Place cookies on a baking sheet / lightly oiled baking tray.
  7. Bake for 12-15 mins.
  8. Take out from oven and allow to cool briefly before placing on cooling rack to continue cooling.

Tip: If you want a fancy (and easy) dessert reserve some of the cookie dough. Serve balls of French vanilla ice cream with little balls of cookie dough and a warm gingerbread cookie.

Note: These cookies are soft coming straight out of the oven and will harden overnight. They are delicious either way. They also freeze well.

Gingerbread cookies with chocolate icing

Gingerbread cookies with chocolate icing

Winter Crafts: Painting Leaves

A wonderful winter activity can be going for a walk through the woods or local park and talking about how the trees change with the seasons (and how some don’t!).

Collect some leaves and pine cones on your walk and take them home to dry.

Tip: Putting then on newspaper or a towel in the hot water cupboard works well.

Once the leaves are dry they make a wonderful canvas for painting. Again, they dry well in the hot water cupboard and can be hung up for a few days as decorations.

Tip: You could try spraying them with varnish to help them last longer.