One of the wonderful things about homeschooling is that being in the kitchen can definitely be part of the curriculum! We’re studying Japan at the moment and one of the suggestions in our Kiwico Atlas Discover Japan box was to try our hand at onigiri.
At it’s simplest, onigiri is a fun gluten free snack that uses a sticky rice to create a treasure box sandwich around a delicious filling of your choice. They are wonderfully easy to make and can be as creative (or quick) as you like.
The key ingredient that you will need is Japanese Short Grain Rice. This is sometimes marketed as ‘sushi rice’ in Western supermarkets although this is actually a misnomer, the same rice can be used to make sushi but while sushi uses vinegar, salt, and sugar to provide seasoning, onigiri uses plain steamed rice and relies on the nori (dried seaweed) and filling for flavour.
Think about what design you would like to use for your onigiri. If you want to keep it simple, use scissors to cut the nori sheets into smaller and shorter strips that you wrap around the base of the onigiri as a handhold. You can also get creative and decorate them into whatever you can imagine! There are fascinating videos on YouTube with plenty of ideas – be aware that fancier designs may utilize special tools to cut the seaweed and moulds to press the rice into. These can often be picked up cheaply online or from stores specializing in Japanese homewares.
Directions
Cook your rice fresh and allow to cool slightly (it should be warm while making the onigiri). I like to use a rice cooker and make just enough rice for the meal.
Prepare your filling while the rice is cooking.
Have a bowl of water available to wet and wash your hands (the rice is sticky!).
Traditionally, salt is rubbed onto both hands and helps to flavour the rice while you shape it. You then scoop some warm rice onto one hand, make it into a flattish nest shape, place 1-2 tsp of filling in the middle, then gently squeeze into a ball or triangular shape. Tip: If this feels a bit tricky, try lining a small bowl with gladwrap and laying the rice on top. Apply filling to centre, pop a little more rice on top, and then pull the gladwrap up at the corners (into a raindrop shape) and mould the rice (keeping the filling in the centre).
You can then decorate the onigiri as you like.
Tip: You don’t need to use any nori but it does provide a pleasant umami flavour. You may prefer to simply dip your onigiri in soy sauce or coconut amino acids (an allergy friendly substitute). You may also like to sprinkle a furikake seasoning onto your onigiri; there are a range of flavours.
WHAT IS IN THE EXPERISENSE NZ SPACE HOMESCHOOL BOX?
The wonderful thing about homeschooling is the flexibility that it provides for exploring learning through fun, hands-on projects that let you cater for your child’s individual learning needs. There are many different learning styles and not all are catered for by task-orientated repetitive worksheets. For those that are highly visual and hands-on, finding alternative ways to engage in learning concepts is very important.
I purchased the ExperiSenseNZ Space Box for NZD$28 to add a kinaesthetic dimension to our learning about space. The box provides fun learning crafts to do that are fully aligned with the NZ Curriculum and are highly adaptable to age, interest, and special needs.
The kit comes with craft materials to explore our solar system through five activities. It anticipates that you will also have access to books / resources that provide additional learning information and you may want to supplement with your own craft materials also (we did).
Exploring the Solar System
We spent a few days creating and painting our own solar system (comprised of: Sun, Mercury, Venus, Earth, Mars, Jupiter, Saturn, Uranus, Neptune). The kit comes with paint (red, UV yellow, blue, green, black, white) but we also supplemented with our own paint, glitter, and tinsel. We loved experimenting with the UV flashlight that is included!
We then took one of our Kiwi Crate boxes; painted it black, added silver and iridescent glitter over white glue; and created a solar system background that was a perfect fit for helping our solar system to stand safely while being interacted with.
Exploring the Sun and Moon
Creating the sun
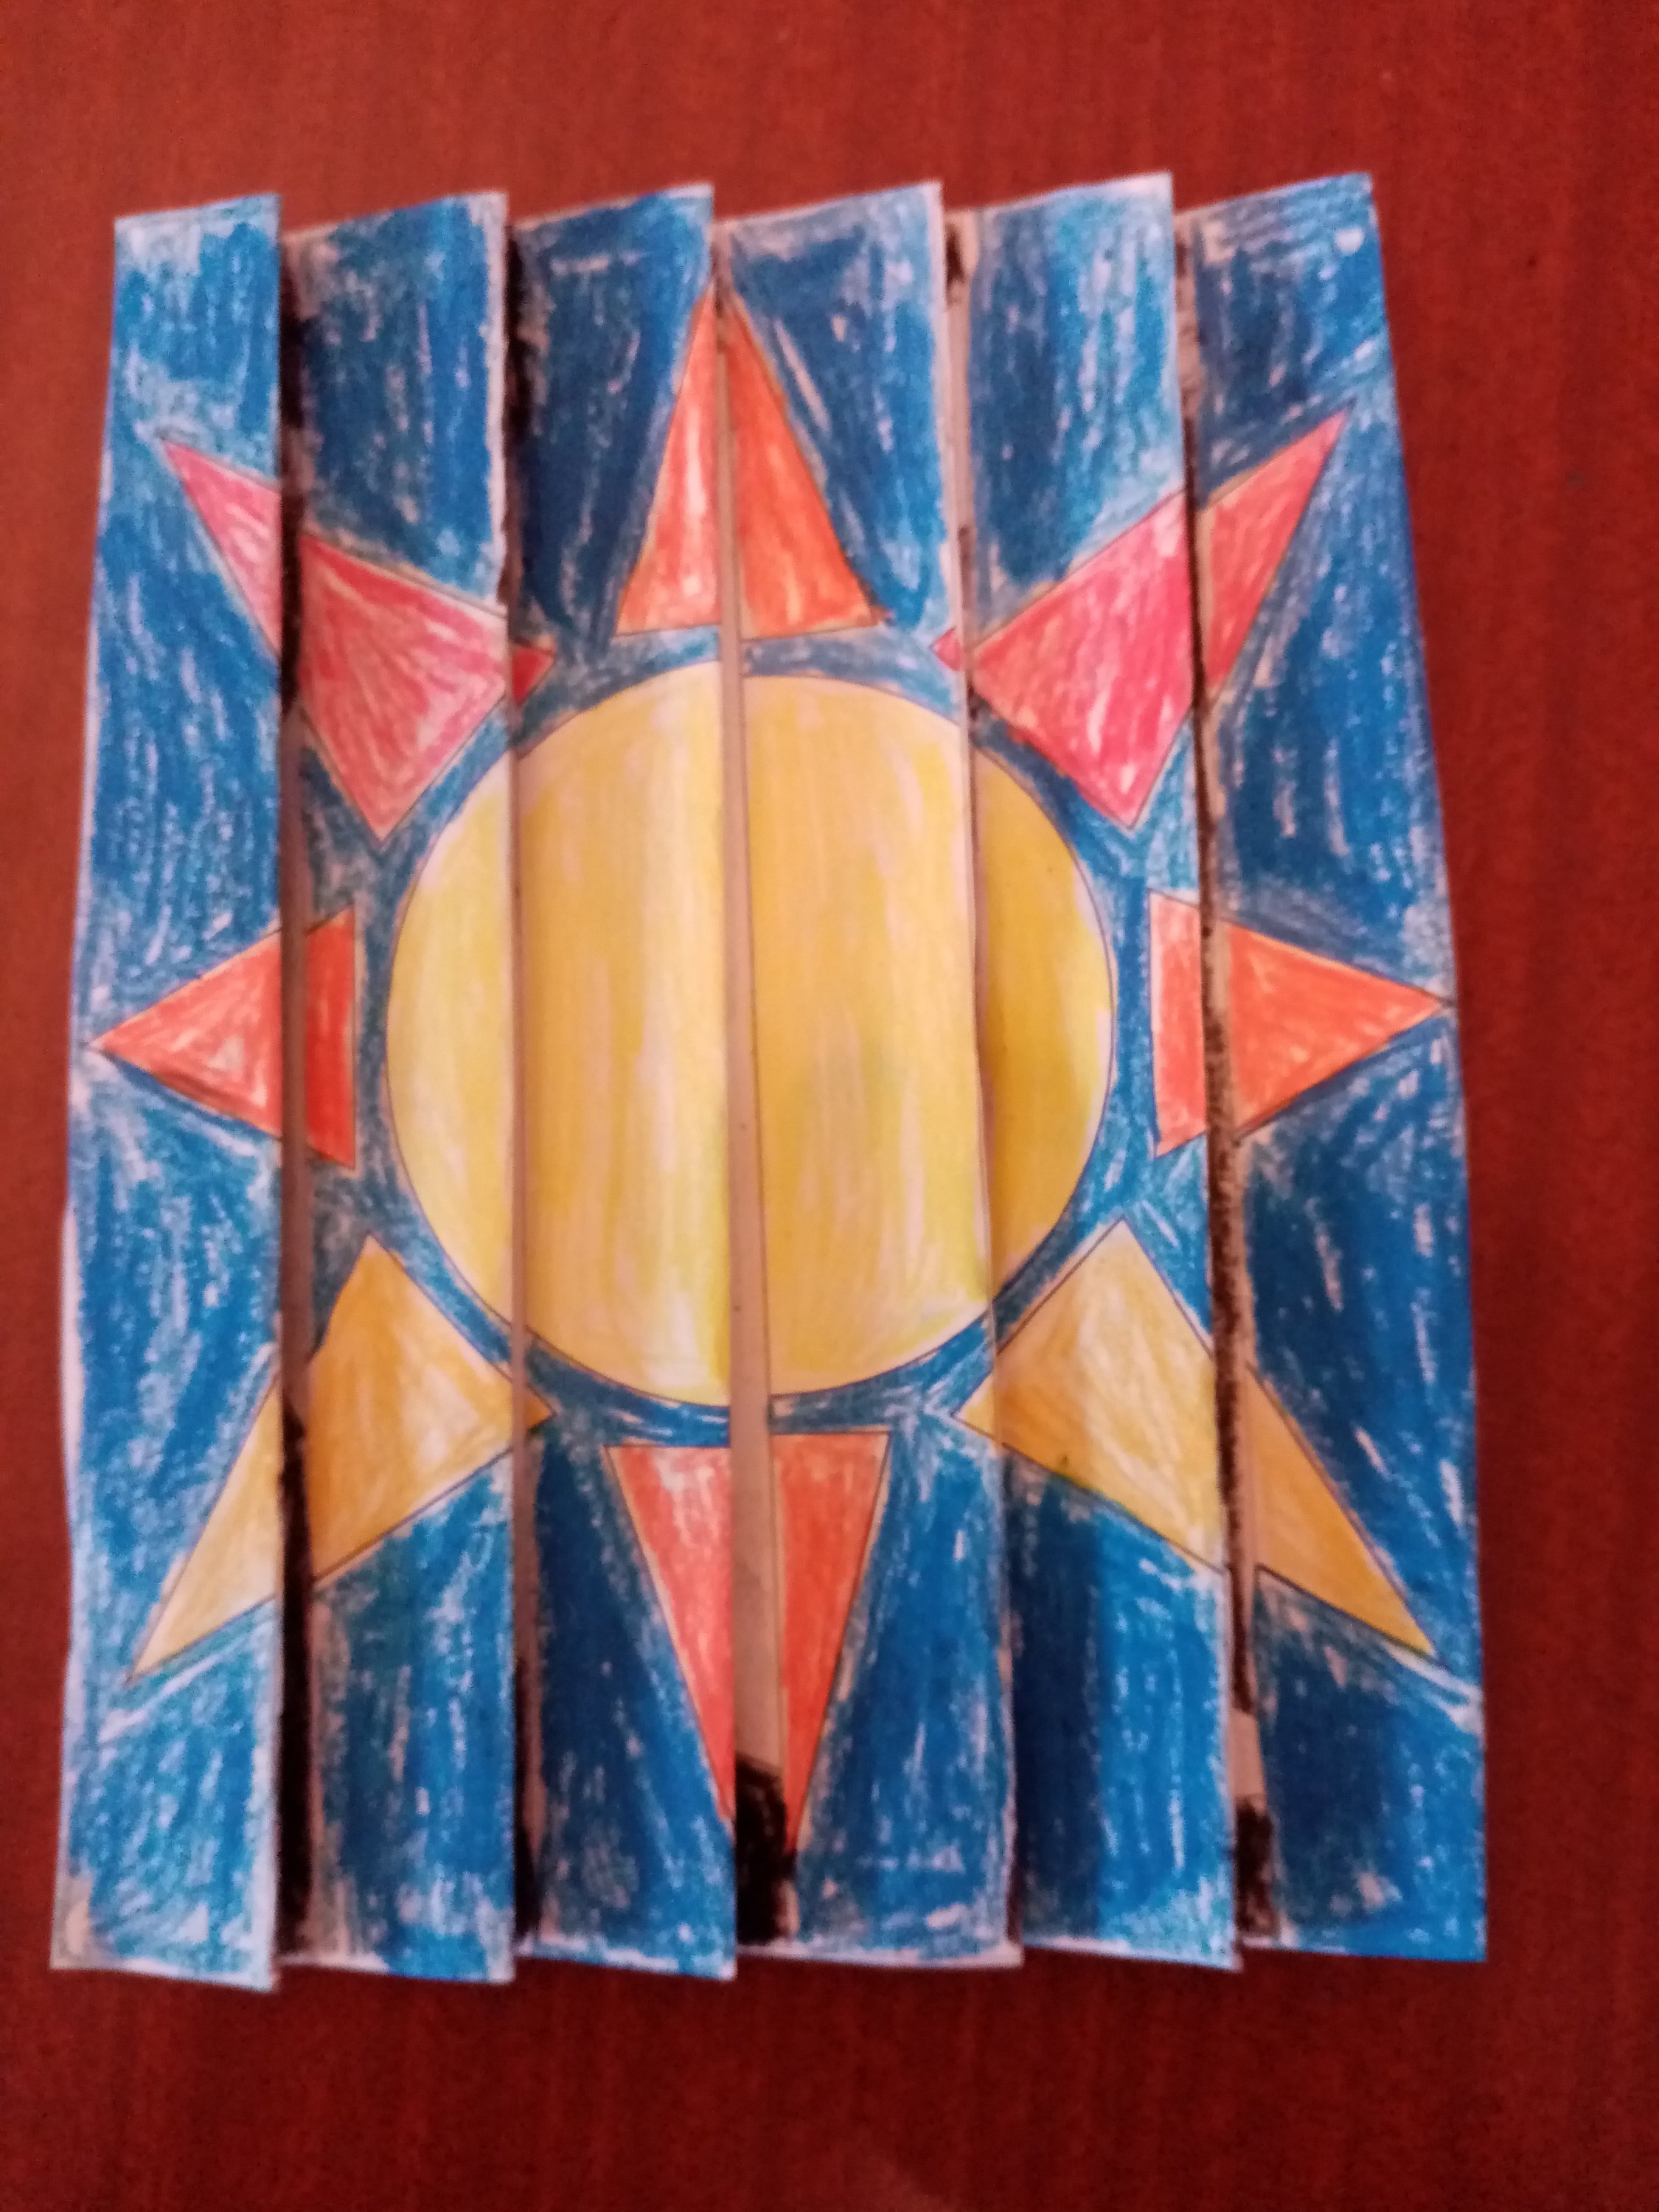
I’ll confess that we jazzed this activity up a bit with materials of our own! Miss 6 wasn’t keen on painting the iceblock sticks with the UV yellow paint so instead we used the yellow yarn and big wooden beads that were provided and then bulked it out with our own multi-coloured yarn and created a Pippins-style sash of additional beads 😀
What I liked about the big wooden beads that are provided is that they can be used to create a wonderful ring for then hanging your finished display in the window. Draw the curtains in the evening and – Voila! – you put the sun to bed.
We also used the globe we’d created with our KiwiCo ATLAS crate and a lamp (as the sun) to explore the Earth’s relationship with the sun and how this creates both night/day and seasons.
Agamographs are fun to do! Colouring in the alternating strips is a visual processing exercise and then there’s the fun of folding them to reveal the illusion. These kids crafts are inspired by the works of artist Yaacov Agam.
Craters of the Moon
Our own moon art under UV light!
There is a visual provided showing the phases of the moon as well as an artistic rendering of the moon’s face. Kids can then keep their own moon journal for a month to watch how the moon’s appearance changes in the night sky (note: this is a great winter activity when it’s dark earlier!).
They can also mix up their own gray paint and using the tinfoil provided stamp out craters on their own moon.
Tip: This moon craft looks awesome under UV light and the leftover dark grey paint (applied very lightly) makes wonderful hand prints – we picked up great ridge-line details forensics style!
I found it to be a really good kit for Year 1 and Year 2 (KS1) with minimal parental help required. Slightly older primary school kids (KS2) may still enjoy the kit and could always use the materials as a springboard for slightly more complex presentations, such as adding a foam base and some mathematical calculations for their solar system creation: like this.
Tip: Consider setting aside a set of messy play clothes for this space project. We used a lot of acrylic paints for ours and the paint clothes were beautifully coloured with hard work by the end of the week!
Creative homeschool STEM fun with the Kiwi Crate Kaleidoscope box learning about reflections and symmetry.
WHAT IS IN THE KALEIDOSCOPE PUZZLE BOX?
The mathematics focus for this box is learning about symmetry. What I love about KiwiCo is how engaging they make learning about maths and how easy they make it for kids to understand. Both the comic strip and the projects explore symmetry and shapes hands on fun through art and mirrors!
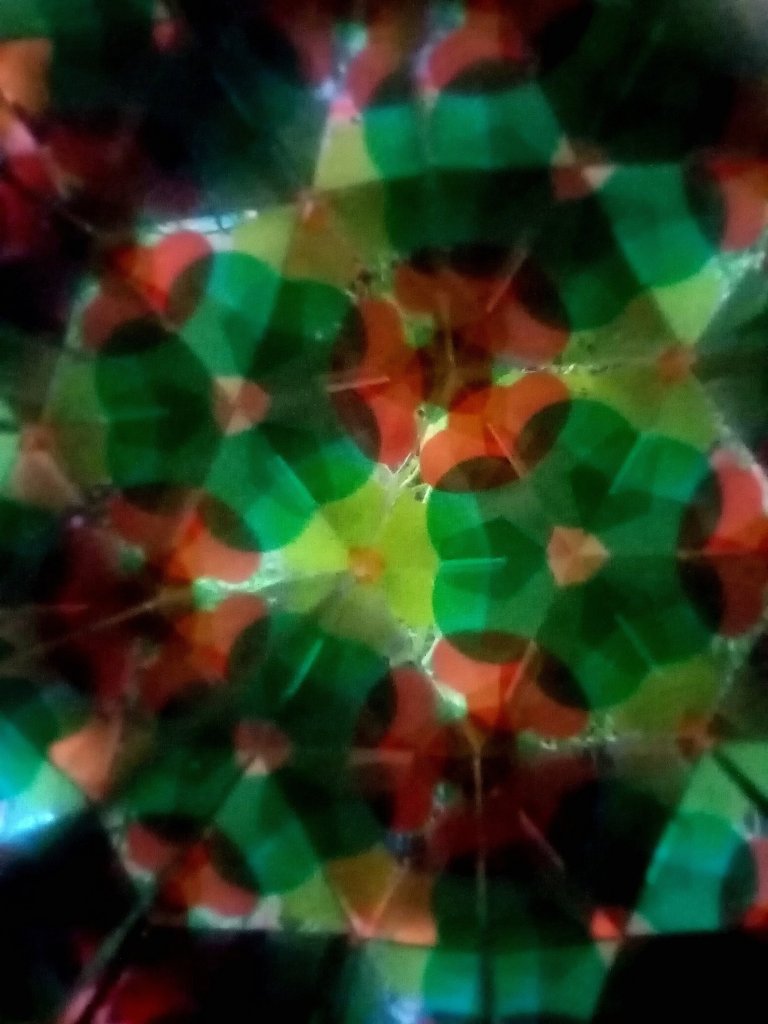
The main engineering build for this box is making akaleidoscope. We’ve made one with a kit previously but had issues with it coming loose and spilling it’s sparkling contents over the floor! KiwiCo have avoided this issue by having clear plastic wheels that get pinned on (and can get easily swapped out); there are two special sticker sheets provided with numerous colours and shapes so that kids can design their overlapping patterns.
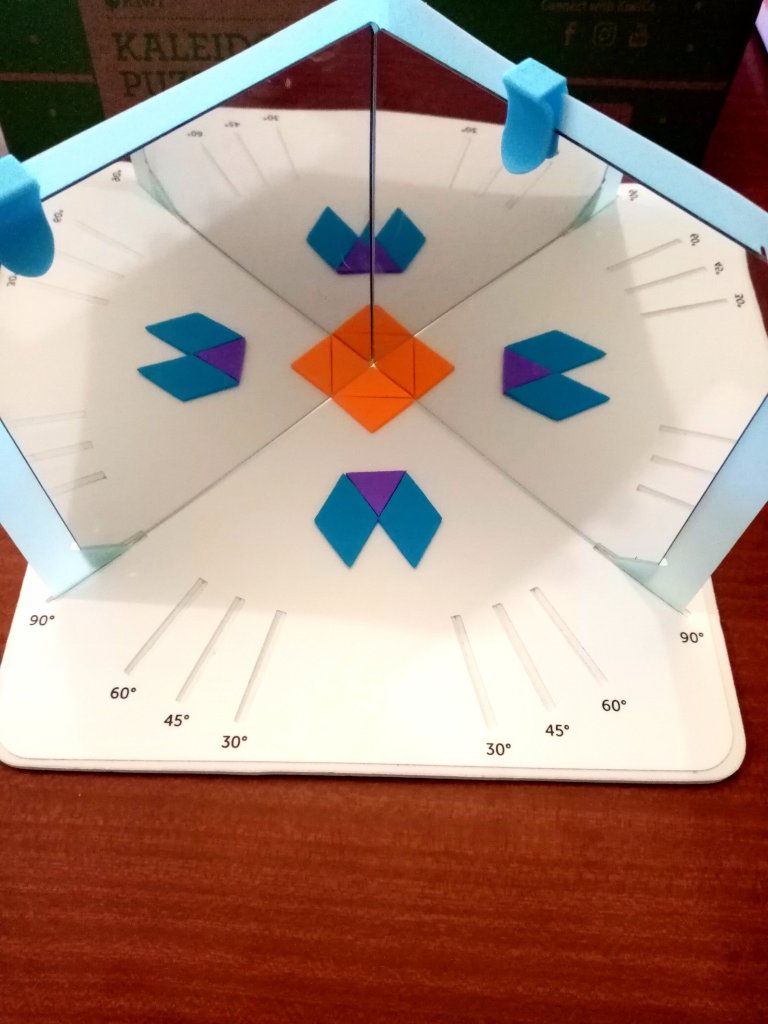
The second project (art and maths) involves experimenting with the mirror book to see what shapes and patterns you can make by shifting the mirror book between 30′, 45′, 60′, and 90′ angles. Encourage children to identify the shapes that are being made (i.e. a square vs pentagram) and to count the number of reflections, points, sides, etc. The box also comes with pre-cut blank shapes and markers so that children can experiment with their own designs! It’s also large enough to accommodate small toys for extra fun!
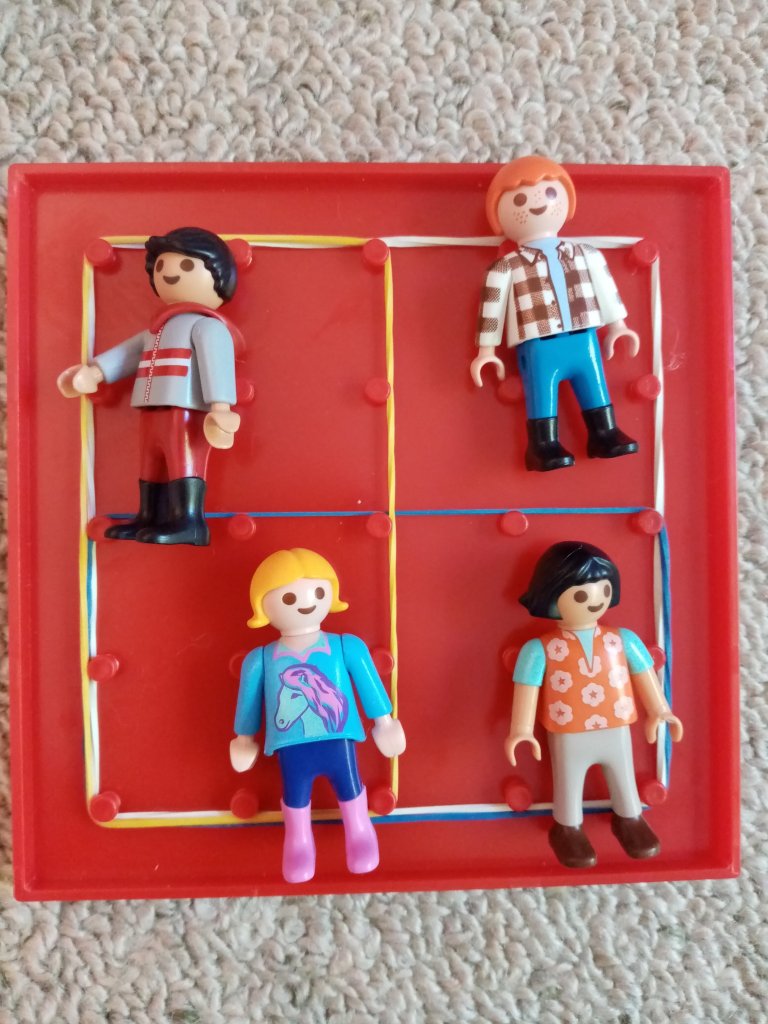
The third project explores logic and visual discrimination by trying to replicate picture puzzle cards using the coloured shapes provided. There is a convenient travel bag included so that kids can also design their own puzzles or pictures on the go!
The Explore magazine also provides ideas for additional ideas for exploring symmetry – handy if you are homeschooling! These include such activities as kite flying, identifying symmetry in nature, making ‘symmetrical socks’, and getting in the kitchen. We opted for pizza for our kitchen activity – which also conveniently let us explore fractions and sharing (division)!
Make a kaleidoscope.
Design your own changing patterns.
Explore angles, shapes, and patterns.
Get creative with angled mirrors
Use shapes to solve puzzle cards
HOW DO I ORDER KIWI CRATE?
This is not a paid review. I spent a lot of time searching the internet to find out more information about the Kiwi Crate and Atlas Crate boxes before deciding to try them and found the blog posts / photos that people shared were really useful!
If you would like to try Kiwi Crate (or one of their other lines), you can receive 50% off your first box by clicking here.
What I like about the Kiwi Crate kits is that they use a combination of Science, Technology, Engineering, Arts, and Mathematics to explore a concept or idea. There’s no obligation to sign-up in an on-going capacity so it’s easy to tie them in with birthdays / Christmas; the boxes are quite compact so they also store easily in a cupboard for bringing them out on a rainy day. Mind you, this only works if you spot the package on the door-step first – children become quite adept at recognising the green Kiwi Crate box and screaming with delight at it’s arrival!
The boxes are sent randomly so there’s no way to know what will come in the future; however, you can log-in to your account at the start of each month to see what box has been selected. Your box history is kept which means that even if you cancel and then pick-up again the following year they can make sure that you aren’t sent repeats of boxes.
WHAT IS IN A KIWI CRATE?
The Kiwi Crate is aimed at ages 5-8 years. It comes with a copy of the Explore magazine which opens with a fun comic about Steve the Kiwi and his friends. [As a side note, these are made by an American company despite the use of our New Zealand native bird]. These comics are really approachable for younger kids and a great way of exploring the concepts being introduced in a relateable manner.
The Explore magazine provides a range of information on the topic, it might include some simple games or tricks to try at home, and provide ideas for additional crafts / activities using simple materials. It also has a sticker [unique to each box theme] to put on your Kiwi Crate chart.
The box also includes an instruction manual and the materials that you need to build the main craft. Generally, there are two activities to do – one that is more art related, and one that is more mechanical engineering. What makes the kits special, is how well crafted the engineering components are. They really are designed for the intended age group so that they can either build themselves or help assist an adult. There are handy visual images and checkpoints to make sure that things are aligned correctly. There is no super-bonding-fingers-together wood glue to use with these projects (which makes them great for highly sensory children); instead parts come with double sided tape finely engineered on so that you just need to remove the backing strip of paper.
What is in the ExperiSense NZ Numeracy Art Homeschool Box?
The wonderful thing about homeschooling is the flexibility that it provides for exploring learning through fun, hands-on projects that let you cater for child’s individual learning needs. There are many different learning styles and not all are catered for by task-orientated repetitive worksheets. For those that are highly visual and hands-on, finding alternative ways to engage in learning concepts is very important.
I purchased the ExperiSenseNZ Numeracy Art box for NZD$25 because it allows key numeracy and mathematics learning concepts to be explored in a fun way by using art. It’s fully aligned with the NZ Curriculum and highly adaptable to age, interest, and special needs. I also purchased a geoboard for added fun!
The kit comes with a teaching guide for 12 different activities, most of the materials you’ll need for the activities (assuming you’ll have basics like scissors, glue, and felts at home), and a highly convenient plastic storage case!
Let’s Count!
Division and sharing
Fractions (parts of a group)
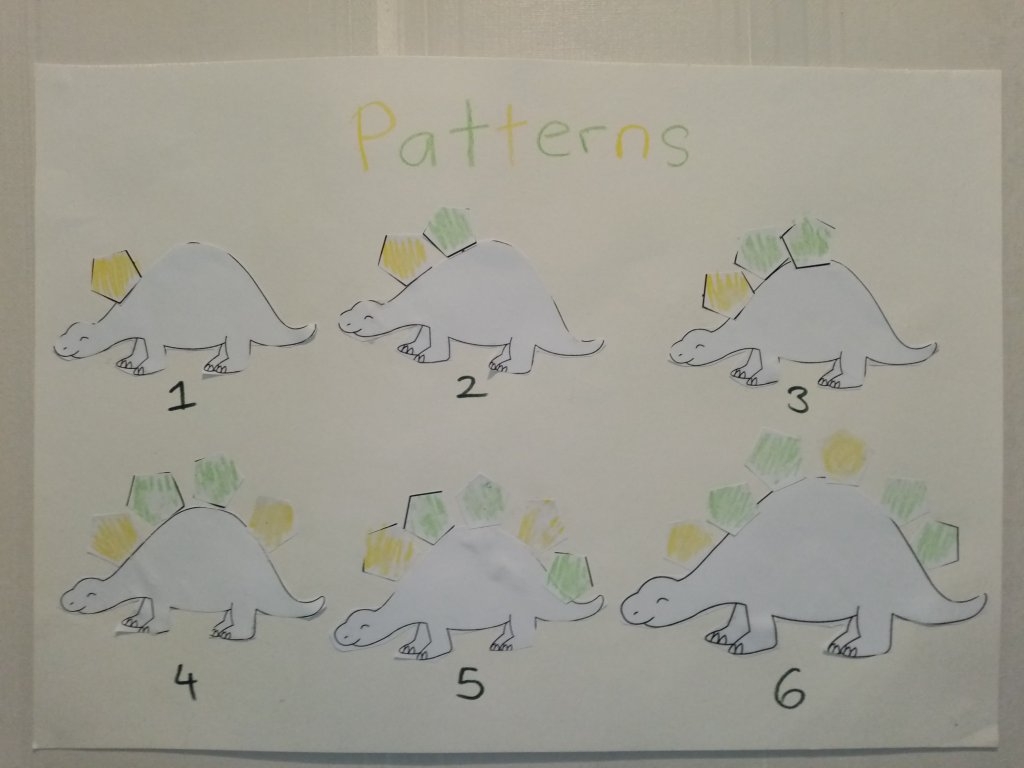
Growing Patterns
Terms and Rules
Decision Trees
Exploring light and colour
Forms of measurement
Shapes and fractions
Shapes and sharing
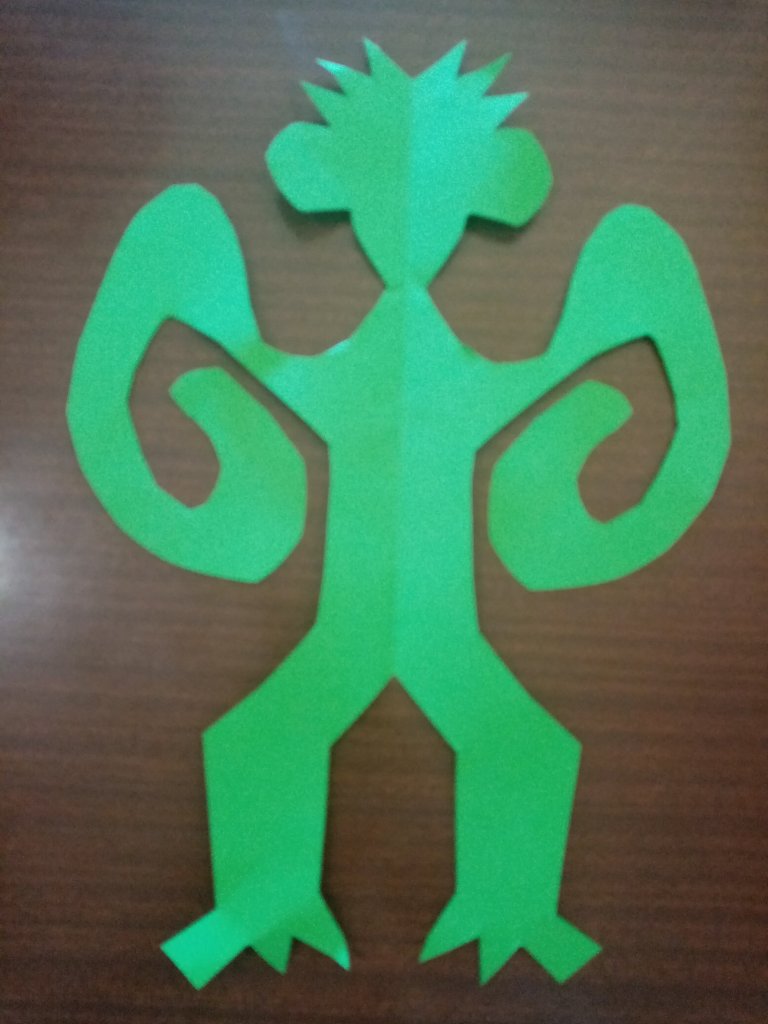
Exploring symmetry
Spatial relationships
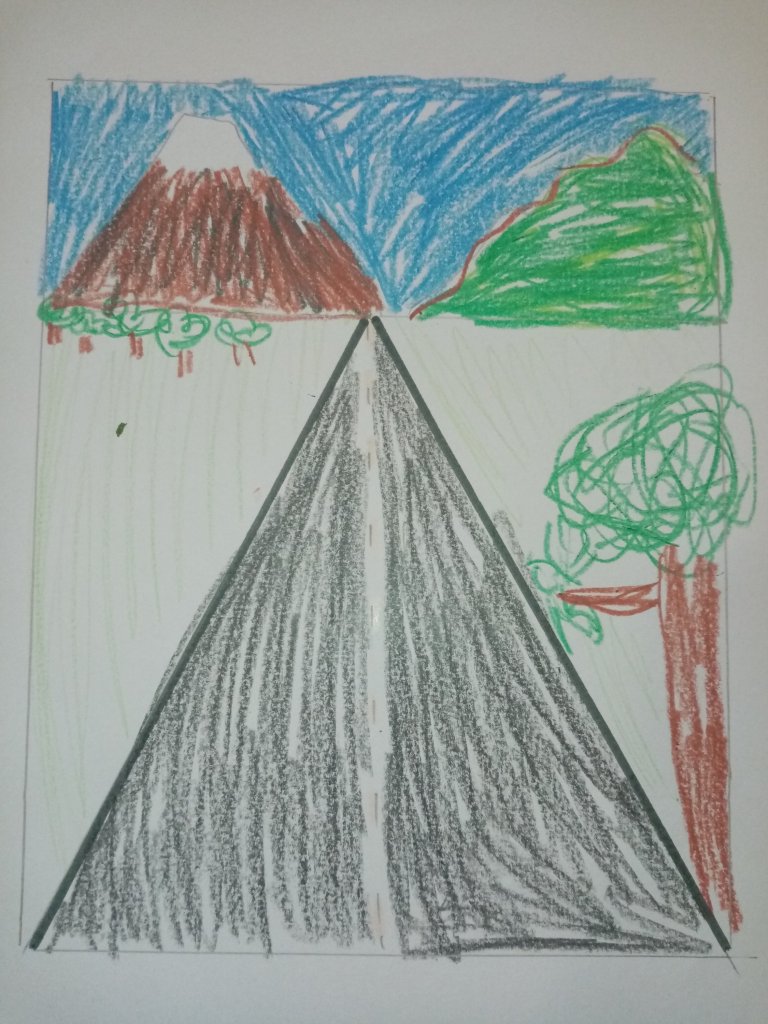
Illusions and perspective
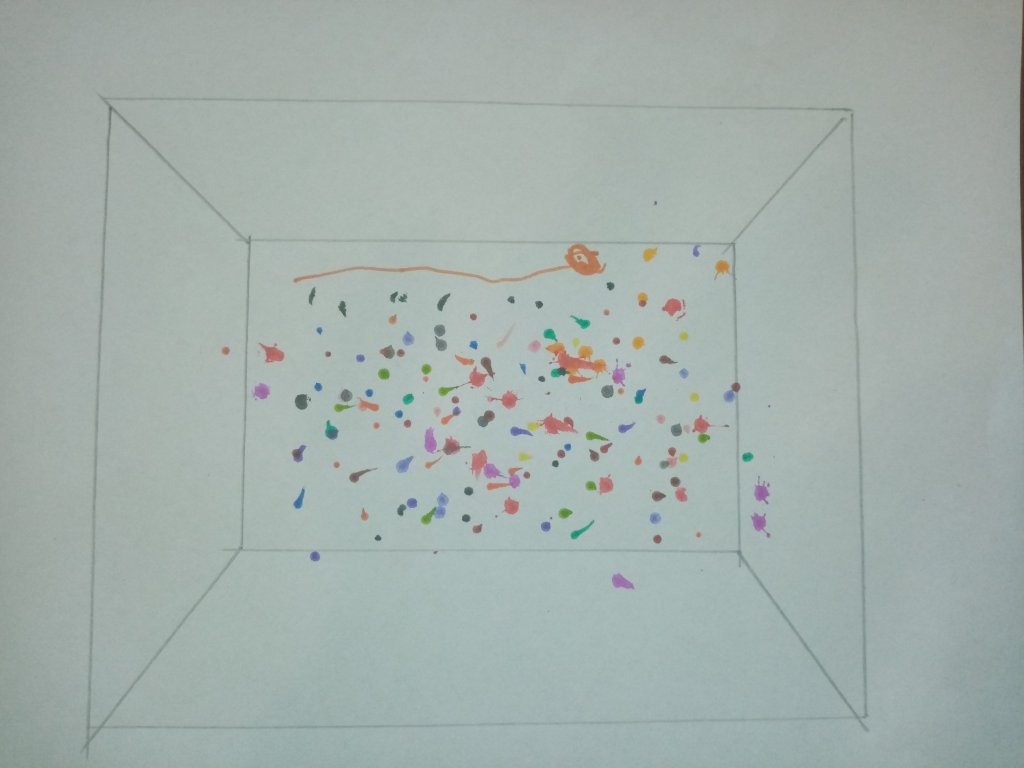
Venn Diagrams: Intersections of Colours in Space
Multiplication gardens
What age is it suitable for?
I adapted the activities to suit around age 5 years (so Year 1 / KS1). The flexibility of the kit means it’s probably suitable for general primary school (KS1 / KS2) as you can adapt the activities to suit your needs. We did a little on ‘skip counting’ by 2’s but you could just as easily practice higher multiplication tables. There are worksheets for calculating area that we skipped at this stage in our learning. We completely changed the algebra and problem solving activity to tie in with our Amazon Rainforest unit and simply explored colour.
Tip: I loved some of the templates in the kit and simply photocopied them for current use and hope to revisit them in the future. Kits like these are useful because you can revisit them the following year and simply build-on with what you’ve explored in the time since.
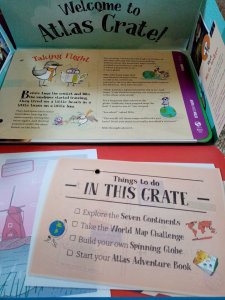
The World Crate is in an introduction to the Atlas series and will be the first box that you receive. It introduces the children to careful Milo (the prepared planner) and carefree Anya (let’s go!) as they realize they would love to see the world.
Learn about maps, continents, and the world!
There are a number of activities for kids to do in this first box 🙂 After reading the welcome story from Anya and Milo, they can choose what they would like to do next.
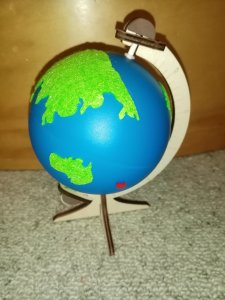
Spinning Globe
KiwiCo – Atlas World Crate – Create your own globe!
The first thing activity that Miss 6 chose was making her own globe. This activity provides a great introduction to teaching continents, introducing concepts of Latitude and Longitude, and talking about 2D vs 3D representations of the world.
You can personalise your globe by adding a cool red felt heart. For kiwi kids, be aware that despite the branding this is produced by an American company and New Zealand is not included on the globe (neither are other non-continental islands such as Japan, Indonesia, or Madagascar). I told her this was simply because New Zealand is full of so much aroha that we get a heart icon ❤ [There was also a less well received explanation about continents].
How to explain Day and Night
A fun activity to do with your new globe is exploring why the Earth’s rotation (spin) creates day and night cycles. All you need is a lamp or a torch! Miss 6 loves to spin the globe in front of the sun (lamp) and see where the heart lands. If it’s facing the sun then it’s morning, if it’s facing away then it’s night time, and if it’s half way then she decides it’s afternoon. It’s a great way of demonstrating why it might be daytime where you live but night time for friends or family living elsewhere in the world!
Learn how to read a map (treasure hunt style!)
KiwiCo – Atlas World Crate – Introducing Longitude and Latitude
The World Crate comes with a World Map for the wall. This allows you to extend on the concepts being introduced to go from continents to countries. It also introduces how to read a compass rose (North, South, East, West), and how to read latitude and longitude (i.e. 38’S, 175’E).
It also comes with a colouful activity sheet with a number of questions for kids to answer by finding co-ordinates on the map.
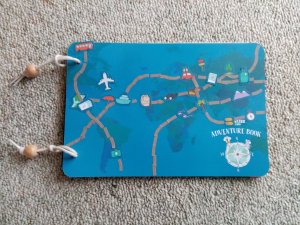
Make your own passport
KiwiCo – Atlas World Crate – Create your own passport!
Kids get to take charge of their ‘Atlas Adventure Book’ by personalising it with stickers and adding their name. They can also choose what order the continent (or section) cards are arranged in. These are: Australia & Oceania, Asia, South America, North America, Europe, Africa, and Antarctica.
Each continent card comes with some colourful photos and cartoons, trivia, and a basic map. Subsequent boxes, themed by country, will add a country card and passport sticker to their Adventure Book.
It contains “47 countries and 100 extraordinary places to visit” and is themed around interconnectedness. Rather than grouping countries by continent, or ordering alphabetically, this takes you on a hopscotch tour around the world to illustrate how our world’s wonders can be curiously linked.
Each country visited has a map icon showing it’s location on the globe, a few facts (including one obscure one), two interesting locations, phenomenon, festivals, or human achievements, etc. A key tie-in to the World box is that each ‘place’ visited provides Latitude and Longitude co-ordinates for locating it on the giant world map.
Was it worth it?
Pro: It’s a colourful and unique book that we can tie in with the world map. It also retails well above what was charged for it.
Con: Miss 6 isn’t particularly interested. She has about a 5 – 10 minute attention span for jumping into the book randomly. She’d rather be able to spin the globe she made and have that determine where we visit in the book; what we really needed was a world map included in the book with stars for all 100 locations visited!
Overall: One of the tricky things with books and the Atlas line is that it’s aimed at quite a diverse age (6-11 years); I suspect this book is probably of more interest to 8-10 year olds. What we will probably do is reference it with each subsequent Atlas crate and also look up photos/videos online of the places referenced.
Alternative books
KiwiCo also provide book recommendations on their website for each crate. For the World box, they suggest Barefoot Books World Atlas and The Barefoot Books Children of the World. We picked up a free secondhand copy of ‘Children of the World’ and Miss 6 loves it. It’s very approachable for younger kids (and those that struggle with reading) as it’s highly visual in its approach illustrating ways that different families might live, eat, dress, and play around the world.
HOW DO I ORDER ATLAS CRATE?
This is not a paid review. I spent a lot of time searching the internet to find out more information about the Kiwi Crate and Atlas Crate boxes before deciding to try them and found the blog posts / photos that people shared were really useful!
If you would like to try Atlas Crate (or one of their other lines), you can receive 50% off your first box by clicking here.
What I like about the Atlas Crate kits is that they provide a colourful and imaginative way of exploring the world through hands-on activities. I like that they use a mix of STEM and art to explore different concepts and ideas. Their products are also very well made, with clear instructions, and kids feel a real sense of pride in what they accomplish with each box.
There’s no obligation to sign-up in an on-going capacity so it’s easy to tie them in with birthdays / Christmas; the boxes are quite compact so they also store easily in a cupboard for bringing them out on a rainy day. Other families will choose to sign up for a longer period (like a 3, 6, or 12 month cycle).
WHAT IS IN AN ATLAS CRATE?
Each Atlas Crate comes with a special airmail envelope from Anya the Cricket and Milo the Sandpiper revealing where they’ve been on their latest adventure. There is a special passport sticker for your child’s Atlas Adventure Book plus seven new pages to add about a new country (highlighting geography, customs, landmarks, history, and foods).
There are supplies for two activities (which might be a mix of art, STEM, and games) as well as suggestions for more DIY activities to try at home – from things to make, to things to bake!
If you choose the Deluxe option, then you will also receive a book that helps you explore that month’s destination. This upgrade is an additional USD$9.95 (approx. $15 NZD) and can impact shipping costs as well. Since we’re homeschooling, I decided that we’d try the Deluxe option for 6 months to see how useful we find it.
It’s a way of engaging with Venn diagrams; traditionally, these are used to show the overlap of sets or categories of information but this wonderful visual explanation of them explores the ways that colours mix and overlap. It’s an organic process, reminiscent of the natural world, that removes language barriers and can appeal to visual learners.
It’s also beautiful, fun, and sensory. It can be used to encourage flexibility and demonstrate how things can be the same-but-different by experimenting with different colour mediums.
Exploring Venn diagrams through colour (Watercolour)
Book Suggestions
A great book to pair with this is Ish by Peter H. Reynolds to demonstrate that perfection in art is not necessary (for those that worry about colouring outside the lines).
The Dot, also by Peter H. Reynolds, which shows how an entire modern art collection can grow from something as simple as a circle.
From the award-winning game designer Reiner Knizia comes a game of strategy, patience, and cool plastic camels! The desert is still treacherous, mysterious, and without mercy. But for those willing to risk the dangers of the shifting, sun-baked sands, the desert holds riches beyond compare. In Through the Desert, two to five players each control a tribe of nomads vying for control of the desert. By establishing caravans and taking over oases, the players gain points as their tribes increase in power.
Strategy is essential in deciding how and where to build your tribe’s caravans. There are multiple ways to gain points and several ways to win. Should you try to build the longest caravan? Or should you dominate the desert’s oases? Don’t forget to keep an eye on your opponents’ caravans, or you may find your own tribe cut off from valuable water holes.
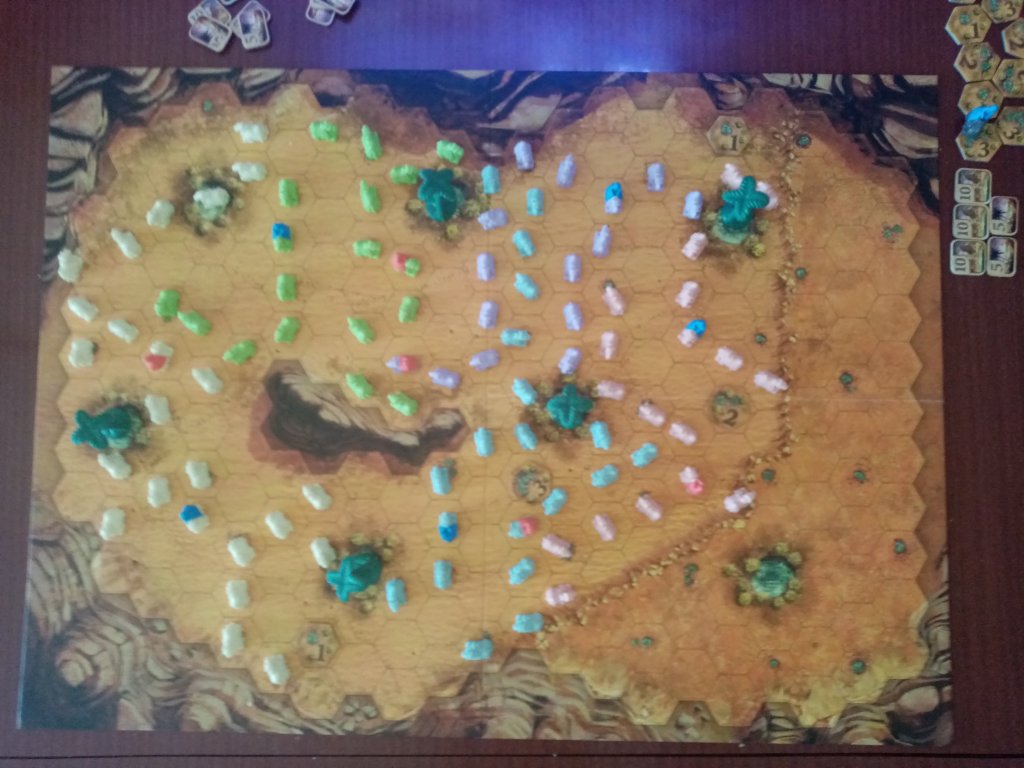
Through the Desert (a strategy / placement game)
Many reviewers have found the game reminiscent of the ancient and elegant game of Go. Through the Desert can be played in a number of strategic ways (including encapsulating territory and aiming to prevent your opponents from reaching key resources) but at it’s heart it’s about camels. 180 beautifully coloured miniature camels in five pastel colours (along with caravan leaders) that are sure to delight younger players (and are still pretty cool as an adult).
Players take turns to place their leaders on the board and then game play proceeds by choosing two camels (of any colour) and placing them on the board (connecting them to your caravan(s) of the same colour. Play continues until there are no camels left of a particular colour.
Strategy comes into play with the various placement rules and scoring system. You can place camels of a different coloured caravan next to your opponents camels but not next to the same colour (an important rule as otherwise camel ownership would become very confusing!). This simple rule opens up all kinds of strategic moves as you work to block opponents from reaching their goals.
Scoring involves reaching the five palm-tree oasis, taking watering holes, capturing territory (by surrounding it), and having the longest caravans of each colour.
Bonus features
There are rules provided for how to scaffold the game from 2 players to 5 players; the beautiful game board also provides natural geographic features to restrict the play area if there are only 2 players. It’s also double sided so that once you have mastered ‘the mountain’, you flip it to see how ‘the river’ changes play.
It also provides optional rules for variant game plays.
What age is the game suitable for?
To an extent, this will depend on the children involved and their interests / attention span. It helps that the rules are simple enough that even younger children can simply choose camels (at random or based on their favourite colour) and join in – while also adding an element of natural chaos to the plans of older players.
Slightly older children will begin to understand there are different possible goals and begin to engage with these. They may choose to focus on a single goal at a time or juggle a multiple focus. Goals can include:
Having the most camels of a particular colour on the board.
Linking their caravans to as many oasis as possible (each caravan scores 5 points for each oasis they reach).
Acquiring as many watering holes as possible (these score points and are removed from the board by the player that reaches them first).
Creating lines to stop other players from moving forward / reaching their goal.
Adults will appreciate that last goal often isn’t the most high-scoring but it’s a tactic that kids will delight in when they thwart their parents!
What can boardgames teach us? a.k.a. learning through play
There’s a whole community of homeschoolers who focus on gameschooling as a key way of learning. Why? Because it makes learning fun and there are so many wonderful games out there that can teach kids skills and knowledge without them even being aware that they’re learning.
In Through the Desert, they are learning:
Maths: strategy; logical reasoning.
Maths: counting to 20, addition, skip counting, and equivalency trading.
Even if they don’t instinctively recognise that 5+5 = 10, they can quickly learn that they can trade 2 x 5 point tokens, for a 10 point token with a different picture.
Children can help to score at end of game by: counting how many camels they have of each colour; ‘skip counting’ by 5’s or 10’s to add their oasis points; add their 1 / 2 / 3 point watering hole tokens together to find a total.
Visual-spatial recognition and reasoning.
By end of game there is a beautiful and unique pattern of coloured camels on the board (with complexity increased by number of players) so there is a fair amount of visual processing involved in working out final scoring – especially for minor captured territories (encapsulation).
World Studies:
It’s a great opportunity to review any desert habitats or countries that you’ve studied. We pulled out our range of desert dwelling animals that we’ve collected in our studies so far to watch the action; unsurprisingly, our Dromedary Camel was lead judge.
Life Skills:
It’s a great game to discuss short-term gains (such as thwarting parents) vs long-term gains (strategic scoring).
Social Skills: turn taking, patience, and good sportsmanship.
Making beautiful marbled paper is a fun and easy craft to do as a family!
One of the things I love about homeschooling is the way you can be multi-modal and explore areas like science or maths through art. Kids love to learn by being creative and hands on!
This is a fun and easy messy play activity that is cheap to do and makes beautiful decorative paper that you can use for upcycling crafts, making cards or christmas crackers, or to theme in with other activities. This green and yellow design was done to explore Spring and daffodils.
Spray shaving foam (about an inch deep) to cover a tray at least A4 in size.
Generously drip food colouring onto the foam.
Discuss first what colours you will use; it’s a good idea to start with 2-3 colours and build up from there (to avoid eager mixing creating a muddly brown!)
Ask younger children to predict what might happen when certain colours are mixed together; i.e. red and yellow (orange); blue and red (purple).
Press the paper firmly onto the foam making sure that all parts of the paper make contact.
Scrape as much foam off the paper as you can.
Leave the paper to dry.
Voila! You have beautiful marbled paper!
Tips
This is an all year round activity, however, you will want to adjust your clean up methods to the season! In summer, consider doing this outside in the warm sun on the grass – hose down your kids afterwards and peg paper to dry on the washing line. In winter, consider doing this in the garage or kitchen on top of a tarpaulin – have paper towels (or a hot shower) ready for clean up and lie paper on a clothes drying rack.
Sensory kids may have different parts of this activity that they like to participate in or watch. It’s a great idea to have some washable toys on hand that can use to play in the shaving foam once you’ve finished with the paper – this may be your kids favourite part! If it’s summer, consider letting them use the left over shaving foam to create a slip’n’slide on the trampoline or a messy ‘snowball’ fight.