Chocolate Buttercream Icing (allergy friendly)

Chocolate Buttercream Frosting

Chocolate Buttercream Frosting

This is a great frosting to use with Gluten Free Chocolate Cupcakes, the Crazy One Dish Chocolate Cake, or the Chocolate Irish Potato Cake (vegan). I made a vegan version of this frosting for my daughter’s 3rd Birthday (using Nuttelex + coconut milk) and it tasted divine!

Ingredients

  • 115g softened butter, or allergy friendly spread like Nuttelex
  • 2 cups icing sugar
  • 1/2 cup Dutch Cocoa Powder
  • 1/2 tsp vanilla essence
  • 1 – 3 Tbsp milk (dairy, rice, or coconut)
  • Optional: 1/2 tsp espresso powder

Allergies: gluten free, dairy free*, soy free, egg free, nut free. Vegan*.

Directions

  1. Whip the butter.
  2. Sift in 1 cup icing sugar, cocoa powder, and espresso powder. Add the vanilla and milk.
  3. Beat until smooth.
  4. Slowly beat in the rest of the icing sugar to give a good consistency for frosting.

Moist & delicious Chocolate Cupcakes (gluten free!)

I love chocolate. I’ve posted a few chocolate recipes like the Crazy One Dish Chocolate Cake and the Chocolate Irish Potato Cake, and I’ve posted some make-from-scratch gluten free recipes like the Vanilla Cupcakes and the all natural pink berry flavoured icing. I wanted to play around in the kitchen with some different gluten free ingredients and make a wonderfully chocolatey and moist cupcake that also wouldn’t be packed with sugar – I prefer to balance my cakes so there’s more chocolate flavour in the cake and then extra sweetness in the (optional) icing. Miss 2 loved these with all natural peppermint icing or the Chocolate Buttercream icing (dairy free).

Ingredients

Group 1

  • 1 cup hot water
  • 1 tsp instant coffee powder
  • 1/2 cup neutral vegetable oil (like Rice Bran oil)
  • 1 egg
  • 1 tsp vanilla
  • Generous pinch ground cinnamon

Group 2

Allergies: dairy free, soy free, gluten free, nut free.

Directions

  1. Preheat the oven to 180’C.
  2. Whisk together the ingredients in Group 1. This helps to aerate the mix. You can use a stick blender or I used the food processor (with a plastic mixing attachment, not a metal cutting blade!).
  3. Sift together the ingredients in Group 2.
  4. Mix the combined dry ingredients into the whisked liquid.
  5. Pour into cupcake cases (makes about a dozen). Bake at 180’c for approx. 25-30 mins or until cooked.
  6. Allow to cool before icing. (We liked combining these with an all natural peppermint icing!).


Icing 

The icings that I use don’t have any artificial colours, glycerin, additives etc.

Gluten Free Pina Colada Cookies

Gluten Free Pina Colada Cookies

Gluten Free Pina Colada Cookies!

These Gluten Free Pina Colada cookies (UK/USA)  are a light fluffy cookie that I don’t think most people realize are gluten free when eating them! They use the Gluten Free Vanilla Cookie recipe as a base but the variations make this a moister cookie (as well as tasting of the sunny tropics). These are very welcome to add a bit of sunshine to a cold winter day and also make a great tropical treat for birthday parties!

Ingredients

  • 1/2 cup superfine white rice flour
  • 1/2 cup Healtheries Gluten Free Bread Mix
  • 2 tsp Baking Powder
  • 1/2 tsp Baking Soda
  • 1/2 cup sugar
  • 3 Tbsp butter or allergy-free spread (i.e. Nuttelex)
  • 1 egg (whisked) or egg replacement.
  • 2 Tbsp greek yoghurt / coconut yoghurt / coconut milk
  • 1/4 cup dessicated coconut
  • 1/4 cup pineapple (crushed and drained)

Allergies: gluten free, dairy free*, egg free*, soy free, nut free.

Directions

  1. Cream the ‘butter’ and sugar. Mix in the egg.
  2. Mix in the rice flour, GF bread mix, baking powder. baking soda, yoghurt, coconut, and pineapple.
  3. Spoon out onto lightly oiled baking tray and flatten slightly.
  4. Bake at 180’C for approx. 15-20 mins (or until golden brown).

Makes approximately 12 cookies.

Note: There are several reasons that I choose to use the Healtheries Gluten Free Bread Mix instead of the Healtheries Gluten Free Baking Mix.

I prefer to use guar gum in my recipes and avoid xanthan gum; the latter is artificially derived and is often grown on an allergenic base (such as corn, soy, or wheat).

I like to control the rising agents in my baking so that I can tailor them to each recipe.

Frugality! The Bread Mix can be used to make both Gluten Free Bread and Gluten Free Baking whereas their Baking Mix can only be used for baking.

Candied Salted Caramel Pumpkin Seeds

Candied Salted Caramel Pumpkin Seeds

Candied Salted Caramel Pumpkin Seeds

I love this recipe! It’s a fantastic candied treat that’s great for parties and for holidays. If you have food allergies in the family, it’s also a great recipe to pass to grandparents who want to spoil the kids! It’s also ideal to take to kindergarten parties and pot lucks as it’s free of all major allergens!

Don’t be put off by the idea of pumpkin seeds – these are nothing like the raw ones that you get in salads. These are as different as corn is after it’s popped and are sweet, salty, and crunchy like M&Ms. They are dangerously addictive and are great eaten straight, sprinkled on fruit crumble, or on top of ice cream.

Ingredients

In the oven:

  • 2c pumpkin seeds
  • 2 1/2T sugar
  • 1/4 tsp cinnamon
  • 1/2 tsp ground ginger
  • Pinch nutmeg
  • 3T water
  • Oil for roasting dish

Caramel sauce

  • 1 1/2T allergy-free spread (i.e. Nuttelex) / butter
  • 2 1/2T brown sugar
  • 1 1/2 tsp salt

Allergies: gluten free, dairy free, soy free, egg free, nut free.

Note: If nut allergies are not a concern,this recipe will also work well with peanuts, cashews, and almonds.

Directions

  1. Pre-heat oven to 180’C and lightly oil a baking dish (I used a silicon flan / pie dish).
  2. Mix all of the oven ingredients together and pour into the baking dish. Note: the water is important because it helps the spices to stick to the pumpkin seeds (and the seeds will absorb the water a little as they puff up during cooking).
  3. Bake the pumpkin seeds for 20-25 mins until golden and crunchy.
  4. Once the pumpkin seeds are cooked, mix the caramel sauce ingredients together in a pot. Cook for 1-2 minutes until the ingredients have melted and turned a deep golden brown.
  5. Mix the caramel sauce and pumpkin seeds together until well coated. Spread on a tray and allow to  cool.

Blood Orange Icing (a.k.a. how to make pretty pink icing without using artificial colours)

Gluten Free Cupcakes with all natural pink icing

Gluten Free Cupcakes with all natural pink icing

My daughter is sensitive to red food colouring – as are many kids! For some reason New Zealand still allows artificial food colouring agents to be sold here that are banned in many parts of Europe. I’ve been doing more research (as you might have noticed from the post on why to be cautious about annatto as a colouring agent) and am experimenting with natural food colours.

One way to make pink icing is to use beetroot juice but I’m not a big fan of beetroot so instead decided to make a Blood Orange icing that has a beautifully delicate berry flavour and uses fruit tea!

The secret ingredient to this icing mix is Blood Orange fruit tea which uses a mix of

  • Hibiscus
  • Apple
  • Rosehips
  • Natural Flavouring
  • Stevia
  • Orange Peel

Not only do you get to make icing but you can also make yourself a cuppa in the process. Incidentally, this tea is also lovely cold, with sparkling water, or in fruit punch. You could also experiment with other fruit teas (like Blueberry & Blackcurrant) to make other colours.

Ingredients

  • 50g Butter or allergy free spread (i.e. Nuttelex)
  • 1c icing sugar
  • Blood Orange tea bag
  • Hot water

Allergies: gluten free, dairy free*, egg free, soy free, nut free.

Directions

  1. In a mug steep the Blood Orange tea bag in a small amount of boiling water (i.e. about 50 ml). Allow it to cool and it should have a concentrated deep red colour.
  2. Cream the butter and icing sugar.
  3. Slowly add the (cooled) blood-orange-water to the mix until you have the colour and consistency that you desire. (Add more icing sugar if needed).
  4. Ice your cupcakes (like these Gluten Free cupcakes!)

Note: You can also make this with just icing sugar and the Blood Orange mix to make a darker colour.


Gluten Free Cupcakes

Gluten Free Cupcakes with all natural pink icing

Gluten Free Cupcakes with all natural pink icing

I love experimenting with gluten free baking! As well as this vanilla cupcake recipe, I also have different recipes for chocolate cupcakes and berry muffins.

Ingredients

Cupcakes

  • 1c superfine white rice flour
  • 1T glutinous rice flour (also marketed as ‘sweet rice flour’)
  • 1/2 fine cornmeal (polenta) – use finely milled.
  • 1/2c sugar
  • 1 tsp guar gum
  • 2 tsp Baking Powder
  • 1/2 tsp Baking Soda
  • Pinch salt
  • 1/3c neutral oil (i.e. Rice Bran Oil)
  • 1 egg (or egg replacer)
  • Vanilla
  • 2/3c water

Allergies: gluten free, dairy free, egg free*, soy free, nut free.

Makes 8-10 cupcakes.

Directions

  1. Mix all the dry ingredients together.
  2. Whisk the egg (or egg replacer) until fluffy and pour in.
  3. Add the oil and vanilla. Mix.
  4. Slowly pour the water in while mixing.
  5. Spoon into cupcake cases and bake at 180’C for approx. 25 mins until golden.
  6. Allow to cool and ice. I used a Blood Orange icing with no artificial colours!


Tip: My current preferred method for cooking cupcakes is to fill a large cake tin with silicon cupcake cases (so that they are touching). This helps them to keep their shape and is super easy to get in and out of the oven.


Icing 

The icings that I use don’t have any artificial colours, glycerin, additives etc.

Easy Butterscotch Pudding (Gluten free!)

Easy butterscotch pudding.jpg

Easy butterscotch pudding

Ingredients

Sponge

  • 1c fine white rice flour / 1c plain flour
  • 1/2 tsp guar gum (or xanthan gum) / *not needed if using gluten containing flour
  • 2 tsp baking powder
  • 1/2c sugar
  • pinch salt
  • 1/4c neutral oil (I used rice bran oil) / 60g margarine (i.e. Nuttelex) / 60g butter
  • 1/2c water / milk of choice (i.e. almond milk)
  • egg replacement i.e. 1T ground linseed + 3T warm water / 1 egg, whisked

Sauce

  • 1/2c brown sugar
  • 1c boiling water

Allergies: gluten free, dairy free, soy free, egg free, nut free.

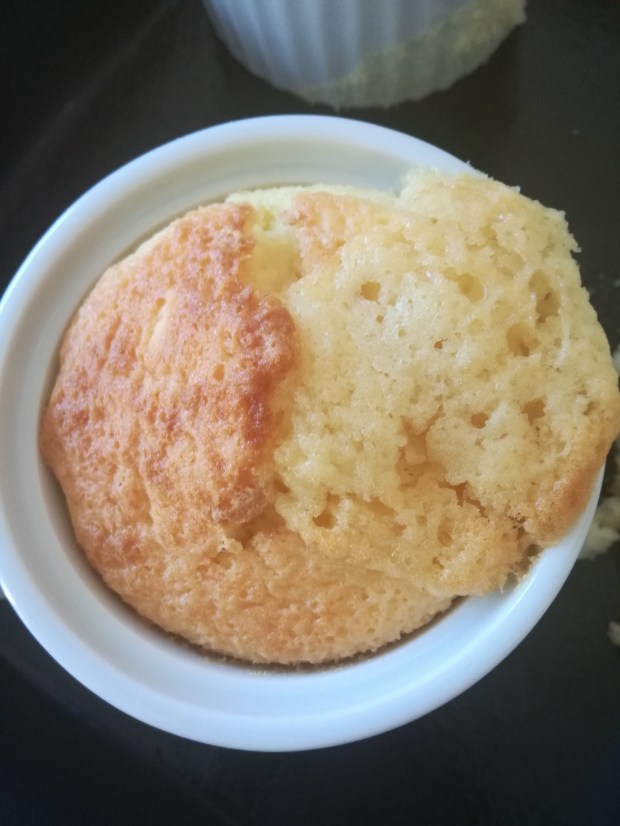
NOTE: This is a delicious and easy self-saucing pudding that can be made free of all major allergens. I’ve included options so that you can tailor it to your needs; i.e. I made my batch gluten free, dairy free, soy free, and included the egg. You can also tailor the sugar to meet your sweet tooth; i.e. you can use less sugar in the sponge (and just have the sweet sauce), or make less sauce, or dissolve maple syrup in boiling water for the sauce.

I was thrilled when Mum sent this to me – gluten free and doesn’t require mixing several types of flour together! It’s also versatile; you could add cooking cocoa to the sponge and sauce to make this a chocolate pudding, or serve with spiced stewed apple, or with warm custard etc.

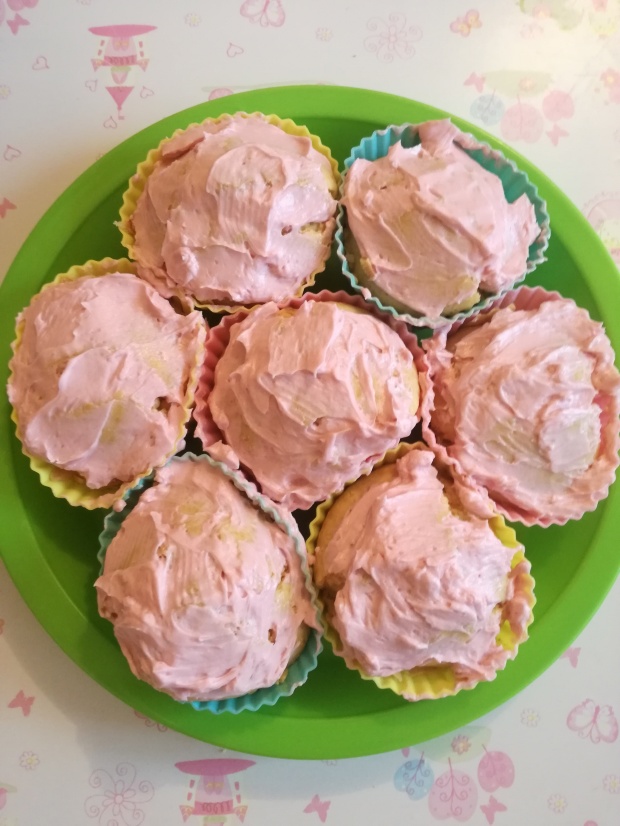
Mum mixed and cooked hers in a Pyrex dish; I cooked mine in five ceramic ramekins. It occurs to me that this would be a great gluten free option to serve at kids parties (especially winter birthdays!). It’s easy to make individual serves (if you don’t have enough ramekins consider using the large silicon muffin trays) and then kids could add to them with with things like custard, sliced fruit, fruit sauces, ice-cream, marshmellows, lemon curd, chocolate hazelnut spread etc.

Directions

  1. Mix all the ingredients together.
    • Choose whether you want to cook this in a single dish (i.e. Pyrex bowl) or individual serves; if the first option, you can mix it up in the dish it will be cooked in.
  2. Pour into cooking dish or ramekins.
  3. Sprinkle brown sugar over the top. Slowly pour on boiling water (you may want to pour over the back of a spoon to help disperse it more gently).
  4. Cook in pre-heated oven at 180’C. Takes approx. 25 mins in ramekins or 35-40 mins in pudding bowl.

Sweet cornbread muffins

wp-1488495429564.jpg

Cornbread muffin

Note: I only wanted to make a small batch so this makes 5-6 muffins, double the recipe to make more.

Ingredients (Dairy or Dairy Free)

  • 1/2c yellow cornmeal
  • 1/2c plain flour
  • 1/2T Baking Powder
  • 1/2 tsp salt
  • 2T Brown sugar
  • 2T liquid honey
  • 1 egg
  • 1/3c milk*
    • I used coconut milk.
  • 1/4c butter*
    • I used rice bran oil.

These turned out beautifully; they were quite sweet with 2T brown sugar & 2T liquid honey. I wouldn’t have known they were dairy free. They were light, fluffy, and delicious warm & cold. Made 5 muffins.

Allergies: soy free, dairy free, peanut free, tree nut free.

Ingredients (Dairy Free & Egg Free)

  • 3/4c yellow cornmeal
  • 3/4c plain flour
  • 1/2T Baking Powder
  • 1/2 tsp salt
  • 2T liquid honey
  • 1T ground linseed soaked in 3T warm water
  • 1/2c – 3/4c coconut milk.
  • 1/4c rice bran oil.

With this batch I was aiming to increase the size of the mix, replace the egg and reduce the sugar. I find, in general, that linseed works well as an egg replacer but you may need a little more liquid. These still turned out well although not quite as fluffy as the first batch. Makes 6 muffins.

Allergies: soy free, dairy free, egg free, peanut free, tree nut free.

Directions

  1. Mix the dry ingredients together.
  2. Mix the wet ingredients together.
  3. Pour the wet ingredients onto the dry and mix till combined. Do not over mix.
  4. Put mixture into muffin trays. Bake at 180’C for 15-20 mins until golden brown.

Chocolate Avocado Mousse

Chocolate avocado mousse.jpg

Chocolate avocado mousse

I’d been hearing about this as a paleo recipe and realized that it would be a great allergen friendly recipe to try with Miss 2 (who thought it was yum!). It’s a seasonal dish that’s wonderful to make when avocados are cheap. It’s creamy, chocolatey, and doesn’t taste like avocado at all.

Note: This recipe is best made with a food processor (or possibly an electric beater). I tried using a smoothie blender but the mixture was too thick and I ended up beating it with a fork (which is why it ended up a little lumpy).

Ingredients

  • 240g flesh of ripe avocados
  • 40g cocoa powder
  • 1/4 – 1/2c coconut milk
  • 1 tsp vanilla extract
  • pinch salt
  • 3-6T brown sugar.

Directions

  1. Blend until smooth.
  2. Serve immediately or chill.

Feijoa Cheesecake

Feijoa cheesecake

Ingredients

Base

  • 250g biscuits
    • Gingernuts pair well with feijoa but aren’t necessarily allergy friendly. I used malt biscuits that were soy free so feel free to sub in something that works for you; i.e. you could use gluten free cookies.
  • 100g melted butter
    • Do melt it; I put butter in straight from the fridge and the crumbs stayed too dry so I had to dash in some rice bran oil.
  • Optional: generous pinches of cinnamon and ginger.

Filling

  • 400g scooped feijoas (after squeezing out excess liquid)
  • 1 – 2T lemon juice
  • 250g cream cheese (at room temperature)
  • 1c greek yoghurt
  • 2T mild liquid honey
  • 1 tsp vanilla essence
  • 3tsp powdered gelatin
  • 2T boiling water

Allergies: Soy free, gluten free*, egg free, peanut free, tree nut free.

Directions

  1. Lightly butter the sides and base of a 20cm springform cake pan. Line the base with baking paper.
  2. Crush the biscuits very finely. Combine with the butter.
    • (I used a food processor.)
  3. Press biscuit mix onto the base of the pan. Chill.
  4. Blend the feijoa flesh and lemon juice in a food processor, until smooth. Add the cream cheese, yoghurt, honey, vanilla essence and blend until smooth. Dissolve the gelatine in the boiling water and add to the filling. Mix well.
  5. Pour onto the biscuit base. Cover and chill for 3 hours or overnight.