
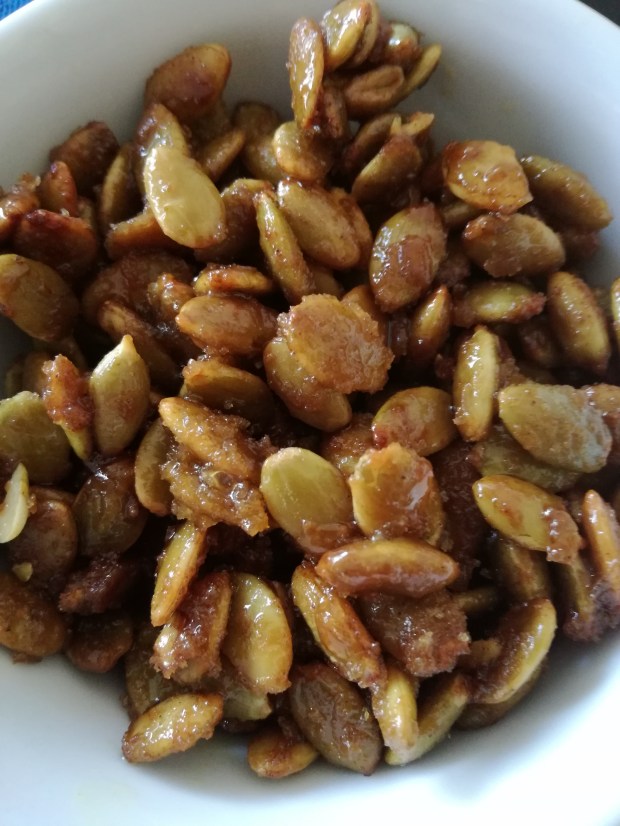
Candied Salted Caramel Pumpkin Seeds
I love this recipe! It’s a fantastic candied treat that’s great for parties and for holidays. If you have food allergies in the family, it’s also a great recipe to pass to grandparents who want to spoil the kids! It’s also ideal to take to kindergarten parties and pot lucks as it’s free of all major allergens!
Don’t be put off by the idea of pumpkin seeds – these are nothing like the raw ones that you get in salads. These are as different as corn is after it’s popped and are sweet, salty, and crunchy like M&Ms. They are dangerously addictive and are great eaten straight, sprinkled on fruit crumble, or on top of ice cream.
Ingredients
In the oven:
- 2c pumpkin seeds
- 2 1/2T sugar
- 1/4 tsp cinnamon
- 1/2 tsp ground ginger
- Pinch nutmeg
- 3T water
- Oil for roasting dish
Caramel sauce
- 1 1/2T allergy-free spread (i.e. Nuttelex) / butter
- 2 1/2T brown sugar
- 1 1/2 tsp salt
Allergies: gluten free, dairy free, soy free, egg free, nut free.
Note: If nut allergies are not a concern,this recipe will also work well with peanuts, cashews, and almonds.
Directions
- Pre-heat oven to 180’C and lightly oil a baking dish (I used a silicon flan / pie dish).
- Mix all of the oven ingredients together and pour into the baking dish. Note: the water is important because it helps the spices to stick to the pumpkin seeds (and the seeds will absorb the water a little as they puff up during cooking).
- Bake the pumpkin seeds for 20-25 mins until golden and crunchy.
- Once the pumpkin seeds are cooked, mix the caramel sauce ingredients together in a pot. Cook for 1-2 minutes until the ingredients have melted and turned a deep golden brown.
- Mix the caramel sauce and pumpkin seeds together until well coated. Spread on a tray and allow to cool.


")


