Makes two servings @ 10.2 carbs each; if cooking for the family simply scale up the recipe. For keto eaters, this is great served with konjac noodles and green above ground veggies; for gluten free families consider serving with brown basmati rice or wholegrain gf corn chips.
Note: Those on keto can reduce carbs further by making their own spice mix; calculations for this recipe are based on Farrahs Taco Spice Mix.
Note: Bacon seems to mean different things in different countries, in New Zealand bacon has a wide selection so feel free to use whatever you prefer.
Allergies: free from gluten and soy.
Directions
Start a small pot of water boiling. Using a spoon, carefully slide in the eggs. Reduce heat to a simmer and set timer. The BBC have a helpful guide on timings; I tend to remove after 6 minutes. Tip: Keep in mind that the yolk will keep setting the hot shell until you peel it.
Start the bacon cooking. If you’re using a frying pan / skillet and on keto than you may wish to use the bacon grease to saute the green beans. I prefer to cook bacon in the air fryer.
Cook your green beans while the bacon is cooking; if you want to boil them (after removing the eggs) they will only take 2-3 mins.
Layer your salad with lettuce, green beans, and tomato. Peel the hardboiled eggs and chop in half. Cut the cooked bacon into strips (or even better, use kitchen scissors and snip it directly onto the salad). Sprinkle over the grated cheese. Drizzle the dressing.
Arepa are one of the most popular foods in Colombia. They are often eaten every day and so versatile that they can be served as breakfast, lunch, or dinner. They might be served with rich Colombian hot chocolate; with soft fresh cheese; with guacamole or fresh tomato salsa; with prawns; the possibilities are endless!
There are many recipes for arepas and this is one variant 🙂
An important note for this recipe is that in Colombia they use a special arepa flour (masarepa) which is a precooked fine cornmeal. It can be sourced in New Zealand but it is a speciality item.
If you don’t have access to masarepa, you can use a gluten free substitute; you will need a larger quantity as it will not absorb the liquid in the same way. For instance, 1.5 cups Cornmeal Flour (not to be confused with NZ cornflour) and 1/2 cup gluten free baking flour.
Directions
Warm the milk and butter (either in a pot or in a microwave).
In a large mixing bowl, combine the warm milk (with dissolved butter) + cornmeal flour + salt + frozen corn + mozzarella. Mix until you have a dough-like batter.
Let the batter rest for 30 minutes.
Divide the dough into balls and then flatten.
You can choose to: deep fry or lightly fry on a skillet / frying pan; give them a very light coating of oil and cook them in the air fryer (which I did); or even cook them in a panini press. The aim is to be golden crisp on the outside and cooked through. They are best served warm and are delicious eaten straight away.
“Chocolate sin queso es como amor sin beso, chocolate without cheese is like love without a kiss.”
It was fascinating researching this as part of our world studies unit on Colombia and delicious to try. This drink is an essential part of Colombian culture and often served for breakfast with arepa. It is an incredibly rich drink and worth noting that the cheese they use is Colombian queso campesino or queso doble crema; note these fresh cheeses are very different to something like our Kiwi block of yellow Colby featured in our quintessential mince and cheese pie.
Colombian Hot Chocolate
Ingredients
Stick(s) of dark chocolate
Full cream milk
White cheese
Those are essentially the ingredients; you can flavour with cinnamon and cloves if desired. Amounts will vary depending on how much you are making; I used about 1 sante bar, 1 cup full cream milk, and about 1/4c mozzarella. While delicious, I’m aware that it’s not quite the same cultural experience as I’m using my local ingredients.
Directions
Warm the milk almost to a boil; watch closely and whisk.
Remove from heat and stir in the chocolate until fully melted.
Drop some mozzarella cheese into your cup and pour hot chocolate over the top.
Let the cheese melt a little and enjoy!
Tip: In Colombia, they use a chocolatera and a molinillo for warming the milk and frothing the chocolate. Lacking these, I used a small pot and a whisk.
While studying Madagascar, I was fascinated by their terraced rice fields (unusual for an African nation). The Malagasy people use rice as a part of all three meals and also draw on many cultural influences in their cooking.
One dish that particularly drew my attention was this idea for a simple marinade that would allow me to make good use of our bountiful lemon tree.
Ingredients
Fresh lemon zest
Ginger
Garlic
Salt
Coconut oil / Coconut cream
Chicken
Rice
Directions
Unlike most recipes, I’m keeping this simple since the focus is really on the combination of flavours used.
In a deep dish, place your chicken. You want something that will stay tender like chicken thighs or whole legs.
Onto the chicken, rub fresh lemon zest (the finely grated skin of the lemon), fresh grated ginger (or ground ginger), some crushed garlic, and coconut oil. Alternatively, use rice bran oil and add a little coconut cream to your finished dish.
Marinate the chicken overnight to absorb the flavours. Cook until tender using your choice of BBQ, skillet, or air fyer.
One of the wonderful things about homeschooling is that being in the kitchen can definitely be part of the curriculum! We’re studying Japan at the moment and one of the suggestions in our Kiwico Atlas Discover Japan box was to try our hand at onigiri.
At it’s simplest, onigiri is a fun gluten free snack that uses a sticky rice to create a treasure box sandwich around a delicious filling of your choice. They are wonderfully easy to make and can be as creative (or quick) as you like.
The key ingredient that you will need is Japanese Short Grain Rice. This is sometimes marketed as ‘sushi rice’ in Western supermarkets although this is actually a misnomer, the same rice can be used to make sushi but while sushi uses vinegar, salt, and sugar to provide seasoning, onigiri uses plain steamed rice and relies on the nori (dried seaweed) and filling for flavour.
Think about what design you would like to use for your onigiri. If you want to keep it simple, use scissors to cut the nori sheets into smaller and shorter strips that you wrap around the base of the onigiri as a handhold. You can also get creative and decorate them into whatever you can imagine! There are fascinating videos on YouTube with plenty of ideas – be aware that fancier designs may utilize special tools to cut the seaweed and moulds to press the rice into. These can often be picked up cheaply online or from stores specializing in Japanese homewares.
Directions
Cook your rice fresh and allow to cool slightly (it should be warm while making the onigiri). I like to use a rice cooker and make just enough rice for the meal.
Prepare your filling while the rice is cooking.
Have a bowl of water available to wet and wash your hands (the rice is sticky!).
Traditionally, salt is rubbed onto both hands and helps to flavour the rice while you shape it. You then scoop some warm rice onto one hand, make it into a flattish nest shape, place 1-2 tsp of filling in the middle, then gently squeeze into a ball or triangular shape. Tip: If this feels a bit tricky, try lining a small bowl with gladwrap and laying the rice on top. Apply filling to centre, pop a little more rice on top, and then pull the gladwrap up at the corners (into a raindrop shape) and mould the rice (keeping the filling in the centre).
You can then decorate the onigiri as you like.
Tip: You don’t need to use any nori but it does provide a pleasant umami flavour. You may prefer to simply dip your onigiri in soy sauce or coconut amino acids (an allergy friendly substitute). You may also like to sprinkle a furikake seasoning onto your onigiri; there are a range of flavours.
Probiotic + prebiotic kefir ice-cream. Tasty, low in lactose, high in calcium.
Ingredients
1 large frozen banana
150g kefir
I used The Collective Blueberry Hemp Kefir. The hulled hemp seeds + chicory root help to add some prebiotic fibre to go with the probiotic kefir. Tip: Another option is to mix in 1Tbsp of ground linseed.
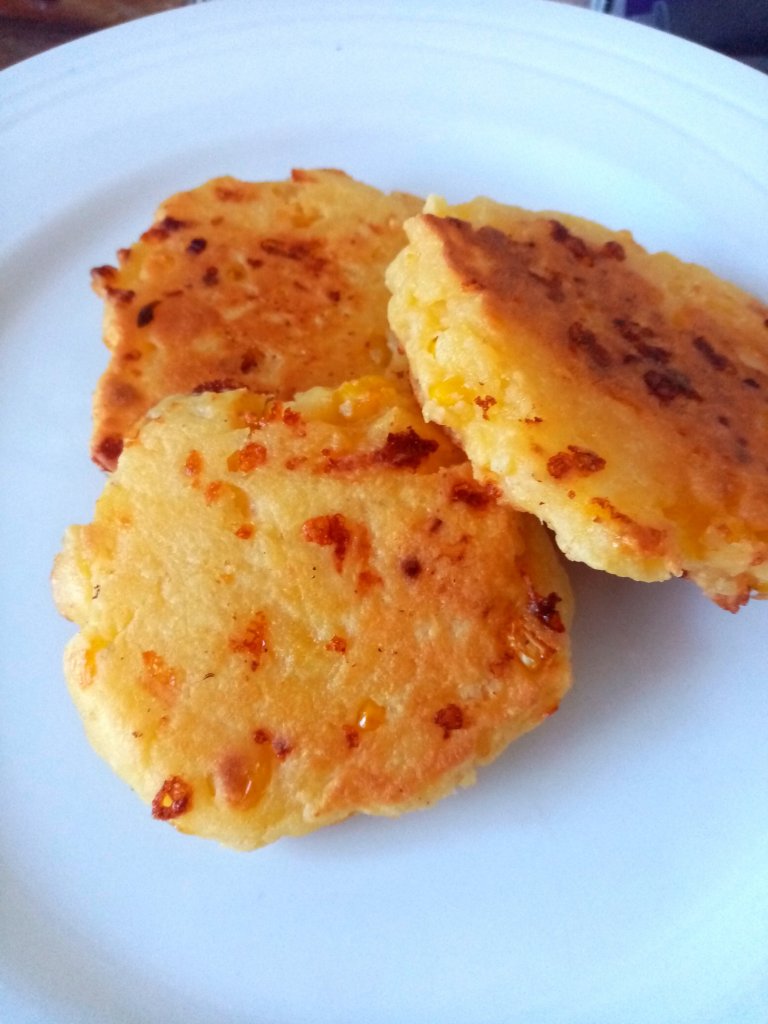
I made mine in the Kmart Pie Maker but you could also make these in greased metal muffin tins and bake in the oven. Also, although these ones are ham and cheese based you can easily adapt them to use up last night’s leftovers – chicken & roast pumpkin, lamb & feta, etc.
1 Tbsp apple cider vinegar or a squeeze of lemon (the acid helps activate the baking powder for the fast cook in the pie maker),
YUMMY EXTRAS:
1 Tbsp chopped parsley from the garden
1 finely chopped ripe tomato
50g finely chopped ham
Large handful of grated cheese (about 1/2 cup)
Last of the frozen corn (about 1/4 cup)
1/4 to 1/2 cup milk
Allergies: soy free, nut free.
TIP: Since cooked tomato is rather moist, I would use garden tomatoes for immediate eating and finely diced sundried tomatoes for school lunches.
Directions
In a mixing bowl: combine flour, baking powder, sugar, salt, chia seeds, wheat germ.
Make a well in the dry ingredients and add: eggs, parsley, tomato, ham, cheese, corn. Mix.
Slowly add a small amount of milk to make a smooth, thick batter. Add the apple cider vinegar or lemon juice last and give a final mix.
Bake in Kmart Pie Maker for 8 minutes. Makes 3 batches (12 muffins). Alternatively, bake in oven at 375’F / 180’C for about 20-25 mins (or until skewer comes out clean).
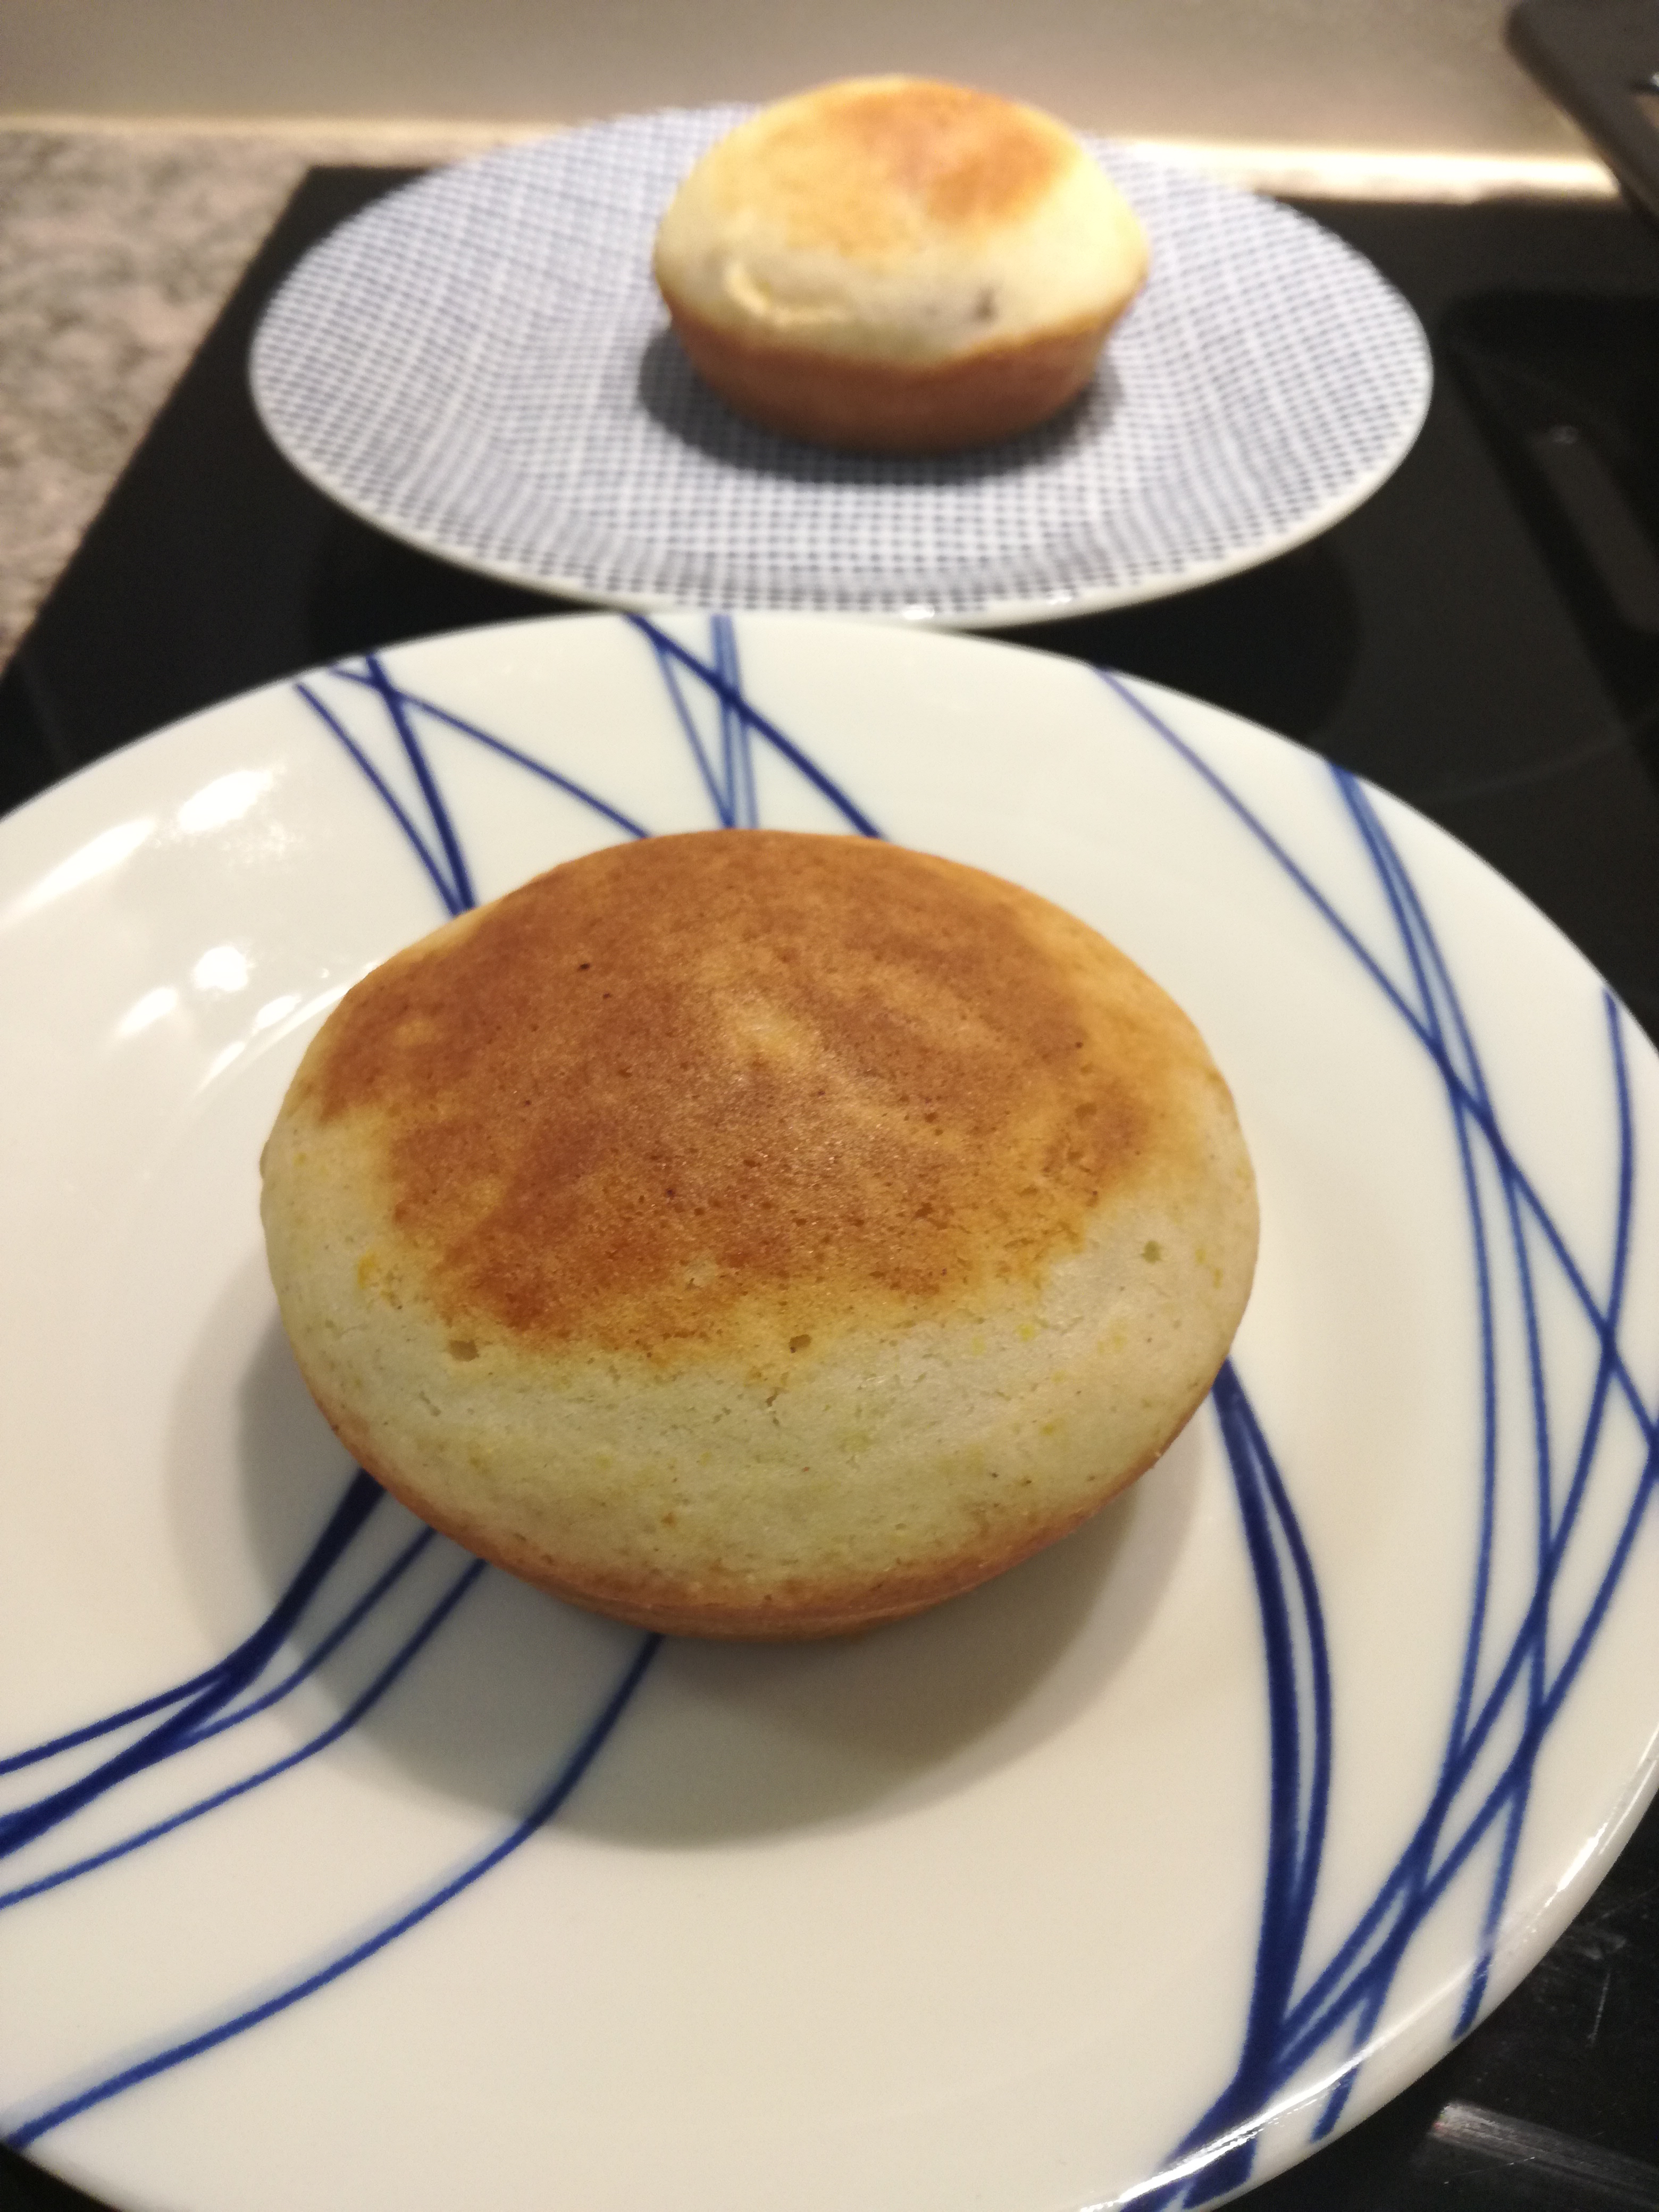
I finally made the leap and purchased an NZD$29 Kmart Pie Maker. They are quite the internet phenomenon in part because they can be used for so many things other than pies. We decided to celebrate the purchase with family by making coealiac friendly american style donuts! They are delicious!
Note: Although I made 12 in the pie maker (3 rounds) you could bake them in the oven in muffin trays instead. You’d probably want 375’F / 180’C for 20-25 mins.
Directions
Mix the dry ingredients.
Make a well in the middle. Add milk, vanilla, eggs, rice bran oil, lemon juice. Mix well.
Allow mix to stand for a few minutes (the gluten free flours will thicken)
3/4 fill each space in the pie maker. Put a teaspoon of jam in the middle. Put a little more mix over the top.
Cook for 8 minutes. Remove and place on cooling rack. Put the next batch on to cook. (Makes 12 donuts) .
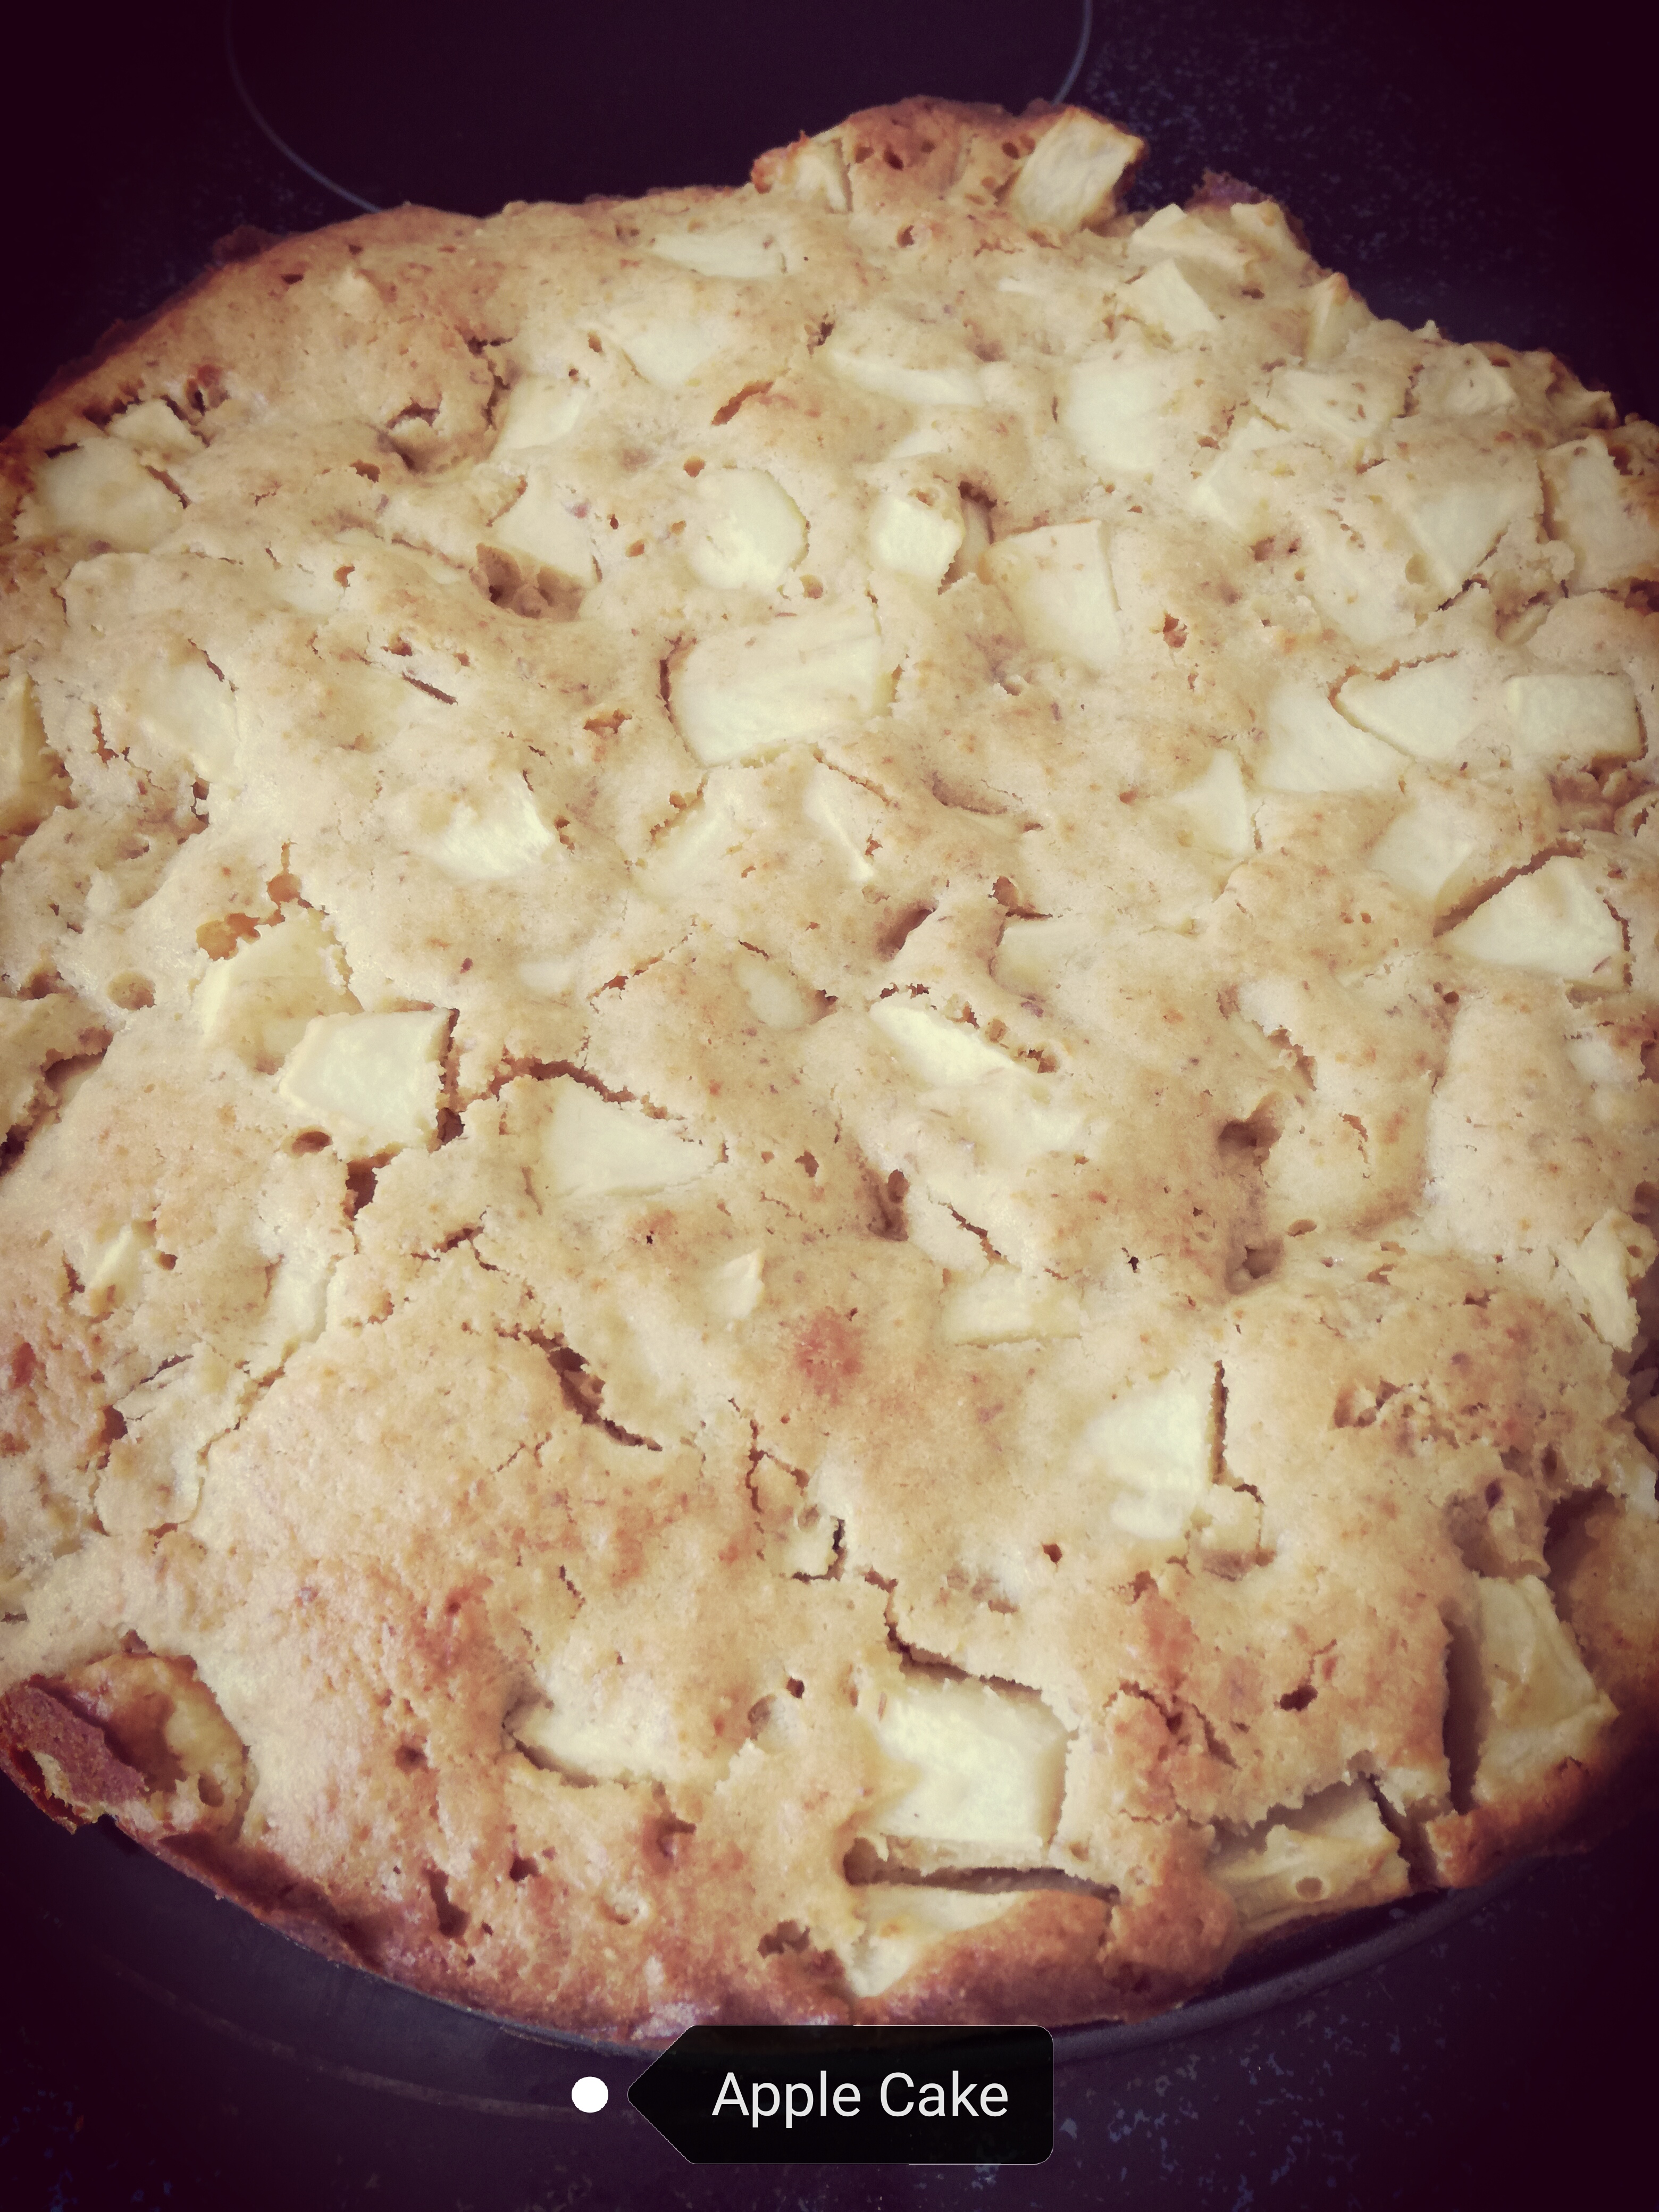
Miss 4 and I have been reading a series of picture books, the latest of which is “The Wolf who visited the land of Fairy Tales.” The wolf goes on a quest to collect a recipe and ingredients to make apple cake. The book has a recipe at the back which inspired me to invent our own version; it has more protein and added micro-nutrients than a traditional recipe. This is a light thin apple cake that reminds me a little of Tarte Tatin.
If you have young children, this is great for school lunches. Alternatively, read the book during the school holidays (or anything that features baking, ‘Little Red Riding Hood’ would work just as well) and then tie in the real world application with the story. Add in some dress-ups for acting out the story and that’s your morning filled!
Apple Cake
Ingredients
1/2 cup Nuttelex (or dairy-free spread, or butter)
1/2 cup sugar
3 fresh eggs, lightly beaten
1 tsp baking powder
1 cup flour, sifted
1/4 cup wheat germ
1 Tbsp ground linseed
1/4 tsp ground cinnamon
1 tsp finely diced fresh ginger
1/4 cup rice milk (or alternative)
3 large apples, peeled and diced into small pieces.
Directions
Preheat the oven to 180’C / 350’F. Grease the sides and bottom of a round cake tin.
Cream the Nuttelex (or butter) and sugar. Add the beaten eggs and mix.
Gently fold in the baking powder, flour, wheat germ, ground linseed, and ground cinnamon.
Gently stir in the apple pieces and fresh ginger.
Stir in a little rice milk until the batter is smooth.
Pour the batter into the cake pan and bake for 40 mins.
Alternatives
You can change the flavour profile in a variety of ways:
Add a splash of freshly squeezed lemon or orange juice.
Switch fresh ginger for ground ginger for a milder ginger flavour.
Increase the cinnamon to 1 tsp and add 1/4 tsp all spice + pinch nutmeg.
If your child is adverse to the apple being in chunks, consider experimenting with stewed apple or apple sauce. Keep an eye on your dry/wet ratios as this will have an impact.