Chocolate Irish Potato Cake (Vegan & Allergy Friendly)


Ingredients

  • 4T ground linseed/flaxseed + 6T hot water
    • OR use 4 eggs.
  • 1c hot unseasoned mashed potato (instant is fine)
    • 1c of potato flakes + approx. 3/4c boiling water makes 1c mashed potato.
  • 1c hot water
  • 3/4c rice bran oil
    • OR 3/4c softened butter
  • 1 1/2c sugar
  • 1 tsp vanilla
  • 2c flour (or gluten free baking mix)
  • 2 1/4 tsp Baking Powder
  • 1/2 tsp Baking Soda
  • 1/4 tsp salt
  • 1 1/4c cocoa
  • Optional: 1 tsp cinnamon

Allergies: soy free, dairy free, egg free, peanut free, tree nut free, gluten free*.

Note: I’ve included ingredient options so that you can choose whether to use butter & eggs; I made mine without. It’s worth having a recipe like this even if you don’t have allergies. It’s great if you’ve run out of other ingredients (or would rather use the eggs for breakfast!), it’s cost effective, it’s allergy friendly to share with others, and you’re getting extra nutrients + fibre from the linseed. The other fabulous thing about linseed as an egg replacement is that it makes cakes and breads beautifully moist.

My inspiration for this recipe came from finding potato flakes in a bulk foods store and wondering what I could do with them. I gather from the internet that in some countries (like the USA) it’s reasonably common to find potato flakes or instant mashed potato at the supermarket; elsewhere, have a hunt in bulk food and health food stores.

Directions

Note: This is a thick batter and you’ll get the smoothest batter by using a food processor. You can also use a big mixing bowl and electric hand mixer but in that case you’ll want to go a bit slower (i.e. egg, beat, egg, beat, etc. and alternate the potato & dry ingredients) to blend & aerate it.

  1. Pre-heat oven to 180’C.
  2. Prepare your egg replacement. Use a bowl or mug, put in 4T ground linseed and 6T hot water. Mix and then leave it, for 5-10 mins, until needed (this gives the seeds time to absorb the water) it turns into a stretchy liquid that’s a bit thicker than egg.
  3. Mix up your mashed potato. You can use a bowl, put in 1c of potato flakes, and then slowly add 3/4 – 1 cup of boiling water while stirring until smooth. It turns into mashed potato very quickly.
  4. Slowly add 1c of hot water to the mashed potato stirring carefully to create a smooth liquid.
  5. In the food processor, blend the oil, sugar, and vanilla until smooth.
  6. Add the linseed (egg-replacement) and blend.
  7. Add the liquidy potato.
  8. Add the flour, baking powder, baking soda, salt, cocoa, cinnamon and blend till smooth.
  9. Pour into a silicon cake tin.
  10. Cook for 25 min and check (a knife is likely to come out sticky); cook for another 15 mins and check (a knife is now likely to come out clean). Turn the oven off and leave the cake inside for another 10 minutes. Pull cake out and place on bench to cool.
  11. Dust with icing sugar.

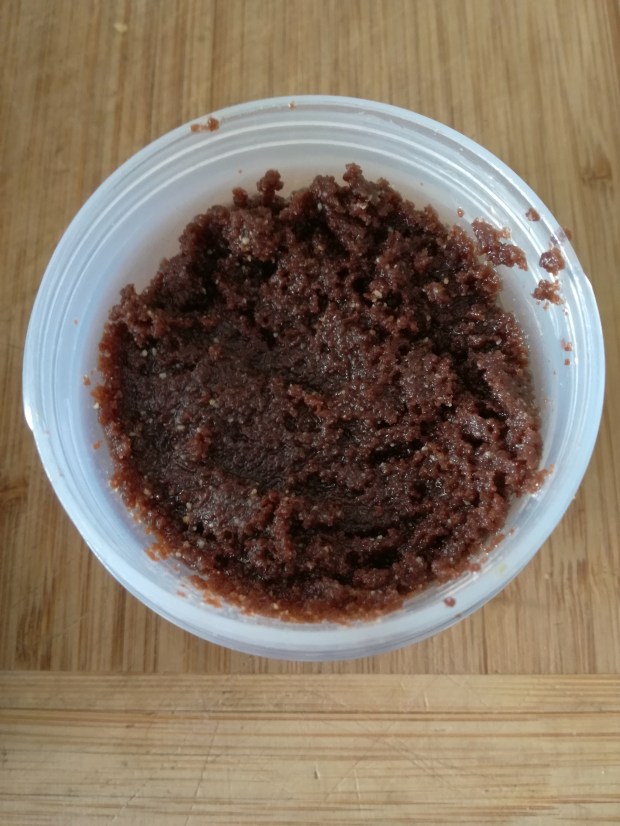
This comes out as a beautifully moist, rich, chocolatey cake.

Alternatives:

  • If anyone successfully plays around with coconut flour/sugar, let me know. I wonder if it would turn out like a gluten-free Bounty Bar cake.
  • If you like coffee consider adding 2T dark roasted instant coffee when adding the dry ingredients.
  • For birthdays or special occasions, try splitting the batter between two cake tins. Layer the cakes with cherry, plum, or raspberry jam in between and a thick chocolate frosting on top.
  • For another allergy friendly chocolate cake, check out this Depression-Era Chocolate cake.

How to make chocolate peanut butter

wp-1485155114616.jpg

Oops – too thick to get smooth in the little pulser. It needs the food processor!

Ingredients

  • 2c (300g) shelled peanuts
    • I used 1/2c for my mini-batch; you probably want to do 2 cups at a time if you’re using it regularly.
  • 1/2 tsp salt
  • 2T oil
    • You may want to use peanut oil. I used rice bran oil.
  • 1/2c (45g) cocoa powder
  • 1 1/2c (170g) powdered sugar

Allergies: soy free, dairy free, gluten free, tree nut free, contains peanuts.

For smooth peanut butter, click here.

My first attempt to make chocolate peanut butter ran into a power problem. I was trying to make a mini-batch in the pulser and the addition of cocoa + honey made it to thick for the motor. I was able to make something warm and delicious for dessert (that tasted like a Snickers bar) but it needed a full size batch in the actual food processor to make it smooth. I have therefore borrow quantities from InspiredTaste.

Directions

  1. Roasting gives the peanut butter more flavour. You can choose whether you want to buy roasted peanuts or roast them yourself (if purchasing pre-roasted, check the type of oil that has been used if you have a soy allergy). Roasting gives the peanut butter more flavour and helps to loosen the oils inside the peanuts to blend into a smoother butter.
    • Heat the oven to 180’C / 350’F and toast the peanuts on a baking sheet till they are golden and glossy with oil. This will take about 10 mins.
  2. Put peanuts, a pinch of salt, and a teaspoon of oil into a food processor.
    • Note: I used a little pulser/grinder but that will only cope with 1/2c peanuts.
  3. Blend for about a minute and then scrape down the sides with a plastic spatula. You’ll find it starts off looking a bit like crumbly breadcrumbs – this is normal!
  4. Blend again until shiny and smooth.
    • Add a teaspoon of oil at a time if you’re finding it dry.
  5. Add salt to taste (and sweetness if you prefer).

The whole process is really quick and will make smooth peanut butter.If you prefer crunchy peanut butter that’s easy too. Put only 1/3c of the peanuts into the blender to start and pulse until they’re chopped into tiny pieces; pull them out and reserve for later. Use the rest of the peanuts to make smooth peanut butter and then stir your crunchy bits back in.

Making your own peanut butter (turns out it’s easy!)

Home-made peanut butter & linseed bread

Ingredients

  • Shelled peanuts
    • I used 1/2c for my mini-batch; you probably want to do 2 cups at a time if you’re using it regularly.
    • Salt
    • Oil
    • Optional: sugar, maple syrup, or honey if you prefer it sweet.

Allergies: soy free, dairy free, gluten free, tree nut free, contains peanuts.

Commercial peanut butters often contain vegetable oil blends so check carefully if you have a soy allergy or make your own 🙂 We discovered this the hard way!

Directions

  1. Roasting gives the peanut butter more flavour. You can choose whether you want to buy roasted peanuts or roast them yourself (if purchasing pre-roasted, check the type of oil that has been used if you have a soy allergy). Roasting gives the peanut butter more flavour and helps to loosen the oils inside the peanuts to blend into a smoother butter.
    • Heat the oven to 180’C / 350’F and toast the peanuts on a baking sheet till they are golden and glossy with oil. This will take about 10 mins.
  2. Put peanuts, a pinch of salt, and a teaspoon of oil into a food processor.
    • Note: I used a little pulser/grinder but that will only cope with 1/2c peanuts.
  3. Blend for about a minute and then scrape down the sides with a plastic spatula. You’ll find it starts off looking a bit like crumbly breadcrumbs – this is normal!
  4. Blend again until shiny and smooth.
    • Add a teaspoon of oil at a time if you’re finding it dry.
  5. Add salt to taste (and sweetness if you prefer).

The whole process is really quick and will make smooth peanut butter.If you prefer crunchy peanut butter that’s easy too. Put only 1/3c of the peanuts into the blender to start and pulse until they’re chopped into tiny pieces; pull them out and reserve for later. Use the rest of the peanuts to make smooth peanut butter and then stir your crunchy bits back in.

Prawn Fried Rice


Ingredients

  • 2c cooked rice (refrigerated from previous day)
  • 1 1/2c frozen vegetables
  • 1 1/2c prawns
  • Dried ginger
  • Sliced green onion
  • Sugar
  • Salt
  • Fish sauce
  • Oil (I like rice bran oil)
  • optional: coriander, chilli, lime slices.

This is the kind of recipe that you may want to make on the spur of the moment because you have leftover rice, or it may be something that you prep the night before so that you can whip up lunch or dinner the next day quickly.

In terms of prep time, the rice needs to have been cooked and cooled long enough. This changes it to resistant starch which will help it to stir fry. My personal preference is basmati rice (both for taste and that it holds together well in a wok); I made this with long grain white rice and it worked well enough but some of the cooked grains for break apart.

My prawns were frozen so I had both those and the veggies covered on the bench for the afternoon to defrost. They were cool when they went in the wok but not frozen so this leads to a quick cooking time.

Tip: I find that sliced green onion freezes well. I portion it out in little bags and then pull it out as needed for stir fries and pizza.

Allergies: soy free, dairy free, egg free, peanut free, treenut free, gluten free. May not be suitable for people with fish or shellfish allergies.

Directions

  1. Cook your rice the day before. Personally, I like to use the rice cooker with water, salt, and rice bran oil.  As your rice cools give it a bit of a fluff (easier if you’ve used some oil in the cooking) and put it in the fridge to cool overnight.
  2. Prepare your vegetables. If you’re using frozen veggies then it’s a good idea to put them in the fridge at the same time as the rice so that it can defrost overnight. Alternatively, you might want to use something like grated carrot.
  3. Prepare your prawns. If frozen, make sure that they’ve defrosted slowly. Give them a rinse and pat dry.
  4. When you’re ready to cook, heat your wok nice and hot with some oil.
  5. Add the prawns and a pinch or two of ginger.
  6. Prawns aren’t as temperamental as squid but they don’t need a long cook time. About 5 minutes for prawns (and less if using shrimp instead).
  7. Add your vegetables.
  8. Add the rice. Keep moving it around to separate and coat the grains.
  9. Add a dash of fish sauce. Add sugar and salt to taste.
  10. Keep moving everything around so that it doesn’t stick; add more oil if needed.  Serve when hot through.
  11. Serve with condiments if desired (like chopped fresh coriander, fresh chillies, lime slices etc.).

Roast Pork Sirloin

Ingredients

  • Pork Sirloin roast
  • 4 crushed garlic cloves
  • 4 tsp chopped fresh rosemary / 2 tsp dried
  • 1 1/2 tsp salt
  • 1/2 tsp black pepper
  • Olive oil
  • Optional: potatoes, carrots, zucchini etc. to roast.

Allergies: soy free, egg free, peanut free, dairy free, gluten free.

Directions

  • Prepare any vegetables that you want to roast. Personally, I used potatoes, carrots, and zucchini. I was useless at cooking potatoes and avoided doing so (using kumara instead) until I learned the trick of parboiling them (or similar). I chop them up and put them in the steamer in the microwave for about 10 minutes to give them a bit of a head start before placing them in the roasting pan.  You can brush the veggies lightly with olive oil before placing the pork on top – they just need a touch to keep from drying out before the fat from the pork starts to drip out.
  • Mix the garlic, rosemary, salt, and pepper together. Moisten with a dash of olive oil. Rub it all over the pork.  Optional: I’m told that if you like garlic, you can also cut small slits in the pork fat and stick whole garlic cloves in to get some yummy roast garlic.
  • Place the fat side down. Place it on top of the potatoes etc. if you have any in the pan.
    • NOTE: I was rather puzzled when I read the initial recipe I was using as my pork roast was rolled and tied with string – it had fat all over! I shrugged and just chose a side to face up. Turns out this was an error (check out the photos below). If your roast is rolled up, cut the string and lay it flat with the fat facing the bottom of the pan. One end will be thicker as this cut is basically pork sirloin chops + pork belly.
  • Cook at 200’C for 30mins.
  • Check on the veggies and turn the roast over so that the fat is now on top. Roast for 25 mins.
  • Remove and stand for 10 minutes.

So… I’d never cooked one of these before and the rolled pork did seem to resemble the photo I saw on the internet. I didn’t realize that the string was supposed to be cut and the meat lay flat so the cooking (and learning) process took much longer than expected. My main concern was that the pork would dry out (a near thing!) so I was doing a lot of checking and basting towards the end. I also began to appreciate why some of my friends have a meat thermometer rather than needing to slice into the meat to check.

dav

I steam my potatoes in the microwave for about 10 mins before putting in the roasting pan.

Oops – I put the pork in rolled up (as it came). The veggies cooked but the pork was still pink when I unrolled it. All I’d managed to do in an hour was to start cooking the fat on each side of the roll!

Rolling it out flat the meat and fat finally began to cook. After another 30 mins at 200’C there was definitely progress. By this point I was hungry and decided to speed things along.

I trimmed off the fat (just leaving a thin layer to provide moisture). I cooked it for about 20 mins at 180’C (basting regularly) and then grilled it to brown the thin layer of fat.

dav

All turned out well in the end with a good collection of roast pork.

dav

The fat I continued to cook to make crackling. The rendered fat and juices can be made into gravy or you can collect the fat as lard. Lard can be used for lots of things, for instance frying potatoes.

Excess roast pork can be frozen and kept for later meals such as pork fried rice or making pizza.

Smashed avocado (easy avocado dip)


This is an easy dip to make that is great to eat outside in the garden paired with home made crackers.

Ingredients

  • 1 large avocado
  • 1T olive oil
  • 1T lemon juice
  • Salt to taste

Note: This is an easy recipe to scale to the number of people you’re serving. If you’re using a small avocado then change the olive oil & lemon juice from a Tablespoon (15ml) to a dessert spoon (10ml).

Allergies: soy free, gluten free, dairy free, egg free, nut free.

Directions

  1. Scoop out the avocado with a spoon.
  2. Smash up with a fork.
  3. Mix in olive oil, lemon juice, and salt.


Allergies: soy free, dairy free, egg free, peanut free.

Mum’s Spiced Fruit Loaf


This is a fabulous recipe and a firm family favourite. It’s also very versatile and can be used to make child sized cakes (in silicon cupcake cases) or miniature christmas cakes (in muffin trays). It also freezes well.

Ingredients

Group 1

  • 1/2c sugar
  • 50g butter or 60ml rice bran oil
  • 1c sultanas
  • 1c chopped dates
  • 1T golden syrup or maple syrup
  • 1 1/4c water

Group 2

  • 1 1/2 tsp  ground ginger
  • 1 tsp cinnamon
  • pinch nutmeg
  • 1/4 tsp ground coriander
  • 1/2c chopped walnuts (optional)
  • 1/2 tsp vanilla
  • 1/4 tsp salt

Group 3

  • 2c flour (or gluten free baking mix)
  • 1 tsp Baking Soda
  • 1 tsp Baking Powder

Allergies: dairy free, soy free, egg free, gluten free*, nut free*.

Directions

  1. Place Group 1 in pot. Boil; then simmer for 5 minutes. Remove from heat and allow to cool.
  2. Stir in Group 2.
  3. Ideally allow to cool to room temperature (this takes several hours) as this allows the dried fruit time to soak.
  4. Grease and line loaf tin. Preheat oven to 180’C.
  5. Stir in Group 3.
  6. Bake for 1 hour or until skewer comes out smooth.
  7. Cool in tin for 15 minutes before turning out onto wire rack.

Notes

I use a greased silicon loaf tin and often cook a smaller portion in silicon cupcake cases at the same time (for my toddler); the cupcake-sized cakes only take about 15 mins to cook.

This is a versatile recipe. Sometimes I have my toddler help me assemble all of Group 1 and 2 in the pot before I put it on to heat; sometimes I only give the fruit mix 5-10 mins to cool before adding the dry ingredients and cooking it. Sometimes I’ll do the fruit mix after my toddler’s midday nap, let it cool all afternoon, and then put it in to cook after dinner (when the oven is already warm); I’ve also allowed the fruit to soak all night and then cooked it in the morning.

I’ve made this a number of times and varied ingredients (while essentially keeping to the base recipe); i.e. using 1/2c sultanas and 1/2c cranberries; having no walnuts; using coconut thread instead of walnuts; using 1c mixed nuts (smashed) + coconut + melted chocolate + extra water (this is the one pictured).

Walnuts are a soft nut that are easy to smash and chew. I’ve made this using a nut mix (predominantly walnuts & almonds with some hazelnuts and brazil nuts) because it was on special – the other nuts just take a bit more effort to smash. If you have a young baby or toddler then you may want to leave the nuts out until they’ve grown all their molars and are comfortable chewing nuts.  I’ve found the ideal way for us to smash nuts is to put them in a plastic bag and have my toddler enthusiastically whack them with her toy hammer!

Allergies: Soy free, peanut free, egg free, dairy free (replace butter with oil).


Grilled pork with strawberry balsamic glaze


This is a great way to use strawberries that are still fresh but a little bruised. It’s also nice to use them in a savoury dish for a change – especially if you’ve been eating lots after going strawberry picking! It met with toddler approval 🙂

This recipe does create rather more dishes than I’d normally prefer so is best if both mother and child are feeling happy, healthy, and relaxed. If you’re looking for a last minute quick and easy meal when you’re both feeling tired or stressed then I suggest Welsh Rarebit.

Ingredients

  • 400-500g pork to oven grill (i.e. pork chops, sirloin steak, tenderloin etc.)
  • Bacon strips (optional)
  • Olive oil
  • 2 tsp crushed garlic
  • 1/3c balsamic vinegar
  • 2/3c sliced strawberries
  • Salt and pepper
  • Potatoes (optional)

Allergies: soy free, dairy free, gluten free, egg free, nut free.

Directions

  1. I served this dish with roast potatoes so I started with those knowing they would take the longest to cook. My preference is to cut the potatoes and pre-cook them in a microwave steamer. Then place them in a roasting dish lined with baking paper and baste with a little olive oil.
  2. Take the pork and sear at a high heat for 1-2 minutes on each side.
    • The purpose of this is to help seal moisture into the pork so it’s worth taking the time for the extra step.
  3. Place pork in the roasting dish with the potatoes. Wrap the pork in the bacon strips. The bacon isn’t essential to the recipe but if you happen to have it then it’s a tasty addition! I’ve read recipes that suggest the bacon also helps the pork to retain it’s moisture (but mainly it’s tasty).
  4. Bake the pork at 180’C for 30 mins.
  5. While the pork is cooking start on the strawberry glaze.
    • In a pot (or glass Pyrex jug) heat olive oil and garlic.
    • Add balsamic vinegar and 1/3c strawberries (reserve the rest of the strawberries).
    • Bring to the boil. Then simmer for 10 mins (stirring occasionally).
    • Add salt and pepper to taste.
    • Add remaining 1/3c strawberries.
  6. Baste the pork and then grill till the bacon is crispy. (I flipped it and grilled it on both sides).
  7. Serve with remaining strawberry sauce, roast potatoes, and greens. Freshly picked basil also goes well if you happen to be growing some on the windowsill.

Allergy: Egg free, peanut free, dairy free, soy free.

wp-1483342237839.jpgwp-1483342254410.jpg

Welsh Rarebit


This is such a wonderful comfort food. It’s tasty, quick and easy to make (even with a grumpy toddler), and a cheap meal to make if these are the kind of staples you have at home. You’re also likely to end up with leftover cheese sauce that you can use the next day (make mince & cheese pie, lasagne, nachos, or just serve with baked beans or broccoli!).

I also have to confess that I normally mispronounce this and tell my toddler that we’re eating Welsh Rabbit.

Ingredients

  • 4 slices thick bread (can use gluten free bread)
  • 250g strong cheddar cheese
    • (I have had this turn out fine with a mild colby so don’t stress if you don’t have something stronger).
  • 100ml milk
    • (apparently you can replace this with light ale but I haven’t tried)
  • 25g butter
  • 1 beaten egg
  • 1T plain flour (or superfine white rice flour)
  • 1T mustard
    • (I like Dijonnaise)
  • Paprika
  • Worcestershire sauce (optional)
  • Dried onion (optional)

Allergies: soy free, gluten free*, nut free.

Directions

  1. Lightly toast bread.
    • (If soft it will go soggy).
  2. In pot on a low heat, melt cheese + milk + butter.
  3. Turn heat to medium and stir in egg.
  4. Add flour and stir swiftly until fully mixed.
  5. Take off heat. Add mustard; dash in Worcestershire sauce (if desired); add a dash of paprika (or you can sprinkle on top once spread); mix in dried onion (if desired).
  6. Butter toast and lay on baking tray.
  7. Spoon cheese sauce onto toast. Sprinkle on paprika (if not already mixed in).
  8. Grill until cheese goes golden and starts to bubble.


Optional:  You can add ham, cooked bacon, anchovies, or warm baked beans to the bread before spreading the cheese sauce. Remember that everything needs to be warm and cooked before it goes under the grill!

Allergy: peanut free; soy free*.

Note: This can be made soy free as long as you’re careful to select soy free ingredients.


Egg Fried Rice without Soy Sauce


Ingredients

  • 2c cooked rice (refrigerated from previous day)
  • 1c frozen peas & corn (refrigerated from previous day)
  • 2 eggs
  • Sliced green onion
  • Sugar
  • Salt
  • Chicken stock powder
  • Oil (I like rice bran oil)
  • optional: fish sauce, chilli, lime slices.

Note: Instead of sugar and salt, you can use 1/2 – 1T of coconut amino acids to achieve a similar umami flavour to soy sauce.

You can play with ingredients, i.e. consider chopped ham or bacon, bbq pork, char siu pork, shrimps etc. You want everything to be cut small and to be pre-cooked; you are essentially heating everything through. It’s important that the rice needs to have been cooked earlier, cooled and been fluffed, and then completely chilled in the fridge (cooling for 12 hours changes the type of starches the rice contains).

This is the kind of recipe that you may want to make on the spur of the moment because you have leftover rice, or it may be something that you prep the night before so that you can whip up lunch or dinner the next day quickly.

Allergies: soy free, dairy free, gluten free, peanut free.

Directions

  1. Cook your rice the day before. Personally, I like to use basmati rice in the rice cooker with water, salt, and rice bran oil. Today I used 80% basmati and 20% black rice; this has the fun visual side-effect of dying the basmati a dark purple colour! As your rice cools give it a bit of a fluff (easier if you’ve used some oil in the cooking) and put it in the fridge to cool overnight.
  2. Prepare your vegetables. If you’re using frozen veggies (I used a mix of peas, corn, cubed carrots, and small cut beans) then it’s a good idea to put them in the fridge at the same time as the rice so that it can defrost overnight. Alternatively, you might want to use something like grated carrot.
  3. When you’re ready to cook, heat your wok nice and hot with some oil.
  4. Crack two eggs and scramble them. You can choose either to: (A) cook them as an omelette, take it out and cut into strips, and re-add once the rice is in, or (B) add the rice when the eggs are almost cooked and break the eggs into small pieces while moving the rice grains around.
  5. Add the rice. Keep moving it around to separate the grains and break the egg up.
  6. Add stock powder, sugar, and salt to taste. (You may also want to add a dash of fish sauce).
  7. Add your vegetables (and any pre-cooked meat).
  8. Keep moving everything around so that it doesn’t stick; add more oil if needed.  Serve when hot through.
  9. Serve with condiments if desired (like dried shallots, dried or fresh chillies, lime slices etc.)


Why not use soy?

You may not like the taste of soy, or may dislike the sodium content; for us, it’s because of a soy allergy. Salt and sugar (I prefer brown) can be found in a variety of soy free fried recipes as way of substituting for the salty flavour of the soy sauce and also providing a dash of sweetness.