Roast Pork Sirloin

Ingredients

  • Pork Sirloin roast
  • 4 crushed garlic cloves
  • 4 tsp chopped fresh rosemary / 2 tsp dried
  • 1 1/2 tsp salt
  • 1/2 tsp black pepper
  • Olive oil
  • Optional: potatoes, carrots, zucchini etc. to roast.

Allergies: soy free, egg free, peanut free, dairy free, gluten free.

Directions

  • Prepare any vegetables that you want to roast. Personally, I used potatoes, carrots, and zucchini. I was useless at cooking potatoes and avoided doing so (using kumara instead) until I learned the trick of parboiling them (or similar). I chop them up and put them in the steamer in the microwave for about 10 minutes to give them a bit of a head start before placing them in the roasting pan.  You can brush the veggies lightly with olive oil before placing the pork on top – they just need a touch to keep from drying out before the fat from the pork starts to drip out.
  • Mix the garlic, rosemary, salt, and pepper together. Moisten with a dash of olive oil. Rub it all over the pork.  Optional: I’m told that if you like garlic, you can also cut small slits in the pork fat and stick whole garlic cloves in to get some yummy roast garlic.
  • Place the fat side down. Place it on top of the potatoes etc. if you have any in the pan.
    • NOTE: I was rather puzzled when I read the initial recipe I was using as my pork roast was rolled and tied with string – it had fat all over! I shrugged and just chose a side to face up. Turns out this was an error (check out the photos below). If your roast is rolled up, cut the string and lay it flat with the fat facing the bottom of the pan. One end will be thicker as this cut is basically pork sirloin chops + pork belly.
  • Cook at 200’C for 30mins.
  • Check on the veggies and turn the roast over so that the fat is now on top. Roast for 25 mins.
  • Remove and stand for 10 minutes.

So… I’d never cooked one of these before and the rolled pork did seem to resemble the photo I saw on the internet. I didn’t realize that the string was supposed to be cut and the meat lay flat so the cooking (and learning) process took much longer than expected. My main concern was that the pork would dry out (a near thing!) so I was doing a lot of checking and basting towards the end. I also began to appreciate why some of my friends have a meat thermometer rather than needing to slice into the meat to check.

dav

I steam my potatoes in the microwave for about 10 mins before putting in the roasting pan.

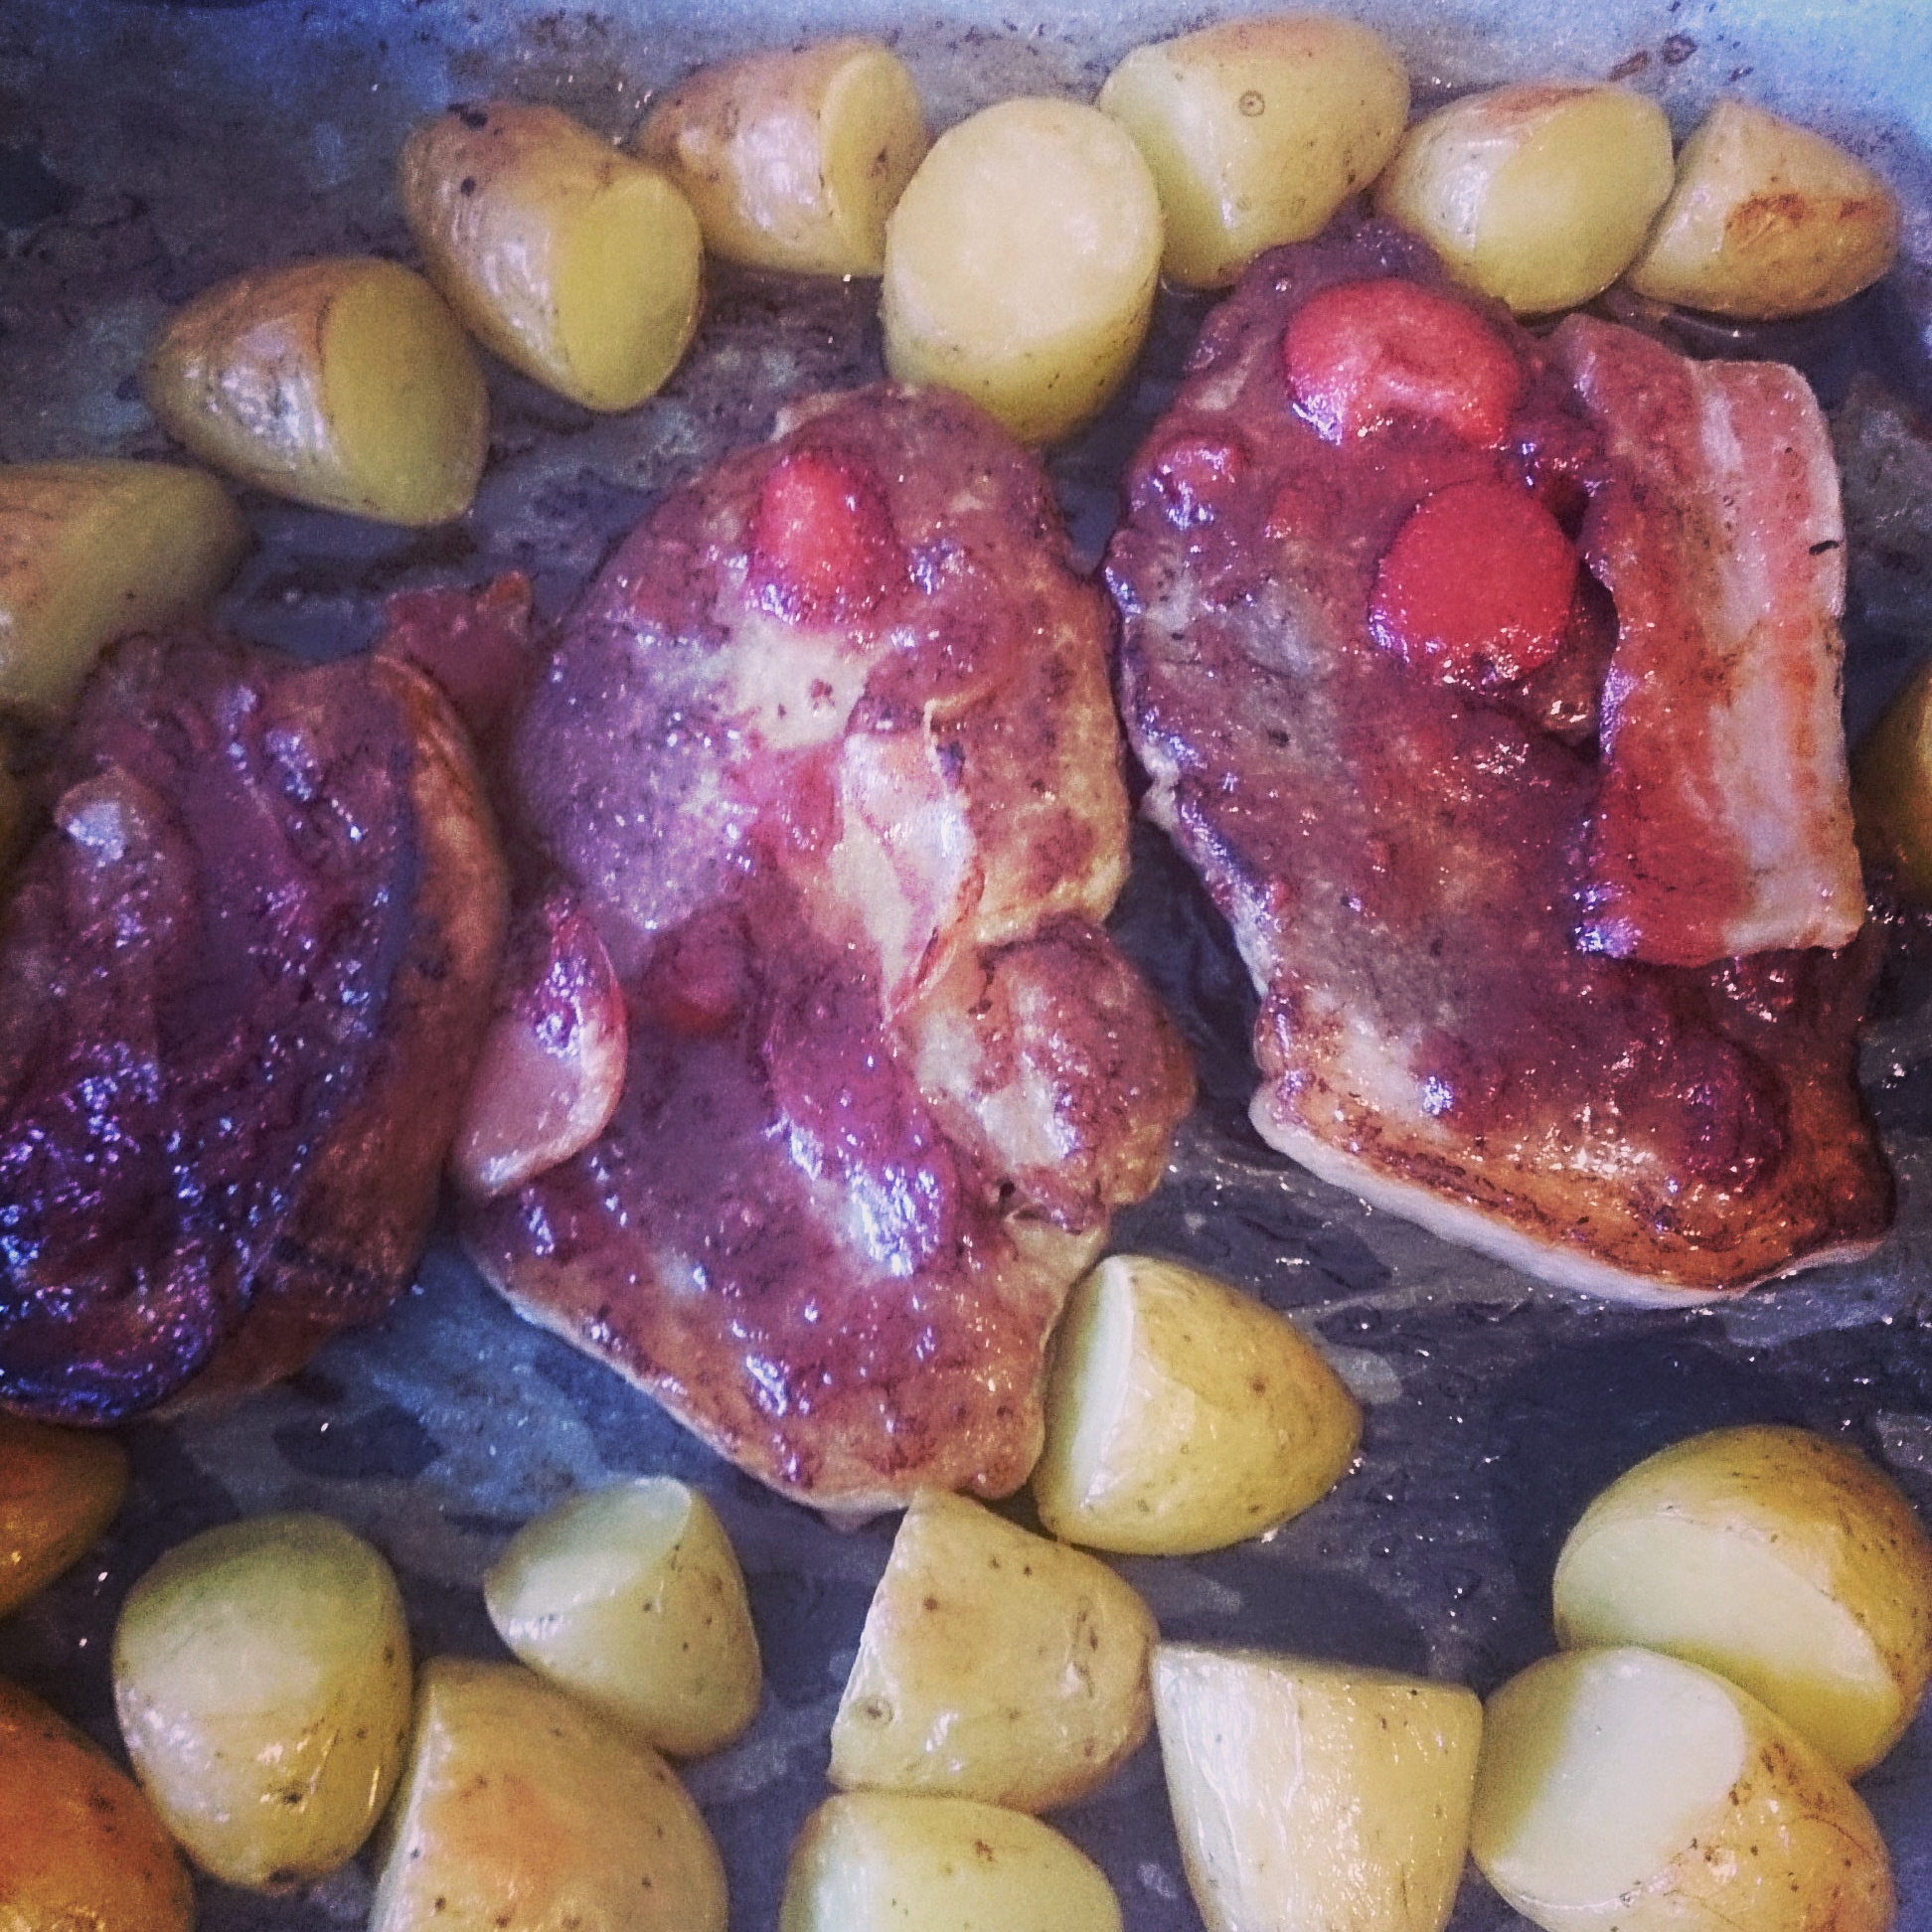
Oops – I put the pork in rolled up (as it came). The veggies cooked but the pork was still pink when I unrolled it. All I’d managed to do in an hour was to start cooking the fat on each side of the roll!

Rolling it out flat the meat and fat finally began to cook. After another 30 mins at 200’C there was definitely progress. By this point I was hungry and decided to speed things along.

I trimmed off the fat (just leaving a thin layer to provide moisture). I cooked it for about 20 mins at 180’C (basting regularly) and then grilled it to brown the thin layer of fat.

dav

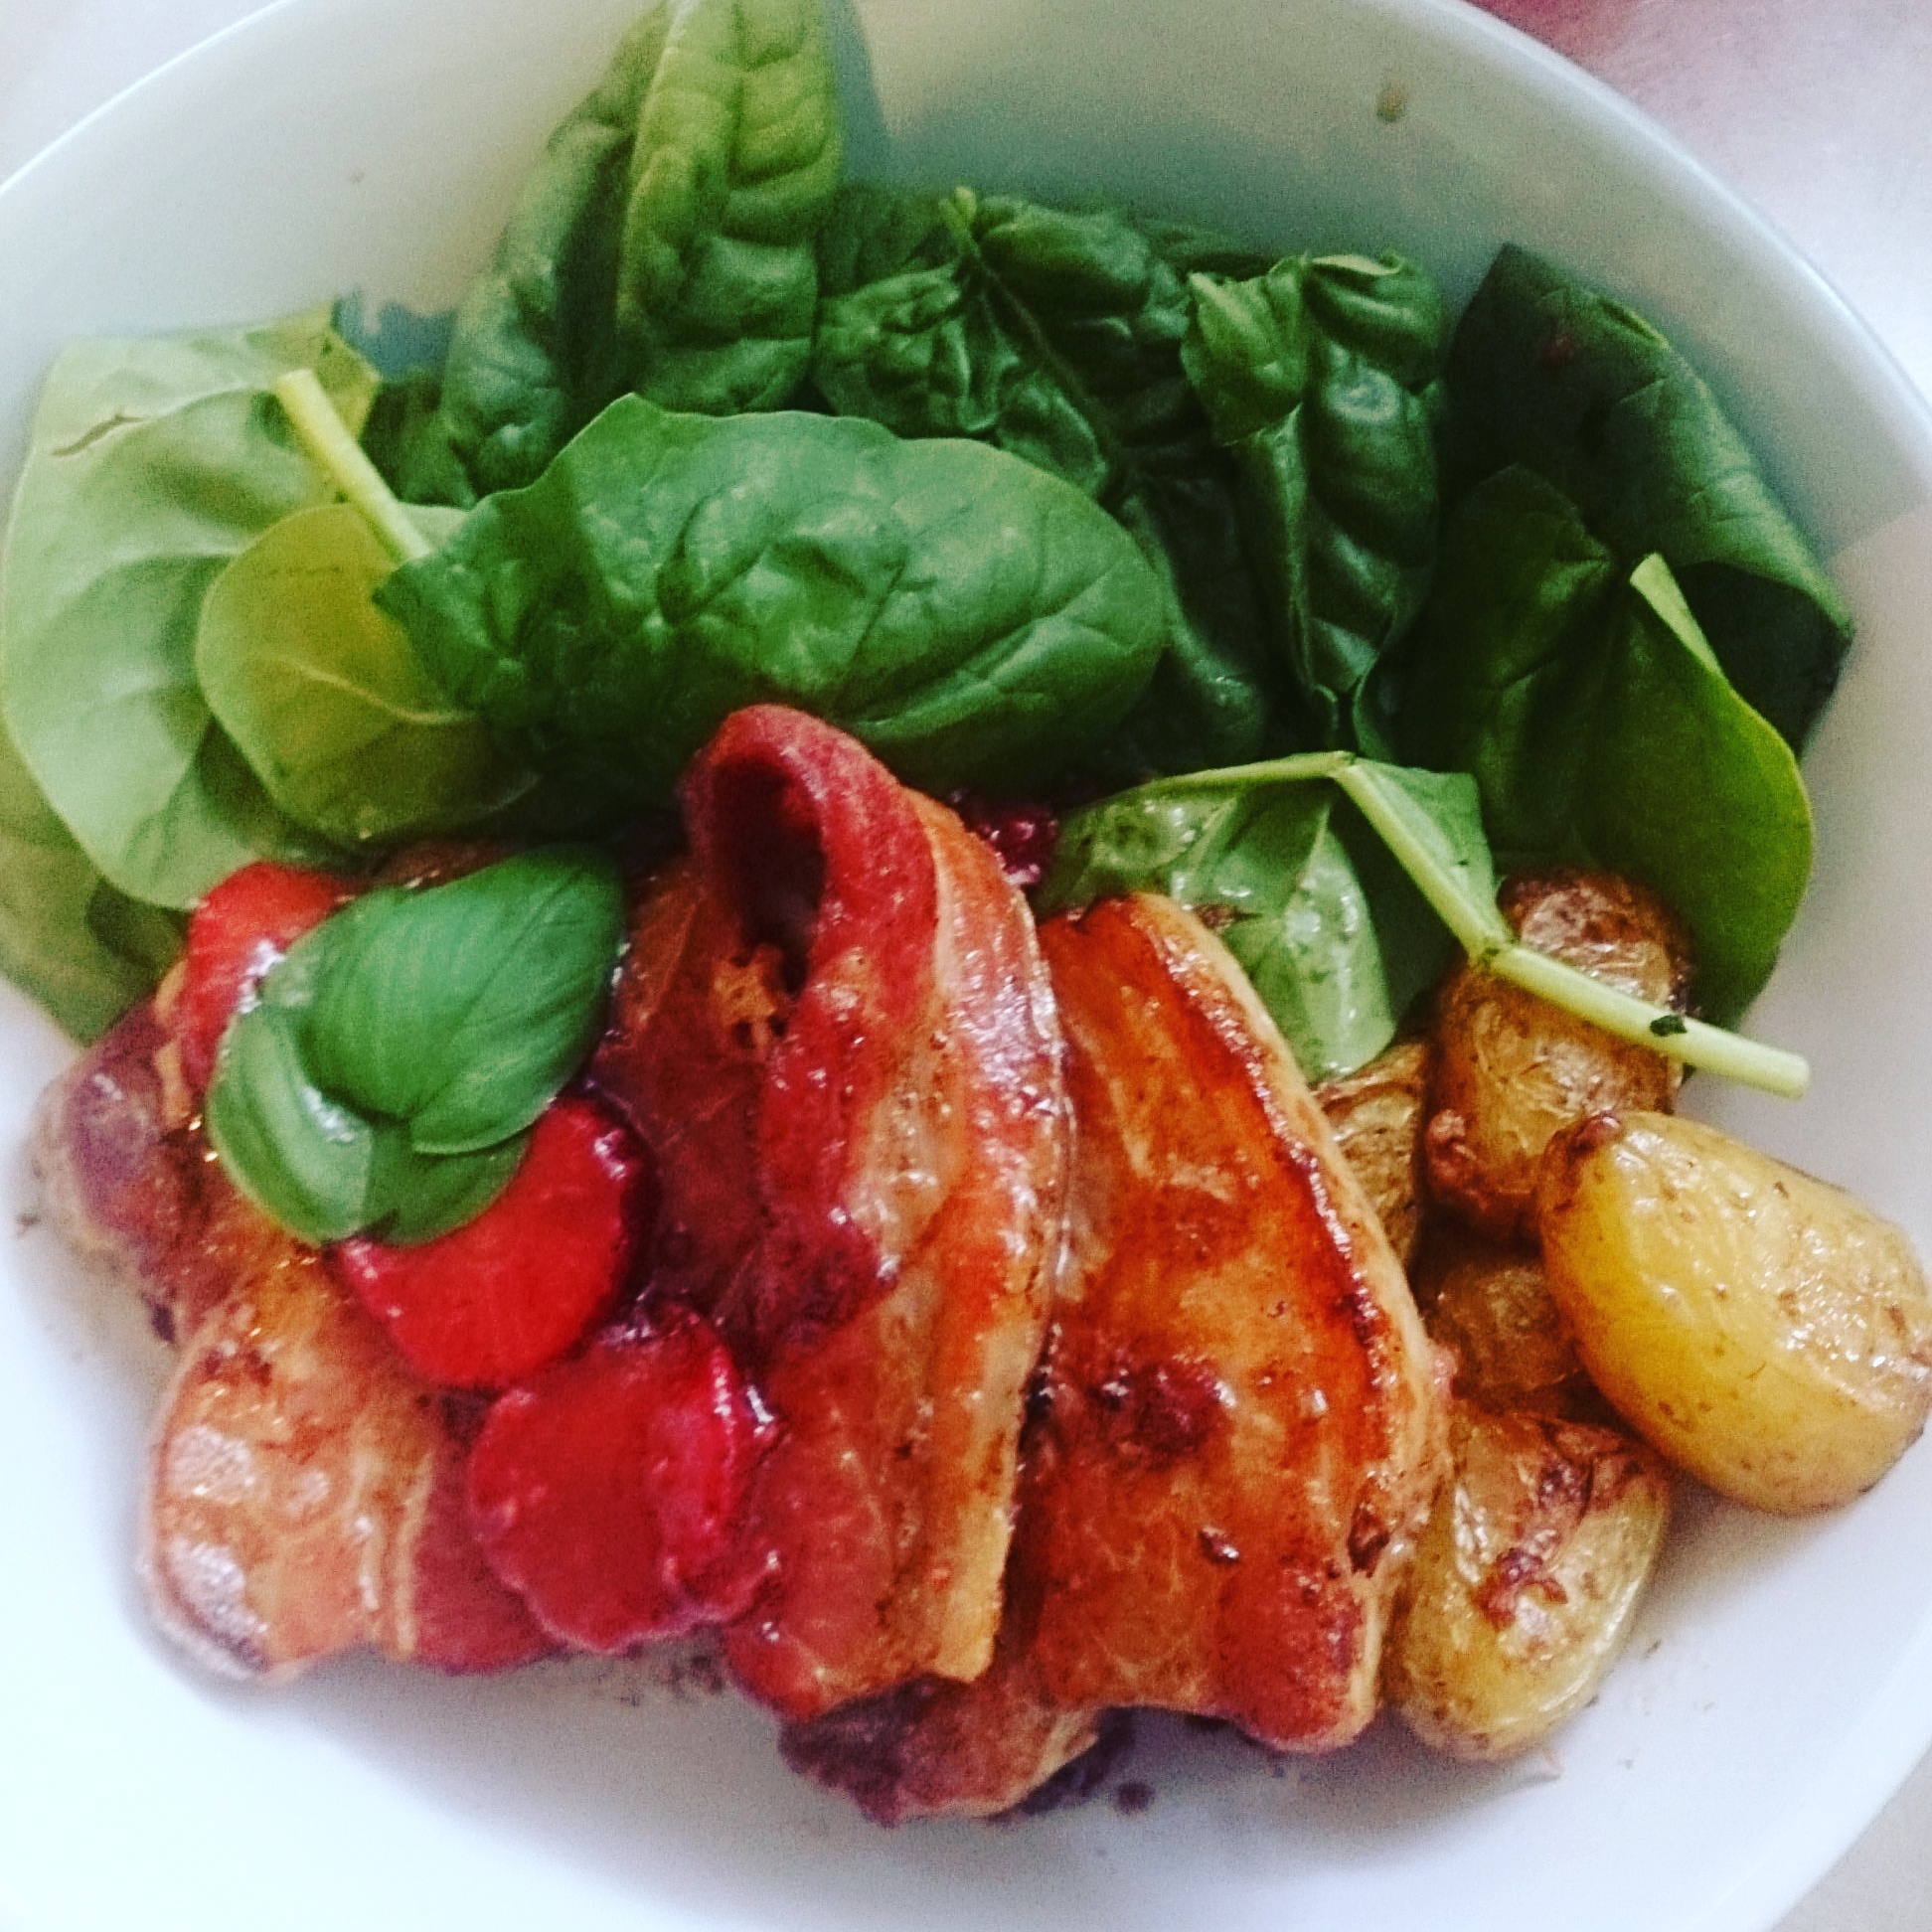
All turned out well in the end with a good collection of roast pork.

dav

The fat I continued to cook to make crackling. The rendered fat and juices can be made into gravy or you can collect the fat as lard. Lard can be used for lots of things, for instance frying potatoes.

Excess roast pork can be frozen and kept for later meals such as pork fried rice or making pizza.

How to have fresh basil cheaply in the kitchen

I’ve tried multiple times to grow basil in the garden with visions of making my own pesto. My problem every time is that the snails think it is delicious and voraciously eat them before my culinary visions can come to pass.
I’ve discovered that it’s far more realistic to simply grow a pot of basil (or in my case basil & one emergency lettuce) on the kitchen window sill. That way you’ll at least have enough basil for topping pizza or spaghetti bolognese (and it smells good too!).

Smashed avocado (easy avocado dip)


This is an easy dip to make that is great to eat outside in the garden paired with home made crackers.

Ingredients

  • 1 large avocado
  • 1T olive oil
  • 1T lemon juice
  • Salt to taste

Note: This is an easy recipe to scale to the number of people you’re serving. If you’re using a small avocado then change the olive oil & lemon juice from a Tablespoon (15ml) to a dessert spoon (10ml).

Allergies: soy free, gluten free, dairy free, egg free, nut free.

Directions

  1. Scoop out the avocado with a spoon.
  2. Smash up with a fork.
  3. Mix in olive oil, lemon juice, and salt.


Allergies: soy free, dairy free, egg free, peanut free.

Mum’s Spiced Fruit Loaf


This is a fabulous recipe and a firm family favourite. It’s also very versatile and can be used to make child sized cakes (in silicon cupcake cases) or miniature christmas cakes (in muffin trays). It also freezes well.

Ingredients

Group 1

  • 1/2c sugar
  • 50g butter or 60ml rice bran oil
  • 1c sultanas
  • 1c chopped dates
  • 1T golden syrup or maple syrup
  • 1 1/4c water

Group 2

  • 1 1/2 tsp  ground ginger
  • 1 tsp cinnamon
  • pinch nutmeg
  • 1/4 tsp ground coriander
  • 1/2c chopped walnuts (optional)
  • 1/2 tsp vanilla
  • 1/4 tsp salt

Group 3

  • 2c flour (or gluten free baking mix)
  • 1 tsp Baking Soda
  • 1 tsp Baking Powder

Allergies: dairy free, soy free, egg free, gluten free*, nut free*.

Directions

  1. Place Group 1 in pot. Boil; then simmer for 5 minutes. Remove from heat and allow to cool.
  2. Stir in Group 2.
  3. Ideally allow to cool to room temperature (this takes several hours) as this allows the dried fruit time to soak.
  4. Grease and line loaf tin. Preheat oven to 180’C.
  5. Stir in Group 3.
  6. Bake for 1 hour or until skewer comes out smooth.
  7. Cool in tin for 15 minutes before turning out onto wire rack.

Notes

I use a greased silicon loaf tin and often cook a smaller portion in silicon cupcake cases at the same time (for my toddler); the cupcake-sized cakes only take about 15 mins to cook.

This is a versatile recipe. Sometimes I have my toddler help me assemble all of Group 1 and 2 in the pot before I put it on to heat; sometimes I only give the fruit mix 5-10 mins to cool before adding the dry ingredients and cooking it. Sometimes I’ll do the fruit mix after my toddler’s midday nap, let it cool all afternoon, and then put it in to cook after dinner (when the oven is already warm); I’ve also allowed the fruit to soak all night and then cooked it in the morning.

I’ve made this a number of times and varied ingredients (while essentially keeping to the base recipe); i.e. using 1/2c sultanas and 1/2c cranberries; having no walnuts; using coconut thread instead of walnuts; using 1c mixed nuts (smashed) + coconut + melted chocolate + extra water (this is the one pictured).

Walnuts are a soft nut that are easy to smash and chew. I’ve made this using a nut mix (predominantly walnuts & almonds with some hazelnuts and brazil nuts) because it was on special – the other nuts just take a bit more effort to smash. If you have a young baby or toddler then you may want to leave the nuts out until they’ve grown all their molars and are comfortable chewing nuts.  I’ve found the ideal way for us to smash nuts is to put them in a plastic bag and have my toddler enthusiastically whack them with her toy hammer!

Allergies: Soy free, peanut free, egg free, dairy free (replace butter with oil).


Grilled pork with strawberry balsamic glaze


This is a great way to use strawberries that are still fresh but a little bruised. It’s also nice to use them in a savoury dish for a change – especially if you’ve been eating lots after going strawberry picking! It met with toddler approval 🙂

This recipe does create rather more dishes than I’d normally prefer so is best if both mother and child are feeling happy, healthy, and relaxed. If you’re looking for a last minute quick and easy meal when you’re both feeling tired or stressed then I suggest Welsh Rarebit.

Ingredients

  • 400-500g pork to oven grill (i.e. pork chops, sirloin steak, tenderloin etc.)
  • Bacon strips (optional)
  • Olive oil
  • 2 tsp crushed garlic
  • 1/3c balsamic vinegar
  • 2/3c sliced strawberries
  • Salt and pepper
  • Potatoes (optional)

Allergies: soy free, dairy free, gluten free, egg free, nut free.

Directions

  1. I served this dish with roast potatoes so I started with those knowing they would take the longest to cook. My preference is to cut the potatoes and pre-cook them in a microwave steamer. Then place them in a roasting dish lined with baking paper and baste with a little olive oil.
  2. Take the pork and sear at a high heat for 1-2 minutes on each side.
    • The purpose of this is to help seal moisture into the pork so it’s worth taking the time for the extra step.
  3. Place pork in the roasting dish with the potatoes. Wrap the pork in the bacon strips. The bacon isn’t essential to the recipe but if you happen to have it then it’s a tasty addition! I’ve read recipes that suggest the bacon also helps the pork to retain it’s moisture (but mainly it’s tasty).
  4. Bake the pork at 180’C for 30 mins.
  5. While the pork is cooking start on the strawberry glaze.
    • In a pot (or glass Pyrex jug) heat olive oil and garlic.
    • Add balsamic vinegar and 1/3c strawberries (reserve the rest of the strawberries).
    • Bring to the boil. Then simmer for 10 mins (stirring occasionally).
    • Add salt and pepper to taste.
    • Add remaining 1/3c strawberries.
  6. Baste the pork and then grill till the bacon is crispy. (I flipped it and grilled it on both sides).
  7. Serve with remaining strawberry sauce, roast potatoes, and greens. Freshly picked basil also goes well if you happen to be growing some on the windowsill.

Allergy: Egg free, peanut free, dairy free, soy free.

wp-1483342237839.jpgwp-1483342254410.jpg

Welsh Rarebit


This is such a wonderful comfort food. It’s tasty, quick and easy to make (even with a grumpy toddler), and a cheap meal to make if these are the kind of staples you have at home. You’re also likely to end up with leftover cheese sauce that you can use the next day (make mince & cheese pie, lasagne, nachos, or just serve with baked beans or broccoli!).

I also have to confess that I normally mispronounce this and tell my toddler that we’re eating Welsh Rabbit.

Ingredients

  • 4 slices thick bread (can use gluten free bread)
  • 250g strong cheddar cheese
    • (I have had this turn out fine with a mild colby so don’t stress if you don’t have something stronger).
  • 100ml milk
    • (apparently you can replace this with light ale but I haven’t tried)
  • 25g butter
  • 1 beaten egg
  • 1T plain flour (or superfine white rice flour)
  • 1T mustard
    • (I like Dijonnaise)
  • Paprika
  • Worcestershire sauce (optional)
  • Dried onion (optional)

Allergies: soy free, gluten free*, nut free.

Directions

  1. Lightly toast bread.
    • (If soft it will go soggy).
  2. In pot on a low heat, melt cheese + milk + butter.
  3. Turn heat to medium and stir in egg.
  4. Add flour and stir swiftly until fully mixed.
  5. Take off heat. Add mustard; dash in Worcestershire sauce (if desired); add a dash of paprika (or you can sprinkle on top once spread); mix in dried onion (if desired).
  6. Butter toast and lay on baking tray.
  7. Spoon cheese sauce onto toast. Sprinkle on paprika (if not already mixed in).
  8. Grill until cheese goes golden and starts to bubble.


Optional:  You can add ham, cooked bacon, anchovies, or warm baked beans to the bread before spreading the cheese sauce. Remember that everything needs to be warm and cooked before it goes under the grill!

Allergy: peanut free; soy free*.

Note: This can be made soy free as long as you’re careful to select soy free ingredients.


Egg Fried Rice without Soy Sauce


Ingredients

  • 2c cooked rice (refrigerated from previous day)
  • 1c frozen peas & corn (refrigerated from previous day)
  • 2 eggs
  • Sliced green onion
  • Sugar
  • Salt
  • Chicken stock powder
  • Oil (I like rice bran oil)
  • optional: fish sauce, chilli, lime slices.

Note: Instead of sugar and salt, you can use 1/2 – 1T of coconut amino acids to achieve a similar umami flavour to soy sauce.

You can play with ingredients, i.e. consider chopped ham or bacon, bbq pork, char siu pork, shrimps etc. You want everything to be cut small and to be pre-cooked; you are essentially heating everything through. It’s important that the rice needs to have been cooked earlier, cooled and been fluffed, and then completely chilled in the fridge (cooling for 12 hours changes the type of starches the rice contains).

This is the kind of recipe that you may want to make on the spur of the moment because you have leftover rice, or it may be something that you prep the night before so that you can whip up lunch or dinner the next day quickly.

Allergies: soy free, dairy free, gluten free, peanut free.

Directions

  1. Cook your rice the day before. Personally, I like to use basmati rice in the rice cooker with water, salt, and rice bran oil. Today I used 80% basmati and 20% black rice; this has the fun visual side-effect of dying the basmati a dark purple colour! As your rice cools give it a bit of a fluff (easier if you’ve used some oil in the cooking) and put it in the fridge to cool overnight.
  2. Prepare your vegetables. If you’re using frozen veggies (I used a mix of peas, corn, cubed carrots, and small cut beans) then it’s a good idea to put them in the fridge at the same time as the rice so that it can defrost overnight. Alternatively, you might want to use something like grated carrot.
  3. When you’re ready to cook, heat your wok nice and hot with some oil.
  4. Crack two eggs and scramble them. You can choose either to: (A) cook them as an omelette, take it out and cut into strips, and re-add once the rice is in, or (B) add the rice when the eggs are almost cooked and break the eggs into small pieces while moving the rice grains around.
  5. Add the rice. Keep moving it around to separate the grains and break the egg up.
  6. Add stock powder, sugar, and salt to taste. (You may also want to add a dash of fish sauce).
  7. Add your vegetables (and any pre-cooked meat).
  8. Keep moving everything around so that it doesn’t stick; add more oil if needed.  Serve when hot through.
  9. Serve with condiments if desired (like dried shallots, dried or fresh chillies, lime slices etc.)


Why not use soy?

You may not like the taste of soy, or may dislike the sodium content; for us, it’s because of a soy allergy. Salt and sugar (I prefer brown) can be found in a variety of soy free fried recipes as way of substituting for the salty flavour of the soy sauce and also providing a dash of sweetness.


Mediterranean Lamb for the slow cooker


Ingredients

  • 400g lamb (small cubes)
  • Marinade:
    • 1/2 tsp cayenne pepper
    • 1/2 tsp black pepper
    • 1 tsp paprika
    • 2 tsp ground ginger
    • 1 tsp tumeric
    • 1/2 tsp cinnamon
    • 1 tsp cumin seeds
    • 1 tsp coriander
    • 1 tsp garlic flakes
    • 1 tsp honey
    • 1-2 T oil
  • 2T plain flour (or superfine white rice flour)
  • 1-2 T tomato paste
  • 1 onion (diced)
  • 1 large carrot (grated)
  • 1-2 T tomato paste
  • Dried dates, dried sultanas, dried apricots (or use 1/2 – 1 tin apricot halves).
  • Flaked almonds
  • 1/2c chicken stock

Directions

  1. Marinade the lamb overnight in the fridge (I marinade mine in the ceramic slow-cooker pot).
  2. In the morning you can brown the meat if you want but I always skip that step for sake of convenience and dishes!
  3. Add the rest of the ingredients in order and mix as you go. The exception is the apricots, I used tinned apricots (because they’re cheaper) and they can get added 30-60 mins before you finish cooking.
  4. Turn the slow cooker on. I put mine on around 8am on Low and then checked it periodically to add a little more water (I wanted to keep the consistency to thick gravy but you can add more liquid as per preference).
  5. Serve with your choice of carbs and veggies. If you’re in a rush then couscous is very quick, or you could choose rice or noodles; personally, I love the opportunity to make fluffy dumplings in the slow cooker so I made a double batch of cheese-garlic-mixed herb dumplings 🙂


As always, adjust the recipe to your personal taste. You can easily add more meat or a legume of your choice (i.e. chickpeas); don’t be put off by the long spice list if you don’t have all those in the pantry, there are lots of spice blends available at the supermarket if you prefer.

Allergens: Soy free (do check the chicken stock carefully though or use home made), dairy free, egg free, gluten free, nut free.


Crazy One-Dish Chocolate Cake!

wordpress-11

I love this chocolate cake recipe (you can also use it to make cupcakes) because it’s allergy friendly, vegan friendly, and toddler friendly (everything gets mixed and cooked in one dish!). There’s no eggs, dairy, soy, or nuts, and it can be made using gluten-free flour.

I found the recipe thanks to Happy Mum Happy Child and apparently it’s based on a Depression-era recipe when dairy was hard to get hold of.

INGREDIENTS :

  • 1 1/2 cups all-purpose flour (or gluten free plain flour)
  • 3 tablespoon cocoa powder
  • 1 cup sugar
  • 1 tsp baking soda
  • 1/2 teaspoon salt
  • 1 teaspoon white vinegar
  • 5 tablespoons oil (I use rice-bran oil)
  • 1 cup cold coffee (or use water)
  • 1 teaspoon vanilla essence

DIRECTIONS:
Preheat oven to 190 degrees Celsius. Combine all dry ingredients in a greased 20 x 20cm baking pan (that’s right, in the dish you’re baking it in).
Make 3 depressions (holes) in the dry ingredients. You want there to be two small ones, and one large one.
Pour the vinegar into one of the small holes, and the vanilla into the other small hole.
Add the vegetable oil to the large one.
Pour the cold coffee (or water) over the entire thing and mix until smooth and combined (I used a wooden spoon).
Bake for 25-30 minutes, or until a skewer comes out clean.
Once cooled, ice or lather in caramel syrup and enjoy with whipped cream.


Allergens: soy free, dairy free, nut free, egg free, can be made gluten free (replace the flour with gf flour).

Beautiful fluffy dumplings

Accredit to: French Tart.

I stumbled upon this recipe one day when looking for something to add to a slow-cooker stew and they were beautiful! The secret is using really cold butter (chilled or frozen) and grating it into the flour.

Ingredients

  • 120g self-raising flour
  • 60g chilled/frozen grated butter (or suet)
  • Cold water to mix
  • Salt & pepper to season
  • Optional: parsley, dried herbs, grated cheese, garlic granules, onion powder, chilli powder etc.
  1. Put the flour, seasonings, & suet in a large mixing bowl, mix thoroughly.
  2. (If you are adding herbs or extra seasonings, add them now & mix well.).
  3. Add sufficient cold water – bit by bit – to make a pliable dough; it should not be too sticky, but just bound together.
  4. Divide the dumpling mixture into 8 portions, and roll into small balls with floured hands.
  5. Drop them into your soup, casserole or stew 20 minutes before the end of the cooking time, making sure that the soup, stew or casserole is very hot.
  6. Put the lid on IMMEDIATELY and do NOT take the lid off until just before the end of the cooking time, about 15-18 minutes to check that they are nearly ready.
  7. They should have doubled in size at least, and be very light & fluffy looking!
  8. Ladle the soup, stew or casserole into warmed soup bowls & serve 2 dumplings per person.
  9. Oven baked: place the dumplings on top of your stew or casserole and cook for about 30 minutes at 200’C or 400’F, or until well risen, golden brown & crusty.


Allergens: soy free, egg free, peanut free.