Featuring a great Autumn vegetable: What’s a choko (chayote)?

I grew up thinking chokos were some kind of wild New Zealand native – simply because I have fond memories of going for long winter walks with my Mum in the local park. We’d gather chokos from wild vines, pick up pine cones to paint, and kick oak leaves. In retrospect, that park didn’t have much in the way of NZ natives!

Note: In the wild, make sure that you don’t confuse chokos with Moth Plant – a noxious weed that grows in New Zealand and definitely should not be eaten. Check out this online information pamphlet from Auckland Council.

What is a choko?

The choko (or cheyote) actually originates from Mesomerica (i.e. Mexico, Costa Rica, Honduras) but has been established in Australia and New Zealand for decades. It’s a member of the gourd family, Cucurbitaceae, which means it’s related to foods like cucumber, squash, and melon. Personally, I think it tastes a bit like a cross between a zucchini and cucumber but it’s commonly referred to as a pear squash. It’s a useful vegetable to try as it has loads of Vitamin C, amino acids, and fibre. It’s also low in natural food chemicals (amines, salicylates, and glutamates) which makes it suitable for sensitive guts, and those following a RPAH Failsafe diet (often useful for allergy sufferers).

Tip: This is a great food if you’re pregnant! It naturally contains folate, as well as many other vitamins; is easy to mix into meals, and the fibre can help with pesky constipation!

Note: Other names for choko include – chayote, sayote, labu siam, seemai kathrikai, Buddha’s Hand Melon, lóng xü.cài, ishkus, इस्कुस, স্কোয়াশ, Bangalore brinjal, chou chou, pipinola.

How do I cook choko?

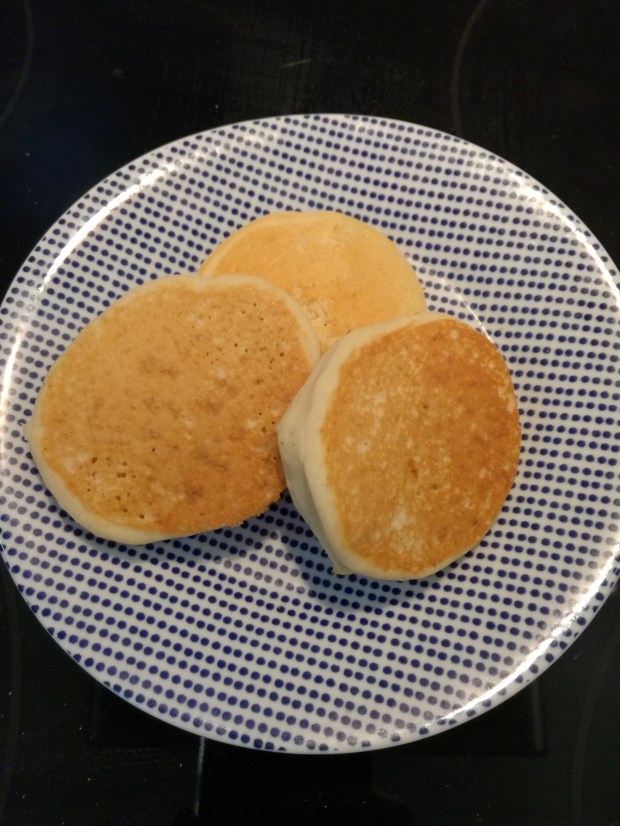
It’s a really versatile vegetable! Miss 2 loves it in apple pie style Choko Pikelets.

  • It makes a great (neutral) filler in jams and chutneys.
  • It can be stewed and made into fruit crumble.
  • Boil or steam then serve with butter and salt.
  • Slice thinly into noodles, cook, and serve with ragu for a paleo meal.
  • Bake with roast vegetables.
  • Add to curries, stews, and soups.
  • Bread it and fry.
  • Bake it with a cheese sauce.
  • Thinly grate it and mix with pork to make Chinese dumplings, sausage rolls, or meatballs.
  • Young leaves can be used in salads and stir fries.
  • The root or tubers can be used just like a potato!

Tip: Peel the chokos under a stream of running water or wear gloves as the older chokos tend to have a sticky sap just under the skin which can irritate some hands. The smaller ones don’t seem to have this problem and you can cook them and eat them with the skin on.

Tip: Remove and discard the pithy core.

Note: Although I call this a winter vegetable, in New Zealand it tends to be available April-June. If your local supermarket doesn’t stock it, try Fruit & Vegetable stores or the local Chinese supermarket. It actually prefers warm climates but hot nights slow it flowering; in parts of Australia it’s available year round.

How can I grow choko?

I asked around a few garden stores and none of them carry it. Never fear, the easiest way to grow your own choko is to simply buy a healthy, fresh, firm and green choko while they’re in season. Leave it in a dark, well ventilated, space until it sprouts. Once the sprouts are about 7cm long, take it outside and plant it in a sunny spot. They are a climbing vine so against a fence or netting is ideal. You will need to wait until frosts have finished (so in some climates, plant in Spring).

They grow prolifically once they’re established so you’ll probably only need one vine per household.  Apparently they make great chicken feed so you may want a spare vine for the chooks!

In New Zealand, where they can often only be purchased until June, you will need to nurse these inside until late Spring. They will take a while to sprout anyway and then you can keep them in a pot on the windowsill until they’re a bit bigger and hardier. They will start to flower in the summer and can be harvested in Autumn.

For more information on growing them, check out this great post from Lady Rain.

Gluten Free Vanilla Cookies

Gluten Free Vanilla Cookies

Gluten Free Vanilla Cookies are the base recipe for making Pina Colada Cookies!

These Gluten Free vanilla biscuits (UK) / cookies (USA) are a light crunchy cookie that I don’t think most people realize are gluten free when eating them! They’re also the base recipe for variations, like the GF Pina Colada cookie recipe that will be publishing soon!

Ingredients

  • 1/2 cup + 1 Tbsp superfine white rice flour
  • 1/2 cup Healtheries Gluten Free Bread Mix
  • 2 tsp Baking Powder
  • 1/2 cup sugar
  • 3 Tbsp butter or allergy-free spread (i.e. Nuttelex)
  • 1 egg (whisked) or egg replacement.
  • Vanilla Essence

Allergies: gluten free, dairy free*, egg free*, soy free, nut free.

Directions

  1. Cream the ‘butter’ and sugar.
  2. Mix in the egg and several drops of vanilla essence.
  3. Mix in the rice flour, GF bread mix, baking powder.
  4. Spoon out onto lightly oiled baking tray and flatten slightly.
  5. Bake at 180’C for approx. 15-20 mins (or until golden brown).

Makes approximately 12 cookies.


Note: There are several reasons that I choose to use the Healtheries Gluten Free Bread Mix instead of the Healtheries Gluten Free Baking Mix.

I prefer to use guar gum in my recipes and avoid xanthan gum; the latter is artificially derived and is often grown on an allergenic base (such as corn, soy, or wheat).

I like to control the rising agents in my baking so that I can tailor them to each recipe.

Frugality! The Bread Mix can be used to make both Gluten Free Bread and Gluten Free Baking whereas their Baking Mix can only be used for baking.

Crispy Pork Belly

Crispy Pork Belly

Ingredients

Liquid marinade

  • 3/4c Chinese cooking rice wine
  • 1T balsamic vinegar
  • 2 1/2T coconut amino acids
  • 1T lemon juice (or 1 lime)
  • 2 tsp ground ginger
  • 3 garlic cloves (sliced)
  • 1 sliced red chilli
  • 1 tsp Chinese Five Spice
  • 1 tsp ground cinnamon
  • 250 ml water

Everything else

  • 1-2 brown onions (cut into wedges)
  • Pork Belly
  • Neutral Oil (i.e. Rice Bran Oil)
  • Salt
  • Pepper
  • Water (added at intervals during cooking)

Allergies: gluten free, soy free, dairy free, egg free, nut free

Directions

  1. Preheat the oven to 220’C.
  2. In a big roasting pan, mix up the liquid marinade.
  3. Cut the onion(s) into wedges and place in a line in the pan. There needs to be enough onion to cut as a support for the pork belly. It will help to moisten the meat and also act as a structural support to keep the crackling raised up out of the jus.
  4. Prepare the pork belly. You will need a very sharp knife in order to score it; I like doing a diamond pattern. This is important not only for helping it to cook but also for cutting it up later in order to serve! Dry the pork belly, apply a little oil over the top, then rub in salt. Crack some pepper over the top as well (if desired).
  5. Place the pork belly onto the foundation of onions (with the fat on top).
  6. Cook at 220’c for 30-40 minutes or until the rind has crackled.
  7. Add 1/2c water to the liquid in the bottom of the pan. Reduce oven heat to 160’C and cook for another hour.
  8. Add 1/2c water to the liquid in the bottom of the pan. Continue cooking at 160’C for approximately another 60 minutes or until the pork is very tender.
  9. Reserve some of the juices to drizzle over the pork when serving. Consider serving with green vegetables and steamed rice. (I chopped up bok choy and other greens, lightly braised them in the marinade, and stir fried before serving as a side dish with the onion, chilli, garlic etc.).

Superhero Smoothie (allergy free)

Superhero smoothie

Superhero smoothie

Today’s smoothie recipe is free from the top 8 allergens and Miss 2 asked for more (even though it has vegetables in it – bwahaha!). It’s also a great way to get some healthy fats and foods into your system when you’re recovering from the flu and can’t cope with the idea of making soup from scratch!

Ingredients

  • 200ml coconut milk
  • 200ml water
  • 4-6 ice cubes
  • 1 ripe banana
  • 2 slices mango
  • 1/3 cup baby spinach
  • 1 tsp ground chia seeds
  • 1 tsp ground linseed (flaxseed)
  • Optional: drizzle of maple syrup

Optional: Since your smoothie is going to be green anyway, you may want to add 1 tsp of Healtheries Super Greens Smoothie Booster.

Tip: Have the coconut milk in the fridge (or add less water & more ice) so that this will be chilled once blended,

Allergies: gluten free, dairy free, soy free, egg free, nut free.

Directions

  1. Put everything in a blender and blend till smooth!
    • Tip: Most blenders will work more effectively if you put the liquids in first.
  2. Serve immediately while it’s chilled.


Nana’s Yummy Gluten Free Pikelets

Yummy Gluten Free Pikelets

Yummy Gluten Free Pikelets (light & fluffy)

Ingredients

Dry

  • 1/2 cup superfine white rice flour
  • 1/2 cup  Healtheries Gluten Free Bread Mix
    • Note: this already contains guar gum.
  • 1/4 cup sorghum flour
  • 1T sugar
  • Optional: 1T Maple Syrup
  • 1 1/2 tsp Baking Powder
  • Pinch salt

Liquid

  • 1/2 cup rice milk
  • 1 egg
  • few drops vanilla essence
  • 1 Tbsp rice bran oil

(Have more rice milk available.)

Allergies: dairy free, gluten free, soy free, nut free.

Directions

  1. Whisk the wet ingredients until frothy.
  2. Combine the dry ingredients and then mix in the frothed wet ingredients.
  3. Slowly mix in additional rice milk until you have a smooth consistency.
  4. Allow mixture to stand for a few minutes (it will thicken up).
  5. Heat a non-stick frying pan over medium heat. Wait until it is hot and then brush with butter or allergy-free spread (like Nuttelex).
  6. Drop level tablespoonfuls of the mixture into the pan and cook for half a minute or until bubbles appear on the surface.
  7. Turn over and cook other side for 1 minute until golden.
  8. Allow to cool and serve with butter / spread and honey or jam.


Note: There are several reasons that I choose to use the Healtheries Gluten Free Bread Mix instead of the Healtheries Gluten Free Baking Mix.

I prefer to use guar gum in my recipes and avoid xanthan gum; the latter is artificially derived and is often grown on an allergenic base (such as corn, soy, or wheat).

I like to control the rising agents in my baking so that I can tailor them to each recipe.

Frugality! The Bread Mix can be used to make both Gluten Free Bread and Gluten Free Baking whereas their Baking Mix can only be used for baking.

Home Remedy Porridge for sore throats and enflamed guts

Home Remedy Porridge

Home Remedy Porridge with Slippery Elm

This is a great recipe for helping your toddler (or adult) to eat when they’ve been vomiting, had diarrhoea,  have a sore throat, have food allergies, or have reflux. It’s also a useful recipe to try after surgery, i.e. for removing adenoids or tonsils. It also pairs well with the rehydration tonic.

Slippery elm can  help relieve inflammatory bowel conditions so it’s also useful for

  • Crohn’s disease, ulcerative colitis, and irritable bowel syndrome (IBS).

You may also want to try this as a baby food if your baby or toddler needs to be gluten free.

Ingredients

  • 1 1/2 Tbsp Quinoa Flour
  • 1 1/2 Tbsp Brown Rice Flour
  • 1 cup Rice Milk
  • Optional: 1 tsp Slippery Elm
  • Optional: boiling water
  • Optional: Maple Syrup

Allergies: gluten free, dairy free, soy free, egg free, nut free.

Directions

  1. Mix everything in a pot and cook over high heat (stir regularly).
  2. Bring it to a boil and then turn down low. Keep stirring regularly and add more liquid (either rice milk or boiling water) to keep a good consistency.
    • If you have an upset gut then it’s best to include the slippery elm. The slippery elm absorbs water so you will need to slowly add liquid while the porridge is cooking.
  3. Cook for approximately 5 minutes.
  4. Serve plain or as you generally like your porridge. I like this with a little maple syrup stirred in.

How to make a rehydration electrolyte drink at home (for sports or sickness)

Failsafe Rehydration Therapeutic Tonic

Failsafe Rehydration Therapeutic Tonic

I’ve just been posting about how Miss 2 and I were rushed to hospital by ambulance – her with croup and me with gastro. This Failsafe Rehydration Tonic is from Sue Dengate’s book about understanding food. It’s an easy to make Gastrolyte style solution to rehydrate after vomiting, diarrhoea, or when you’ve been too sick to eat. It’s a handy recipe to have for both adults and sick kids! It can also be used for fitness and wellness reasons after training or after sports – it’s much better for you (and cheaper) than commercial drinks that are packed with preservatives and artificial colours.

Ingredients

  • 1 litre boiled water
  • 2 Tbsp sugar
  • 1/4 tsp salt
  • 1/4 tsp baking soda (sodium bicarbonate)


Directions

  1. Mix well.
  2. Sip regularly.

What is croup and how does it effect toddlers?

What does croup look like in toddlers?

What does croup look like in toddlers?

Croup is a viral illness in young children which causes narrowing of the upper airways. Croup is often a mild illness but can quickly become serious, so do not hesitate to get medical help.

The funny thing about croup is that it’s like the vampire of toddler illnesses. During the day it may not have a visible impact beyond your toddler eating little (and lets face it sometimes they do want to live on air and crayons) and sounding hoarse.  Daytime clues to croup might be largely losing one’s voice, eating little, a sensation like a slight obstruction in the throat, difficulty swallowing, and a mild temperature.

Toddlers have softer windpipes than older children so it’s often when they lie down to sleep that the narrowed airways will become more apparent. Their breathing may start to wheeze and become progressively more of a struggle; it can also cause a strange cough (stridor). What does a croup cough sound like in a two year old? It sounds a bit like a lion purring or a seal bark; personally I think stridor sounds most like a lion coughing up a fur ball.  The animal metaphors might sound cute but the cough can be so loud that it’s enough to travel between rooms and wake you up at night; it can also be frightening if it’s the first time you’ve heard it and you have no idea what it means!

For many children, croup will be a mild illness (which can recur) and which can be treated at home. For others, they need to see a doctor or require urgent medical care. In New Zealand there is a registered nurse available 24/7 to provide free health advice on Healthline (0800 611 116); they can help assess your child and advise whether to ring for an ambulance or wait to see a doctor the next morning.

Personally, I think that croup is worse for children that have allergies. In fact, as well as viral croup, there is also a form of spasmodic croup which may be caused by Gastric Reflux Disease (GERDs) or by allergies. I’ve also read blog posts from other allergy families where croup has become a recurrent problem for their toddllers.

For us, it involved night time difficulties with breathing and a croup cough. On ringing Healthline, I was advised to ring emergency services. A triage nurse did an assessment over the phone and dispatched an ambulance.  We spent the night in the Emergency Ward as she required oral steroids, monitoring for fever, and to remain semi-upright to provide relief for airways. Recovery at home took time, monitoring of airways, and a largely liquid / soft foods diet for a few days.

I continue to feel that croup can be a much more serious illness for families with medically fragile children – including food allergies, airborne/environmental allergies, asthma, and reflux. Doctors will most commonly look for croup in babies and very young toddlers but plenty of allergy families have shared that their children have continued to have viral croup up to age 10!

NOTE – Thank you to all the readers that have shared their stories with me!

If you’re familiar with what a croup cough sounds like then do advocate on behalf of your child for medical care if it’s needed – you’re the one awake in the wee hours of the night hearing it (and they may not have the cough during the day)!  Don’t hesitate to ring for an ambulance at night if your child is struggling to breathe!

It’s worth investigating what charges there are for your local ambulance service and if they have a subscription service. If you live in New Zealand, it’s around NZD$90 for each medical emergency (non-ACC) call-out of a St John’s ambulance but you can get an annual ambulance subscription for the whole household for NZD$65 per year.

Cinnamon Playdough

Cinnamon Playdough

Cinnamon Playdough

Making playdough is something I love to do. Home-made playdough keeps better, is easier to wash out of carpet, and is better for your child. It also allows you to experiment with pleasing scents and natural colours.

Cinnamon makes a lovely light brown and is gently scented. Add ground ginger and you have Gingerbread playdough!

Ingredients

  • 1c plain flour
  • 1/4c salt
  • 1T cream of tartar
  • 1T oil
  • 1T cinnamon
  • 1c boiling water

Note: This makes a small batch, just double if you want a big batch.

Directions

  1. Mix dry ingredients.
  2. Mix in oil.
  3. Slowly add boiling water. (You may not need all of. It should be smooth and pliable not sticky).
  4. Store in air tight container.

Candied Salted Caramel Pumpkin Seeds

Candied Salted Caramel Pumpkin Seeds

Candied Salted Caramel Pumpkin Seeds

I love this recipe! It’s a fantastic candied treat that’s great for parties and for holidays. If you have food allergies in the family, it’s also a great recipe to pass to grandparents who want to spoil the kids! It’s also ideal to take to kindergarten parties and pot lucks as it’s free of all major allergens!

Don’t be put off by the idea of pumpkin seeds – these are nothing like the raw ones that you get in salads. These are as different as corn is after it’s popped and are sweet, salty, and crunchy like M&Ms. They are dangerously addictive and are great eaten straight, sprinkled on fruit crumble, or on top of ice cream.

Ingredients

In the oven:

  • 2c pumpkin seeds
  • 2 1/2T sugar
  • 1/4 tsp cinnamon
  • 1/2 tsp ground ginger
  • Pinch nutmeg
  • 3T water
  • Oil for roasting dish

Caramel sauce

  • 1 1/2T allergy-free spread (i.e. Nuttelex) / butter
  • 2 1/2T brown sugar
  • 1 1/2 tsp salt

Allergies: gluten free, dairy free, soy free, egg free, nut free.

Note: If nut allergies are not a concern,this recipe will also work well with peanuts, cashews, and almonds.

Directions

  1. Pre-heat oven to 180’C and lightly oil a baking dish (I used a silicon flan / pie dish).
  2. Mix all of the oven ingredients together and pour into the baking dish. Note: the water is important because it helps the spices to stick to the pumpkin seeds (and the seeds will absorb the water a little as they puff up during cooking).
  3. Bake the pumpkin seeds for 20-25 mins until golden and crunchy.
  4. Once the pumpkin seeds are cooked, mix the caramel sauce ingredients together in a pot. Cook for 1-2 minutes until the ingredients have melted and turned a deep golden brown.
  5. Mix the caramel sauce and pumpkin seeds together until well coated. Spread on a tray and allow to  cool.