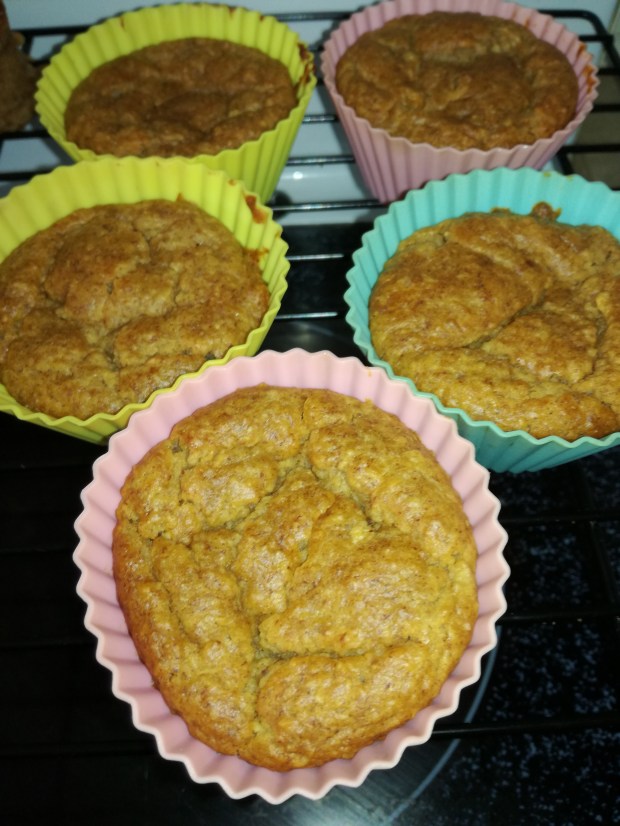
Apple Nut Muffins

Apple Nut Muffins

Apple Nut Muffins

These sweet treats are high in natural goodness and fruit fibres, do not contain refined sugar, and contain valuable trace minerals from the almond, brazil, and cashew nut butter.

There are a few different ways that you can make this recipe and I have endeavoured to include options without over-cluttering. Keep in mind when subbing ingredients whether it will impact the recipe overall; i.e. coconut oil or butter will solidify in cold temperatures and hold a gluten free version together better than rice bran oil; using almond meal rather than flour will give a substantially different texture.

Ingredients

  • 1 cup flour + 30g fine instant oats
  • 1 tsp baking powder
  • 1 tsp baking soda
  • 1/4 tsp salt
  • 1 1/2 ripe bananas (= 150g frozen sliced banana)
  • 2 apples peeled and quartered (= 350g intact apples)
  • 1/4 cup Almond Brazil Cashew nut butter (or almond butter).
  • 2 tsp Orgran egg replacer + 4 Tbsp water
    • OR: 2 flax eggs
    • OR: 2 eggs
  • 2 Tbsp coconut oil (melted)
    • OR: 2 Tbsp rice bran oil
    • OR: 2 Tbsp butter (soft)
  • 1/4 cup maple syrup
  • 1 Tbsp apple cider vinegar
  • Optional: 1 tsp cinnamon

Allergies: This recipe can be made gluten free, soy free, dairy free, egg free, peanut free. Contains tree nuts.

Directions

  1. Preheat the oven to 180’C / 350’F. Grease a muffin tray or cupcake liners.
  2. In a food processor, blend the banana and apple until smooth. (If you prefer a rougher texture, grate the apple instead and mix in at the end).
  3. Add the egg replacer (or eggs), coconut oil, ABC nut butter, and maple syrup. Pulse to combine.
  4. Add the flour, oats, baking powder, baking soda, salt, cinnamon (if using), and apple cider vinegar. Gently pulse to combine.
  5. Spoon your batter into the muffin trays and place in preheated oven.
  6. Cook for about 35 minutes. Check after 25 minutes (you may want to add tinfoil as a cover for the remainder).
  7. Take out of the oven and allow to cool for 10 minutes.

Gluten Free American-style jam donuts

I finally made the leap and purchased an NZD$29 Kmart Pie Maker. They are quite the internet phenomenon in part because they can be used for so many things other than pies. We decided to celebrate the purchase with family by making coealiac friendly american style donuts! They are delicious!

Allergy friendly jam donuts

Ingredients

  • 1 1/2 cup Healtheries Gluten Free Bread Mix
  • 1/2 cup rice flour
  • 3 tsp Baking Powder
  • 3/4 cup sugar
  • (Pinch salt)
  • 1 tsp ground cinnamon
  • 1 cup rice milk
  • 1 tsp vanilla essence
  • 2 eggs (beaten)
  • 30g Nuttelex or 1/4 to 1/2 cup rice bran oil
  • Squeeze of lemon (or 1 Tbsp apple cider vinegar).
  • Filling: jam, or maple syrup, or honey.

Allergies: gluten free, dairy free, soy free, nut free

Note: Although I made 12 in the pie maker (3 rounds) you could bake them in the oven in muffin trays instead. You’d probably want 375’F / 180’C for 20-25 mins.

Directions

  1. Mix the dry ingredients.
  2. Make a well in the middle. Add milk, vanilla, eggs, rice bran oil, lemon juice. Mix well.
  3. Allow mix to stand for a few minutes (the gluten free flours will thicken)
  4. 3/4 fill each space in the pie maker. Put a teaspoon of jam in the middle. Put a little more mix over the top.
  5. Cook for 8 minutes. Remove and place on cooling rack. Put the next batch on to cook. (Makes 12 donuts) .

Flourless Banana Pancakes

Gluten Free Banana Pancakes & Raspberry Compote

Gluten Free Banana Pancakes & Raspberry Compote

Miss 2 has gone off porridge recently, which is a shame as it’s a cheap, healthy, and filling gluten free breakfast. I wondered how else I might coax her into eating oats and made up these beautiful banana pancakes – she loved them! The idea of including variations was actually inspired by her as she asked for them again and wanted to know if we could make Peanut Butter banana pancakes.

This an easy recipe to make up (for breakfast, snack, or dinner) if you have food allergies in your family. I’ve made it sometimes as Miss 2’s dinner when we’ve had a particularly trying day and we both need some comforting. It’s also a cheap and easy recipe to teach teenage boys to make when they get home from school – more nutritious than filling up on white bread!

Tip: There are two ways that you can make this recipe; you can make it with fork mashed bananas + rolled oats for a more rustic texture or use a food processor to blend the banana smooth + use oat flour. I like to do the latter as I have a little (non-motorised) beater that I use and happen to have oat flour in the cupboard (along with all a multitude of other flours).

Ingredients

  • 1 ripe banana (mashed)
  • 1/2c oats
    • Finely cut ‘quick cook’ porridge oats are best, or, oat flour.
  • 3 1/2T milk / almond or rice milk
  • Pinch salt
  • Pinch cinnamon
  • Optional: 1/4 tsp guar gum + 1/2 tsp Baking Soda
    • If you are using oat flour, this will provide a slightly lighter texture.

Tip: If cooking for celiacs make sure that the oats are certified as gluten free as it is possible for cross-contamination to occur if there are wheat fields nearby.

Allergies: gluten free, dairy free, egg free, soy free, nut free.

Variations

Directions

  1. Mix everything together well in a bowl (or food processor).
  2. Heat frying pan or skillet.
  3. Throw in some butter or neutral oil (like Rice Bran Oil), add a few tablespoons of pancake mix. Cook on both sides until golden brown.

Baked Chicken & Peaches

Baked Chicken and Peaches.jpg

Baked Chicken and Peaches

This is a great dish to make in summer when fresh peaches are cheap; I made it recently on a dark Autumn day with the skies full of rain – tinned peaches work just as well and bring a bright note to the day!

It takes very little time too mix up and put in the oven; combine it with some vegetables and instant mashed potatoes for a quick meal that is also toddler / child friendly!

(FYI I buy plain potato flakes from a bulk buy store rather than buying boxed instant mashed potato from the supermarket.)

Ingredients

  • 2 chicken breasts (boned & skinned)
  • 1/3c brown sugar
  • 1 peach / 1/3 of a 400g tin of peaches
  • 2 pinches of ground ginger
  • 1 pinch allspice or ground cloves
  • 1/2T lemon juice

Optional

  • Superfine white rice flour or cornflour (corn starch) to make gravy.
  • Potato flakes + boiling water + rice bran oil + salt + almond milk to make mashed potatoes.
  • Broccoli.

Allergies: gluten free, dairy free, soy free, egg free, nut free.

Note: The recipe will also work well for larger amounts just double or triple the ingredients based on the number of chicken breasts you are cooking.

Directions

  1. Take a pyrex baking dish and put in the brown sugar.
  2. Put in the chicken breasts (turning them to coat them in sugar).
  3. Lay slices of peaches over the chicken breasts.
  4. Sprinkle the ground ginger, allspice, and lemon juice over the chicken and peaches.
  5. Bake in a preheated oven at 180’C for approx. 30 minutes. Baste regularly with the chicken juices. Cover in tinfoil if needed.
  6. Optional: After removing the chicken and peaches, whisk in some superfine white rice flour (or cornflour) to make a sweet gravy.
  7. Optional: Serve with steamed broccoli, mashed potatoes, and gravy.

Chicken with 40 cloves of garlic

Chicken with 40 cloves of garlic

Chicken with 40 cloves of garlic served with bacon, brussel sprouts, and rice noodles.

I really love the simplicity of this dish and that it’s a one pot meal when cooked in the wok. Miss 2 even ate a brussel sprout after licking all the gravy off it!

Ingredients

  • 40 cloves of garlic (peeled; hard end cut off; cut in half any large cloves)
  • 3 large skinless, boneless chicken breasts (cut in half)
    • You can use chicken tenderloins or thighs instead.
  • Neutral oil (i.e. Rice Bran Oil)
  • Salt & Pepper
  • 3 cups chicken stock + 1/2 cup in reserve
  • 1/4 cup lemon juice
  • 1T dried basil
  • 2 tsp dried oregano
  • 2T fine white rice flour
  • Optional: 2 chopped rashers of bacon (middle or shoulder)
  • Optional: approx. 8 brussel sprouts (chopped in half)
  • Optional: Wild Mushroom Powder

Allergies: soy free, gluten free, dairy free, egg free, nut free.

Directions

  1. In a large skillet / frying pan / electric wok, heat the oil.
  2. Put in the chicken and garlic. Once the chicken is partially cooked, put in the bacon and brussel sprouts to cook as well.
  3. Cook until the chicken is browned on both sides.
  4. Add 3 cups of the chicken stock, lemon juice, basil, and oregano. You may want to keep back some of the lemon juice and add after tasting (it can be quite a strong flavour).
  5. Bring mixture to the boil, then reduce heat and simmer for 10 minutes.
    • Note: If you want to serve with rice noodles, you can rinse the noodles under hot water until you are able to separate them and then cook them in the simmering broth. Not only will this help to reduce the broth but the noodles taste amazing!
    • Taste the broth and add salt + pepper to liking. If you’d like slightly more umami flavour, consider adding  a dash of one of the following: coconut amino acids, wild mushroom powder, soy sauce, or hoisin sauce.* Food allergies will impact choice.
  6. In a small bowl or cup, whisk the rice flour and 1/c of reserved chicken stock. Add this slurry to the cooking mixture and cook until the sauce thickens (you may need to increase the heat).
  7. Serve with rice noodles, rice, or mashed potatoes.

Note: The secret to this recipe is to lightly sear the outside of the garlic cloves – you want them to go soft, sweet, and squishy inside (like when roasted (otherwise the garlic can be a bit overwhelming). In the traditional French recipe the cloves are left intact (skin on) and the dish is cooked in the oven (then you suck out the gooey inner and discard the skin).


This slideshow requires JavaScript.

Butter bean dip

butter bean dip

Butter bean dip

This is a great way to use up leftover Butter Beans with Butter & Garlic. Serve it with freshly made bread, rice crackers, pita chips etc.

Ingredients

  • Sauteed butter beans with butter (or rice bran oil) & garlic
  • Natural greek yoghurt
  • Lemon juice (or a pinch or citric acid)
  • Optional: fresh herbs like parsley, chives, coriander.
  • Optional: for a Moroccan style dip: add 1 tsp ground cumin, 1 tsp paprika, and garnish with dukkah.

Note: Most of the ingredients for the dip have already been included when you cooked the beans; the flavour of the dip will be impacted by which optional extras you cooked with the beans (i.e. leek, shallots etc.)

Allergies: gluten free, soy free, egg free, nut free, dairy free*.

Directions

  1. In a bowl, mix natural greek yoghurt with a teaspoon of lemon juice (or a pinch of citric acid).
  2. Mash the beans.
  3. Mix the bean mash into the yoghurt mix.
  4. The dip is tangy with smokey notes. You can adjust the flavour, if desired, by slowly adding any of the following: lemon juice, olive oil, salt, maple syrup, chilli.
    • Just remember that it’s easy to add more of something but much harder to balance if you put too much of something in!
  5. Garnish with fresh herbs and serve with freshly made bread, rice crackers, pita chips etc.

Tip: You can fork mash these for a rustic blend or pop everything in a food processor to get it smooth.

Butter Bean Dip

Butter Bean Dip (rustic blend)

Butter beans (a baked beans alternative)

Butter beans with butter, leek, and garlic

Butter beans with butter, leek, and garlic. Grated parmesan. Choko noodles.

Don’t get me wrong, I loved baked beans as much as the next kiwi kid, but  the reality is that processed foods these days are often packed full of unnecessary sugar and salt. Hopefully Watties have changed their recipe since this damning article in 2009: “Wattie’s baked beans 420g: Although beans are good for you and packed with fibre, a can of baked beans has almost 30g of sugar. This is a low fat product and high in fibre, but does it require 1890mg of salt and 29g of sugar to make it taste good?”

Processed foods can also be a minefield for allergy families! Additionally, the reason for choosing vegetables like garlic, choko (chayote), leeks, and shallots for this recipe is because they’re low in naturally occuring food chemicals like salicylates, amines, and glutamates which is helpful for sensitive systems.

Don’t worry if you don’t have allergies – I’ve seen people post similar recipes simply because they don’t like baked beans or because butter + garlic can make anything awesome!

Tip: This recipe is also the basis of the easy to make Butter bean dip!

Ingredients

  • 400g tin of butter beans (rinse thoroughly)
    • You can substitute different beans according to taste. Like broad beans, these are quite large and hold up well in a wok without a sauce to simmer in.
  • Butter (or neutral oil, like Rice Bran Oil)
  • Garlic (crushed)
    • You can use garlic granules if you don’t have fresh.
  • Optional: leek (thinly sliced) or shallots (finely diced)
  • Optional: parmesan or grated cheese
  • Optional: cooked bacon (finely chopped)
  • Optional: choko (cheyote) as vegetable noodles.

Allergies: gluten free, dairy free*, soy free, egg free, noodle free.

Directions

  1.  Heat a frying pan (or wok) and melt butter. Lightly saute the garlic and any optional extras like leek or shallots.
    • Be careful not to over cook the garlic or you’ll get a distinctly smokey taste! (she says from experience…)
  2. Add the butter beans and cook until soft. You may need to add some extra butter while they are cooking.
  3. Serve topped with parmesan or tasty cheese if desired.


Choko noodles

  1. Use a vegetable peeler to remove the skin.
  2. Peel wide strips of the actual vegetable (the length of the choko).
  3. Add some more butter to the pan (after you’ve removed the butter beans) and fry the choko noodles until softened (they should still be slightly firm to the bite; not raw and not falling apart!). They will pick up the remaining garlic from the pan.


Superfood Coconut Cacao Smoothie

I used the Healtheries Ground Chia Superfood Blend Cacao & Coconut in the Gluten Free Wild Berry Chocolate Cake and wanted to see what it would be like in a smoothie. The result is creamy, delicious, chocolatey, and with the added nutritional benefits of chia seeds!

Ingredients

Allergies: gluten free, dairy free*, soy free, nut free*, egg free.

Directions

  1. Place everything in a high-powered blender and blend until smooth and creamy.
  2. Pour into a serving glass. Consider topping with a little coconut cream or greek yoghurt and sprinkle some cacao on top.

Tamale Pie

Tamale Pie.jpg

Tamale Pie (gluten free!)

Tamale Pie is delicious! I’d never heard of it until I discovered it in Elizabeth Gordon’s The Complete Allergy-Free Comfort Foods Cookbook. Apparently it’s a Depression-era dish that’s considered a comfort food in the Southwestern United States. It’s warm, filling, serves a bunch of hungry people (or can be used over several nights), and is conveniently gluten-free. It’s also an awesome and economical dish for those that do eat gluten and just want to try something different from a traditional Shepherd’s Pie.

Ingredients

  • 4 1/2c water
  • 1 tsp salt
  • 1 1/2c quick-cooking polenta (fine cornmeal)
  • 350-450g beef mince (ground beef)
    • Or: turkey,  chicken.
  • 1/2 tsp cumin
  • 1/4 tsp chipotle powder
  • 400g tin of black beans (rinsed and drained)
  • 350-450g jar mild salsa
  • 1c grated cheese
    • Use Daiya vegan cheese if you need to be soy & dairy free.
  • Optional: 2nd jar of: salsa, or tomato passata, or basic tomato pasta sauce.
  • Optional: grated carrot, grated zucchini, finely sliced celery.
  • Optional: finely chopped ham or bacon.

Allergies: soy free, gluten free, dairy free*, egg free, nut free.

Note: You’ll see that there are a number of optional ingredients. Personally, I like to add in the extra vegetables so that I have a one dish meal. I also like to add in the extra tomato for flavour (you’ll need to spend more time simmering the mince in order to reduce the extra liquid). The cheese on top helps to flavour the polenta (and is just plain yum); Daiya is apparently affordable in the USA as an allergy-free vegan cheese but it very expensive in New Zealand. If you can’t use cheese, consider adding some light spices to the polenta that is going on top.

Directions

  1. Preheat the oven to 180’C.
  2. Bring the water and salt to the boil in a large pot. When the water is boiling, slowly stir the polenta in and keep stirring to prevent clumping. Stir until smooth and then turn heat to low; cook for 5 minutes.
  3. Remove the polenta from pot and spread half over the bottom of your pie plate or casserole dish.
  4. Heat up your frying pan (or electric wok in my case) and brown your mince; break it up as it cooks. Stir in the cumin, chipotle, and a pinch of salt.
  5. Add the beans + salsa. Also add any additional salsa/pasta sauce and vegetables that you are choosing to use.
  6. Continue cooking over a medium heat.If you are using a minimum of ingredients, you only need to cook until the edges start to bubble.
    • If you have added extra liquid and vegetables then, once the mix has started to bubble, reduce to a low-medium heat until the liquid has reduced and vegetables have started to soften.
  7. Pour the meat mixture on top of the polenta.
  8. Spread the remaining polenta on top. Sprinkle with cheese (if using).
  9. Cook for 20-25 mins at 180’C.
  10. Remove the pie from oven and let it cool for 10-15 mins before serving.
  11. Store lefovers, covered and refridgerated, for up to 3 days.

This slideshow requires JavaScript.

Baked Meatballs (easy to make)

Baked Meatballs

Baked Meatballs & Onion Rings

I haven’t made meatballs in the past; for some reason I thought they would be really tricky to make. I found these to be super easy and have now made them both in passata and oven baked. The two cooking styles create different textures – if you cook in oven they will be drier and denser (good to dip in an accompanying sauce) whereas meatballs cooked in passata they will have a softer, moister mouthfeel. Both ways are great!

This recipe will make a big batch of meatballs so feel free to halve it if desired (or to cook half in oven and half in passata to enjoy both styles!)

Tip: Baked meatballs are really just little round sausages (a great way to market them to toddlers) so they are easy to play around with flavours. Why not try Lamb & Cumin, Chicken & Cranberry, or Pork & Apple instead of the traditional Beef & Onion!

Ingredients

Meatballs

  • 150g breadcrumbs / gluten-free breadcrumbs / cooked quinoa
  • 3/4c milk / almond or rice milk
  • 600g beef mince (ground beef)
  • 1 small finely chopped onion
  • Optional: 1/2c parmesan cheese (powder or finely grated)
  • 1T ground chia seeds
  • Salt & pepper
  • Parsley (dried or finely chopped fresh)
  • Chives (dried or finely chopped fresh)
  • Garlic (dried granules or crushed fresh garlic)

Allergies: gluten free*, dairy free*, egg free, soy free, nut free.

Directions

  1. Preheat oven to 180’C.
  2. Soak the breadcrumbs in the milk until the liquid has been absorbed.
    • If you’re using cooked quinoa instead: put the quinoa in the mixing bowl for the next step and add the milk after the other ingredients are roughly combined (you may not need to add all the milk).
  3. In a large mixing bowl, add all of the meatball ingredients (including the soaked breadcrumbs). Mix until combined. The mixture will be a little sticky but should be thick and not overly wet.
  4. Lightly oil your hands and roll meatballs; I like to do lots of small ones (approx. 2T of meat mix). Sit the rolled meatballs on a sheet of baking paper (on an oven tray).
  5. Bake for 18-25 minutes (or until no longer pink in the middle).
  6. Serve as a snack with a dipping sauce, or serve with pasta sauce and spaghetti, gluten-free pasta, or rice noodles.