How to make chocolate peanut butter

wp-1485155114616.jpg

Oops – too thick to get smooth in the little pulser. It needs the food processor!

Ingredients

  • 2c (300g) shelled peanuts
    • I used 1/2c for my mini-batch; you probably want to do 2 cups at a time if you’re using it regularly.
  • 1/2 tsp salt
  • 2T oil
    • You may want to use peanut oil. I used rice bran oil.
  • 1/2c (45g) cocoa powder
  • 1 1/2c (170g) powdered sugar

Allergies: soy free, dairy free, gluten free, tree nut free, contains peanuts.

For smooth peanut butter, click here.

My first attempt to make chocolate peanut butter ran into a power problem. I was trying to make a mini-batch in the pulser and the addition of cocoa + honey made it to thick for the motor. I was able to make something warm and delicious for dessert (that tasted like a Snickers bar) but it needed a full size batch in the actual food processor to make it smooth. I have therefore borrow quantities from InspiredTaste.

Directions

  1. Roasting gives the peanut butter more flavour. You can choose whether you want to buy roasted peanuts or roast them yourself (if purchasing pre-roasted, check the type of oil that has been used if you have a soy allergy). Roasting gives the peanut butter more flavour and helps to loosen the oils inside the peanuts to blend into a smoother butter.
    • Heat the oven to 180’C / 350’F and toast the peanuts on a baking sheet till they are golden and glossy with oil. This will take about 10 mins.
  2. Put peanuts, a pinch of salt, and a teaspoon of oil into a food processor.
    • Note: I used a little pulser/grinder but that will only cope with 1/2c peanuts.
  3. Blend for about a minute and then scrape down the sides with a plastic spatula. You’ll find it starts off looking a bit like crumbly breadcrumbs – this is normal!
  4. Blend again until shiny and smooth.
    • Add a teaspoon of oil at a time if you’re finding it dry.
  5. Add salt to taste (and sweetness if you prefer).

The whole process is really quick and will make smooth peanut butter.If you prefer crunchy peanut butter that’s easy too. Put only 1/3c of the peanuts into the blender to start and pulse until they’re chopped into tiny pieces; pull them out and reserve for later. Use the rest of the peanuts to make smooth peanut butter and then stir your crunchy bits back in.

Making your own peanut butter (turns out it’s easy!)

Home-made peanut butter & linseed bread

Ingredients

  • Shelled peanuts
    • I used 1/2c for my mini-batch; you probably want to do 2 cups at a time if you’re using it regularly.
    • Salt
    • Oil
    • Optional: sugar, maple syrup, or honey if you prefer it sweet.

Allergies: soy free, dairy free, gluten free, tree nut free, contains peanuts.

Commercial peanut butters often contain vegetable oil blends so check carefully if you have a soy allergy or make your own 🙂 We discovered this the hard way!

Directions

  1. Roasting gives the peanut butter more flavour. You can choose whether you want to buy roasted peanuts or roast them yourself (if purchasing pre-roasted, check the type of oil that has been used if you have a soy allergy). Roasting gives the peanut butter more flavour and helps to loosen the oils inside the peanuts to blend into a smoother butter.
    • Heat the oven to 180’C / 350’F and toast the peanuts on a baking sheet till they are golden and glossy with oil. This will take about 10 mins.
  2. Put peanuts, a pinch of salt, and a teaspoon of oil into a food processor.
    • Note: I used a little pulser/grinder but that will only cope with 1/2c peanuts.
  3. Blend for about a minute and then scrape down the sides with a plastic spatula. You’ll find it starts off looking a bit like crumbly breadcrumbs – this is normal!
  4. Blend again until shiny and smooth.
    • Add a teaspoon of oil at a time if you’re finding it dry.
  5. Add salt to taste (and sweetness if you prefer).

The whole process is really quick and will make smooth peanut butter.If you prefer crunchy peanut butter that’s easy too. Put only 1/3c of the peanuts into the blender to start and pulse until they’re chopped into tiny pieces; pull them out and reserve for later. Use the rest of the peanuts to make smooth peanut butter and then stir your crunchy bits back in.

Prawn Fried Rice


Ingredients

  • 2c cooked rice (refrigerated from previous day)
  • 1 1/2c frozen vegetables
  • 1 1/2c prawns
  • Dried ginger
  • Sliced green onion
  • Sugar
  • Salt
  • Fish sauce
  • Oil (I like rice bran oil)
  • optional: coriander, chilli, lime slices.

This is the kind of recipe that you may want to make on the spur of the moment because you have leftover rice, or it may be something that you prep the night before so that you can whip up lunch or dinner the next day quickly.

In terms of prep time, the rice needs to have been cooked and cooled long enough. This changes it to resistant starch which will help it to stir fry. My personal preference is basmati rice (both for taste and that it holds together well in a wok); I made this with long grain white rice and it worked well enough but some of the cooked grains for break apart.

My prawns were frozen so I had both those and the veggies covered on the bench for the afternoon to defrost. They were cool when they went in the wok but not frozen so this leads to a quick cooking time.

Tip: I find that sliced green onion freezes well. I portion it out in little bags and then pull it out as needed for stir fries and pizza.

Allergies: soy free, dairy free, egg free, peanut free, treenut free, gluten free. May not be suitable for people with fish or shellfish allergies.

Directions

  1. Cook your rice the day before. Personally, I like to use the rice cooker with water, salt, and rice bran oil.  As your rice cools give it a bit of a fluff (easier if you’ve used some oil in the cooking) and put it in the fridge to cool overnight.
  2. Prepare your vegetables. If you’re using frozen veggies then it’s a good idea to put them in the fridge at the same time as the rice so that it can defrost overnight. Alternatively, you might want to use something like grated carrot.
  3. Prepare your prawns. If frozen, make sure that they’ve defrosted slowly. Give them a rinse and pat dry.
  4. When you’re ready to cook, heat your wok nice and hot with some oil.
  5. Add the prawns and a pinch or two of ginger.
  6. Prawns aren’t as temperamental as squid but they don’t need a long cook time. About 5 minutes for prawns (and less if using shrimp instead).
  7. Add your vegetables.
  8. Add the rice. Keep moving it around to separate and coat the grains.
  9. Add a dash of fish sauce. Add sugar and salt to taste.
  10. Keep moving everything around so that it doesn’t stick; add more oil if needed.  Serve when hot through.
  11. Serve with condiments if desired (like chopped fresh coriander, fresh chillies, lime slices etc.).

How is atopic eczema treated?

eczema5

Eczema – the painful cycle of inflammation

Eczema cannot be cured. It can be treated and managed; key to this is caring for skin and managing the cycle of inflammation. Ensure that you discuss treatment with a medical professional; it’s also a good idea to ask what they can prescribe (as this may be free or discounted) as this often includes soap replacements and moisturisers as well as treatment creams.

Moisturise

It’s important to keep skin supple and moisturised. It’s a good idea to bathe every day (as the water will help to hydrate skin) and avoid soaps and other products that will have a drying effect. I’ve heard some people find goats milk soap to be gentler than normal soap and some emollient lotions can be used as soap replacements (though you may find they do better in a shower than a bath as I’ve found they can be kind of gluggy in bath water).

It’s a good idea to moisturise every day even when eczema isn’t flared up. Be careful when selecting moisturisers as general ones often contain alcohol that can still have a drying effect. It’s a good idea to discuss options with your doctor or pharmacist, and to look for ones endorsed by an eczema association.

Also, try different ones. You might find that some work better for you than others or that you prefer the smell or texture of some over others. I have a sorbitol/glycerin cream from the doctor which is ‘fragrance free’ but which I personally think smells so bad, v.s. one from Curash which I don’t think smells at all.

First: Emollients

eczema4

Emollients are basically moisturisers that are essential for increasing skin hydration and mimicking the barrier effect of the surface lipids the skin is lacking.

These should be used at least once a day at a different time to when corticosteroids are applied (as they will dilute these and prevent them from being as effective). It’s most effective to apply emollients after a warm bath or shower while skin is still damp.

Types of Emollients

From most effective to least effective.

  • Ointment – This provides a ‘lock-in’ protective layer. It can leave a greasy film so is often preferred at night (over day).
  • Cream –  Thinner and easier to apply. It is less effective than ointment and will need to be applied more often.
  • Lotion – Has a runny consistency and is less effective again than cream.

Generally, the rougher and drier the skin is, the thicker the emollient that is required. So a lotion may be suitable when when skin is good but cream, and then ointment, as it gets worse.

Emollients are important as part of a daily routine and will help to soothe skin during a flare-up. They will not treat the inflammation and it is important that a treatment cream is also used.

Second: Corticosteroids

eczema1-topical-corticosteriod

Topical corticosteroids (like hydrocortisone) actually treat the inflammation and help to reduce itchiness. They help to reduce blood flow in the skin and suppress over-active infection-fighting white blood cells. They imitate the effects of cortisol hormones produced naturally in the adrenal glands.

Doctors may prescribe different strength corticosteroid creams for different parts of the body (i.e. a weaker one for the face, and a stronger one for feet or hands where skin is thicker).

Additional treatments

Depending on the severity of symptoms, doctors may also discuss additional treatment options such as wet wrap, or oral anti-histamines.

There is little research supporting the effectiveness of using oral antihistamines to treat eczema but they can provide relief; for instance, night time ones can temporarily ease inflammation and also cause drowsiness.  Not only is scratching bad for the skin but chronic sleeplessness (due to lying in bed scratching) can cause a raft of flow-on troubles, especially for young children, so a night anti-histamine is something to consider discussing with your doctor.


Key source: “Eczema: The Essential Guide” by Sharon Dempsey

What is eczema?

img_20170114_154411.jpg

Eczema – Coming from Greek phrase “to bubble” or “to boil over”.

Eczema, also called ‘atopic dermatitis’, is a chronic skin condition characterised by inflamed, dry, and itchy skin which can have periods of acute flare ups. It’s one of three diseases that form the Atopic Triad; eczema, asthma, and allergic rhinitis are linked diseases which some people are genetically predisposed to develop. Eczema is not an allergy, however, it’s common for children that develop eczema to also have food allergies.

NOTE: Eczema is not a contagious disease. It’s not something that can be caught from touching, playing with, or bathing with someone that has eczema.

eczema3

Eczema – Cause factors

Eczema can be maddening for those that suffer from it. Skin starts off becoming swollen, red, and bumpy. The skin becomes itchy, often intensely so, and sufferers can rub the skin raw simply because the pain is easier to tolerate than the itch. The skin can also feel hot and painful. Little water blisters can appear that will burst and weep easily if scratched. It’s important not to scratch as this will damage the skin further (easier said than done, especially for young kids!).

Skin will bleed easily because of the inflammation and scratching damages the skin cells resulting in additional blood and immune cells rushing to the area.

It’s also common for areas of skin where eczema frequently flares up to become rough, scaly, chapped, and cracked. This is because dead skin cells are shed and replaced at a faster rate than healthy skin; these dead cells often sit on the skin. These areas of skin also lose moisture more easily and as it escapes the skin dries out and cracks form.

It’s important to discuss treatment options with a medical professional; eczema requires on-going management and care for the skin.

eczema5

Eczema – painful inflammation cycle

Key source: “Eczema: The Essential Guide” by Sharon Dempsey

What is the Atopic Triad?

eczema2-atopic-triad

Atopic Triad

‘Atopic’ refers to diseases that are hereditary and therefore tend to run in families; they also often occur together. It’s common for someone to have eczema, a form of allergic rhinitis (like hayfever), and asthma (though they may have these at different times of their lives); someone that is ‘atopic’ (or a family that is ‘atopic’) are also more likely to have food allergies. It’s possible to have mild cases of these diseases (like eczema) and not be atopic; it requires a doctor’s diagnosis and the demonstration of allergic antibodies.

It’s worth researching ‘atopy’ when it’s diagnosed by a doctor because it helps to have an awareness that your toddler that has eczema has a higher chance of developing asthma later in childhood (see ‘The Atopic March’).  It also means that if one parent has hayfever and another has a mild food allergy, children have a greater chance of being ‘atopic’ although they may exhibit this differently than either of their parents.

If you have suspicions of a food allergy, allergic rhinitis encompasses more than just hay fever in response to pollen. In general terms it means that an allergen has caused the inside of the nose to swell and become inflamed. This can cause cold-like symptoms, such as sneezing, itchiness, and a blocked or runny nose. Ongoing inflammation in the sinuses can also result in ‘allergy shiners‘ (like a continually bruised look beneath the eyes even if sleep hasn’t been disrupted). The problem is that under 5’s do get a let of colds and it can be hard to distinguish between an actual cold and a warning sign that there is an underlying allergy. If there’s a family history of atopic illnesses or your child has been diagnosed with other atopic illnesses (like eczema) then it’s worth reading up on the most common food allergies and discussing these with your doctor. For most children, a food allergy will result in them creating IgE antibodies which can be screened for with skin or blood testing.


Key source: “Eczema: The Essential Guide” by Sharon Dempsey

Scone Pizza Base

I’ve posted previously with a recipe for making a thin pizza base; a scone pizza base makes a wonderful thick pizza base and brings back warm memories for me of my Poppa in his kitchen making this in the summer holidays. Pizza is also a great way of using up leftovers.

Ingredients

  • 3c standard plain flour
  • 6 tsp Baking Powder
  • 1/4 tsp salt
  • 75g butter
  • 1 to 1 1/2c milk
  • Optional: Add some chopped fresh basil and dry oregano to the flour.

Allergies: soy free, egg free, peanut free.

NOTE: Lots of pizza pastes have added sugar, additives and other things. I prefer tomato paste that’s 99.5% tomatoes + salt and nothing else. The latest pizza had tomato paste on 1/2 and basil pesto on the other 1/2. I added finely diced red onion, thinly sliced zucchini & mushrooms, diced roast pork, and grated cheese. I love adding finely sliced asparagus stalks (the bottom half) when they’re in season.

Directions

  1. Preheat oven to 200’C.
  2. Sift flour, baking powder, salt into a bowl.
  3. Cut butter in until it resembles breadcrumbs.
  4. Add milk and mix quickly until it resembles a soft dough.
  5. Turn out onto floured bench and knead a few times. Roll out into a flat base. (You may want to move onto a lined or greased baking tray before adding the toppings).
  6. Apply your choice of pizza toppings.
  7. Bake for 10 minutes. Check. Cook for another 5-10 mins until golden.

Roast Pork Sirloin

Ingredients

  • Pork Sirloin roast
  • 4 crushed garlic cloves
  • 4 tsp chopped fresh rosemary / 2 tsp dried
  • 1 1/2 tsp salt
  • 1/2 tsp black pepper
  • Olive oil
  • Optional: potatoes, carrots, zucchini etc. to roast.

Allergies: soy free, egg free, peanut free, dairy free, gluten free.

Directions

  • Prepare any vegetables that you want to roast. Personally, I used potatoes, carrots, and zucchini. I was useless at cooking potatoes and avoided doing so (using kumara instead) until I learned the trick of parboiling them (or similar). I chop them up and put them in the steamer in the microwave for about 10 minutes to give them a bit of a head start before placing them in the roasting pan.  You can brush the veggies lightly with olive oil before placing the pork on top – they just need a touch to keep from drying out before the fat from the pork starts to drip out.
  • Mix the garlic, rosemary, salt, and pepper together. Moisten with a dash of olive oil. Rub it all over the pork.  Optional: I’m told that if you like garlic, you can also cut small slits in the pork fat and stick whole garlic cloves in to get some yummy roast garlic.
  • Place the fat side down. Place it on top of the potatoes etc. if you have any in the pan.
    • NOTE: I was rather puzzled when I read the initial recipe I was using as my pork roast was rolled and tied with string – it had fat all over! I shrugged and just chose a side to face up. Turns out this was an error (check out the photos below). If your roast is rolled up, cut the string and lay it flat with the fat facing the bottom of the pan. One end will be thicker as this cut is basically pork sirloin chops + pork belly.
  • Cook at 200’C for 30mins.
  • Check on the veggies and turn the roast over so that the fat is now on top. Roast for 25 mins.
  • Remove and stand for 10 minutes.

So… I’d never cooked one of these before and the rolled pork did seem to resemble the photo I saw on the internet. I didn’t realize that the string was supposed to be cut and the meat lay flat so the cooking (and learning) process took much longer than expected. My main concern was that the pork would dry out (a near thing!) so I was doing a lot of checking and basting towards the end. I also began to appreciate why some of my friends have a meat thermometer rather than needing to slice into the meat to check.

dav

I steam my potatoes in the microwave for about 10 mins before putting in the roasting pan.

Oops – I put the pork in rolled up (as it came). The veggies cooked but the pork was still pink when I unrolled it. All I’d managed to do in an hour was to start cooking the fat on each side of the roll!

Rolling it out flat the meat and fat finally began to cook. After another 30 mins at 200’C there was definitely progress. By this point I was hungry and decided to speed things along.

I trimmed off the fat (just leaving a thin layer to provide moisture). I cooked it for about 20 mins at 180’C (basting regularly) and then grilled it to brown the thin layer of fat.

dav

All turned out well in the end with a good collection of roast pork.

dav

The fat I continued to cook to make crackling. The rendered fat and juices can be made into gravy or you can collect the fat as lard. Lard can be used for lots of things, for instance frying potatoes.

Excess roast pork can be frozen and kept for later meals such as pork fried rice or making pizza.

The Complicated World of Food Allergies: Allergy (immediate) v.s. Allergy (delayed) v.s. Intolerance

checklist

Identifying why your baby or toddler is miserable, screaming, unable to sleep, refluxy, colicky, vomiting, prone to rashes etc. is often a daunting task that bears with it a heavy burden of responsibility. It can feel like a frustrating, maddening,  and isolating process. You are your child’s best advocate. You are the one spending the nights pacing them through the house so that you don’t feel so horrifyingly impotent and because it seems to marginally comfort them. You are the one weeping because they are clearly so unhappy. You are the one that sees them day in and day out (and often through the night). You are the one with a niggling fear that something is wrong, even if they are your first and only, because they are nothing like the healthy, happy, peacefully sleeping babies you see with other mothers.

There can be a number of medical reasons for the circumstances above and a food allergy or intolerance is one of those (it may also be coupled with another condition such as Gastric Reflux Disease [GERDS] and be a compounding factor for the other condition). Many allergens can pass across in breast milk and even minute traces can be enough to trigger a reaction. For some, the allergy or intolerance may not be apparent until they begin eating solids, or until they’re a toddler, or until they’re almost starting school. I still have vivid memories of sitting in the car as a three or four year old wishing desperately that I could trade bodies with someone to see if they also had a sore stomach all the time; it was so constant and such a naturalized part of my young world that I never told my parents. It wasn’t until a major vomiting incident at a birthday party, triggered by a small ice-cream, that an investigative process started that identified I was intolerant to dairy.

Terms like allergy and intolerance can be bandied around interchangeably in the media, and sometimes by medical professionals, but they have quite different meanings. There are also two different types of food allergies, immediate and delayed, with the former getting more press.

Food Allergy: Immediate: IgE mediated

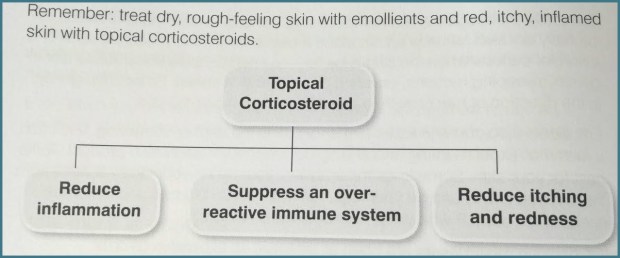
A food allergy is an inappropriate immune response to a particular food protein. An immediate type allergy happens very quickly after the food is eaten (or sometimes after minute traces of the food touch the skin or membranes). Reactions are caused by a particular part of the immune system causing the body to release histamine and other chemicals, leading to hives, swelling, and, in rare cases, anaphylaxis (a severe, life-threatening reaction). A skin prick or blood-specific IgE testing can be useful for diagnosis.

Oral Allergy Syndrome

A sub-set of this is Oral Allergy Sydrome which usually develops later in childhood or in adulthood. It happens after a person develops an allergy to a pollen. As well as getting seasonal hay fever, their immune system starts identifying foods that contain proteins with a similar structure to the pollen. The immune system then mistakenly identifies this food as being pollen when it is consumed and causes a mild allergic reaction in the mouth (such as itching or swelling). This can happen even with food that has previously been regularly eaten without issue. So for example, an allergy to birch tree pollen can cause a reaction when eating apple, peach, plum, cherry, potato, carrot, hazelnut, pumpkin seed and aubergine. A ragweed pollen allergy can cause a reaction to melon and banana; mugwort pollen can cause a reaction to celery and tomato; grass-pollen can cause a reaction to tomato, melon, and peach.

The process of cooking often destroys the pollen-like protein so someone may react to raw apple but have no reaction, or milder symptoms, when eating apple pie.

Food Allergy: Delayed: non-IgE mediated

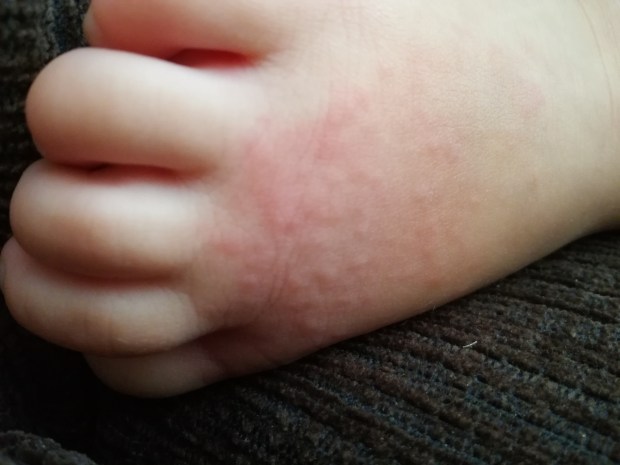
The reaction can occur hours (or sometimes days) after the food is eaten, making them very difficult to diagnose. The reaction is caused by a different part of the immune system to IgE mediated reactions; one of the biggest problems is diagnosis as allergy tests are unhelpful for delayed allergy. In truth, delayed allergy is a spectrum of disease, in terms of severity and where the problems show themselves such as in the gut or skin. The most common causes are cow’s milk and soya, and less so wheat and egg. Typical symptoms may include persistent non-responsive eczema, rash, refluc, colic, diarrhoea, poor weight gain, difficulty feeding, and, less commonly, constipation. Breathing symptoms are rarer and do not occur in isolation, i.e. they may have noisy breathing or a wheezy cough in conjunction with reflux.

Diagnosing often involves detailed daily diaries (covering everything from food, sleep, bowel motions, and mood), food inclusion-exclusion challenges, and working through skin prick and/or blood-specific IgE testing. This should be done under the qualified care of a dietician and peadiatrician. It can be a long, difficult journey but it is important to keep detailed, accurate notes and to persevere.

Food intolerance

“More common than a food allergy, food intolerance is a reaction to food that does not involve the immune system. Although symptoms can mimic an allergy, the causes are different and on-set of symptoms is often slower and longer lasting. Symptoms of food intolerance can include almost anything but most commonly fatigue and gastrointestinal symptoms, such as diarrhoea and vomiting, bloating (often as part of irritable bowel syndrome) are described.”

Atopic disease

You may hear doctors talk about a family as having a family history of being atopic. “This refers to a group of illnesses, including eczema, hay fever, food allergy, and asthma that are characterised by the presence of immunoglobulin E (IgE) antibodies.”

Atopic illness in a parent(s) makes it more likely that children will also present with these – although they may be to something different. For instance,  parents might have asthma, hayfever, and an oral food allergy but their children may have eczema and an allergies or intolerances to different foods than their parents.

Resources

It is important to seek professional medical advice if an allergy is suspected.

There is of course a wide range of information on the web (some more reliable than others). The source that I have drawn on for this post, often quoting directly, is my favourite of the six allergy books that I’ve read in the past two months and the most relevant to my family: The Allergy-Free Baby & Toddler Book by Charlotte Muquit & Dr Adam Fox. I also found it the most approachable in terms of language and found it comforting that it included anecdotes from a number of other families.

My other recommendation is that if you have access to a free public library system then make use of it. Just like finding the right pair of shoes, look at a range of books until you find the one most relatable to your circumstances. If you find one that you really like, and would want to re-read, then buy just that one book. I definitely found it helpful having an understanding of what tests and diagnostic process to expect and I actually took my copy of Charlotte Muquit’s book into some appointments with me.

Watercolours are great for indoor painting

Watercolours are a great form of indoor painting. They’re much less mess than poster paint and easy to wipe up if you’re using a plastic mat or lino. They also handily come with a whole palette of colours!

These are great for encouraging creative messy play, colours (and colour mixing), fine motor control, and learning a process. Encourage them to go: paint, paper, water, paint etc. I find an old glass baby food jar ideal for washing brushes. It’s best to put only a tiny amount of water and change it frequently (that way there’s less to clean up if it gets knocked over!).

Watercolours will often come with a small brush. You can also experiment with other brushes, fingers, even a wet wipe will provide cool textures and colour mixing! If you’re toddler loves painting themselves and is going to do so anyway, why not support them in their experiment and try putting our a hand mirror so that they can see what they’re doing.

Supervision, support, encouragement, and modelling is important for toddlers. It can take a while to learn that the brush needs washing or that it’s not a good idea to smear black paint over all the other paint colours on the palette. On the bright side, they’re easy to wipe with a tissue or wet wipe to get back to a ‘purer’ colour.

Wet wipe watercolour painting